Let’s be real: No one wants to watch a boring stream.
If your live video is missing context, energy, or clarity, your viewers are going to check out fast. But here’s the good news: It doesn’t take much to change that. With just a few taps, you can add graphics to a live stream, turning basic footage into something that looks intentional and feels exciting to watch. And with Switcher, it’s easier than ever.
In this blog, we’ll break down the types of graphics you can use, when to use them, and how to add them using Switcher — quickly, easily, and without overcomplicating things.
Graphics that instantly improve your stream
Before you start adding graphics to your live stream with Switcher, you need a good idea of what kinds of graphics you can add. So here are some of the most common (and most useful) graphics you can use.
Lower thirds

These are the small banners that pop up at the bottom of the screen, usually to introduce someone or provide context. Think: the name of a coach mid-interview, a pastor’s title during a sermon, or a quick note about what’s coming next.
When to use: Introducing speakers, identifying locations, and adding extra context without interrupting the flow.
Full screen graphics
.png?width=1000&height=582&name=Full-screen%20graphics%20(1).png)
These take over the entire screen and are great for transitions, pre/post-roll content, announcements, or highlighting a sponsor. You can even use full-screen slides for lyrics, scripture, or key talking points in a worship service.
When to use: Between segments, during intros/outros, or when you want to make sure your message has the full spotlight.
Logos & overlays

You can upload and place static images — like team logos, sponsor graphics, event branding, or decorative flourishes — anywhere on screen. These overlays help reinforce your brand and create a consistent visual identity for your stream.
When to use: Throughout the stream, especially during less dynamic moments when subtle branding helps fill space.
Scoreboards & timers

How do I put a scoreboard on a live stream? If you're streaming sports, this is one of the most common questions, and one of the easiest things to do with Switcher. Update the score and the seconds left in real time, just tap to quickly make changes as the action unfolds.
When to use: Any live sporting event, from youth leagues and varsity games to rec tournaments, or anytime you need a countdown or count-up clock, like during a race or timed competition.
Text callouts & real time info

Got a last-minute change or breaking news? Need to share a social media handle or prayer request line? Text overlays let you add info on the fly, no need to stop the stream or scramble for a workaround.
When to use: In response to live updates, mid-game announcements, or quick reminders for your audience.
Pro tip: These are just a few of the graphic options available. With Switcher, you can also add images, multiviews, pre-recorded videos, audio files, and other multimedia to your production — and even pull in live comments from Facebook and YouTube in real time to keep your audience engaged.
How to add graphics with Switcher (step-by-step)
Here’s a fun fact: You don’t need a team of graphic designers or expensive software to make your live stream look polished. With Switcher, you can add eye-catching graphics right from your iPhone or iPad.
Here’s how it works:
Start with Assets
In Switcher, graphics and visuals are called Assets — these include everything from lower thirds and logos to full-screen images, countdowns, and even pre-recorded videos. You can upload your own designs, create custom overlays directly in the app, or use one of Switcher’s built-in templates to get started fast.
If you need detailed instructions on creating, uploading, or importing your assets, check out our support guide.
Choose what you want to show
Once your assets are loaded in, you can arrange them in the order you want and choose how they’ll appear on screen. You can:
-
Layer a logo in the corner throughout your stream
-
Show a scoreboard graphic with an added timer
-
Add a full-screen visual between segments
-
Drop in a quick lower third to introduce your on-screen guest
Everything is fully customizable — from colors and fonts to how long the graphic stays on screen.
Use scenes for easy switching
Want to streamline the way you work? Use our Scene Builder tool to group assets into a single layer that you can build ahead of time and tap to use instantly.

Think of these scenes like presets or templates: you could create one with a guest’s camera feed and a name banner, or one with a wide shot, a logo, and a scoreboard. When it’s time to go live, switching between scenes is as simple as tapping a button.
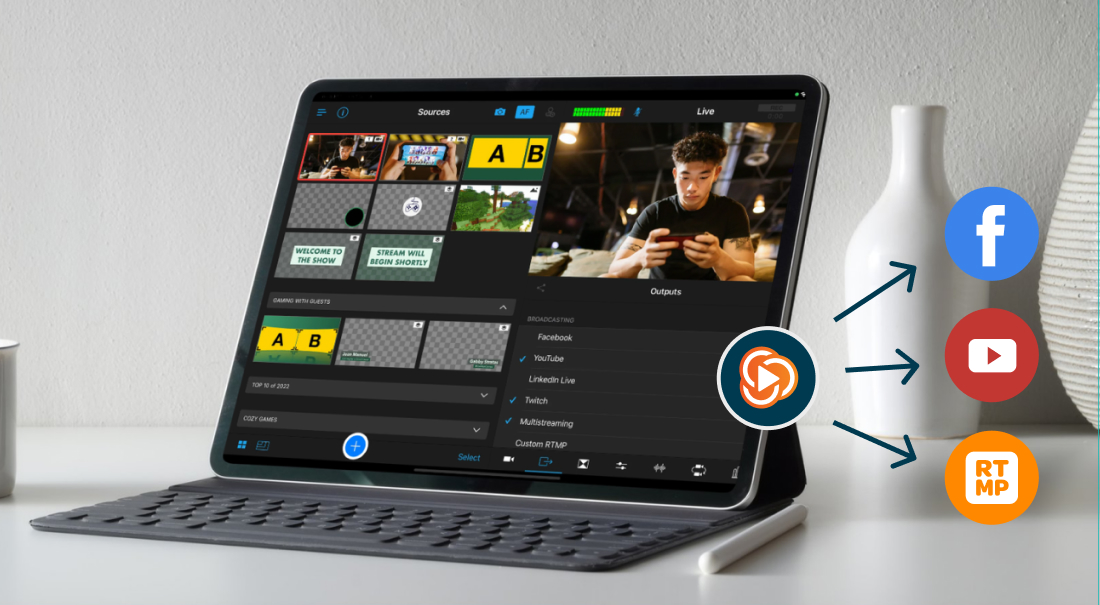
Go live with confidence
Once you’ve built your overlays and scenes, all that’s left to do is start streaming! Switcher makes it easy to preview everything in real time and make edits on the fly. Want to multistream to YouTube and Facebook at the same time? Switch angles mid-stream? Done and done.
Time to bring your live streams to life
Bottom line: With Switcher, adding graphics to your live stream doesn’t feel like a technical challenge — it feels like a creative one. And that’s exactly how it should be.
Whether you’re showing a scoreboard during a game, displaying lyrics at a worship service, or just dropping in a few lower thirds, you’re turning a simple stream into something more polished, more engaging, and more memorable.
Ready to add graphics to your live stream and make it something worth watching and sharing? Try Switcher free for 14 days and start creating memorable content.
Subscribe to the blog
Sign up to receive notifications whenever a new blog post is published. You may unsubscribe at any time.

Share
About the Author

Carly is a content specialist at Switcher and is passionate about creating informative and engaging blog and social media material. With her background in digital marketing and degree in writing, she’s here to help others learn about our features and all things video content.
All posts by Carly Cowie