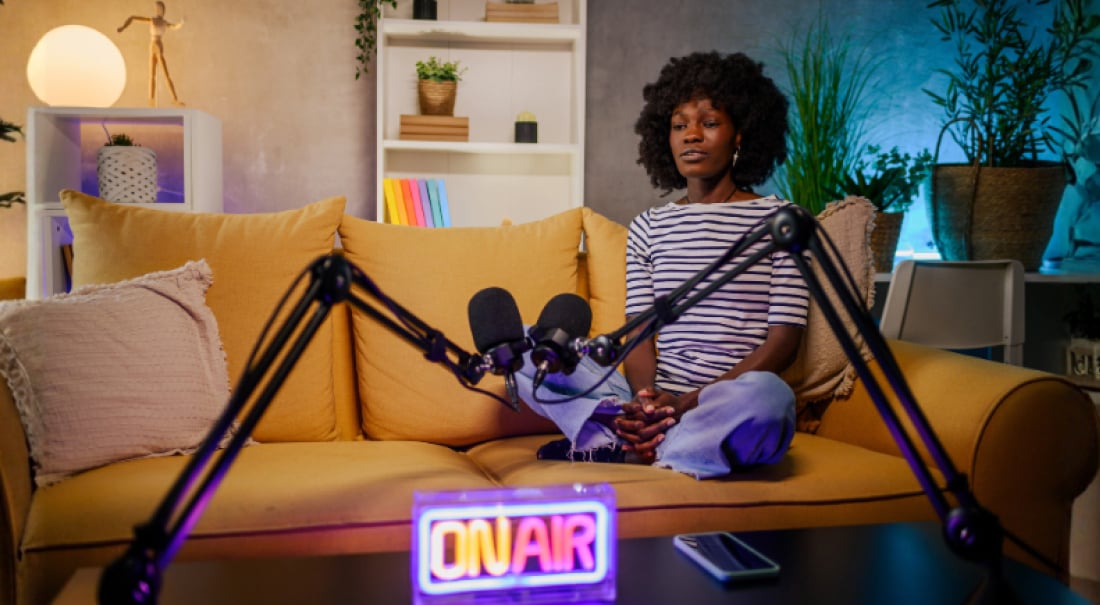

A live stream with an HDMI camera can make all the difference.
Suddenly, your picture is sharper, colors pop, and viewers actually feel like they’re in the room with you. Without endless camera-juggling or technical chaos.
In this guide, you’ll get answers to these questions:
-
What is an HDMI camera, and how does it work for live streaming?
-
What are the advantages and trade-offs of streaming with HDMI?
-
When does an HDMI camera setup make sense for me?
-
Which types of HDMI cameras work best for different use cases?
-
How can I build a reliable HDMI setup without getting buried in gear?
Let’s get started.
What is an HDMI camera for live streaming?
An HDMI camera sends high-quality video and audio via an HDMI cable to another device, like a capture card, computer, or live streaming app. HDMI stands for High-Definition Multimedia Interface, and it’s the standard way professional video gear moves clean, high-quality signals between devices.
HDMI cameras give you a clean, uninterrupted feed. “Clean” means the video feed doesn’t include camera menus, focus boxes, battery icons, or status overlays. Your viewers only see the image, not the camera interface.
6 advantages of live streaming with an HDMI camera
Here are six advantages an HDMI camera offers.
1. Sharper, clearer video that helps viewers stay engaged

HDMI cameras usually have larger sensors and higher-quality lenses than webcams or iPhones, which means more detail and a cleaner image. That clarity matters all the more when viewers need to see small and intricate movements or details.
It also creates a stronger sense of presence in streams built on connection, where facial expressions and subtle movements help viewers feel closer to you.
2. Greater control over how your image looks
With an HDMI camera, you can manually adjust exposure, focus, and white balance. That control lets you shape your image intentionally instead of relying on automatic settings that change mid-stream.
Additional control is especially helpful when you’re performing, creating art, or streaming in environments with unpredictable lighting.
3. Stable, predictable video during long or active sessions
HDMI cameras are designed for continuous video, which helps them maintain steady focus and consistent exposure while you’re live and moving. That predictability keeps the image from constantly shifting or hunting for focus as the scene changes.
This matters if you’re pacing, using props, or moving under changing lights. A stable image keeps attention on the content instead of the camera.
4. A camera that stays framed once you set it

During a live stream, iPhones often do more than one job. They might be your camera, controller, or monitor, something you still need to touch occasionally. An HDMI camera has one role. Once you frame it, it stays powered, locked in, and hands-off.
This helps when you need consistent wide shots, or when an overhead camera needs to stay perfectly aligned with your workspace.
5. Easier multicamera control with consistent-looking shots
HDMI cameras work well in multi-camera setups because their behavior is predictable. It’s easier to match framing, exposure, and color across angles, so switching shots feels intentional instead of distracting.
You’ll notice this when switching between guests, moving from a presenter to slides and back again, or rotating through camera angles. Consistent visuals keep your audience focused on the message, not the transition.
6. Live switching that takes less mental effort
When each camera behaves the way you expect, switching shots becomes almost muscle memory. You don’t need to pause, double-check previews, or worry about surprises.
This is especially important if you’re presenting and producing at the same time, like advancing visuals, showcasing while answering questions, or managing a multi-session event on your own.
6 disadvantages of HDMI Camera live streaming (and how to handle them)
Nothing’s perfect. Here are 5 downsides of live streaming with an HDMI camera to consider.
1. Your setup takes more time and intention

When you stream with HDMI cameras, you’re adding cables, mounts, power supplies, and capture devices to your workflow. It’s not as easy to just show up and hit “Go Live.” You’ll need time to place cameras, run cables, and confirm everything’s connected.
How to minimize it: Build a repeatable setup. Use labeled cables, mark tripod positions, and keep cameras mounted whenever possible. If you stream regularly from the same space, leave as many connected as you can, so setup becomes a quick checklist instead of a full rebuild.
2. Some cameras aren’t designed for long live sessions by default
Photo-first cameras can auto shut off or overheat if they’re not configured correctly. This often catches people off-guard the first time it happens, especially during longer sessions.
How to minimize it: Disable sleep timers, avoid internal recording, use external power, and get to know your camera before going live by testing it for a full-length session.
3. Power becomes something you have to plan for

HDMI cameras are most reliable when powered externally. Batteries drain quickly, and watching battery levels during a live stream adds unnecessary stress.
How to minimize it: Use AC adapters or dummy batteries whenever possible. For temporary setups, bring extension cords and power strips so your camera placement isn’t limited by outlet location.
4. More gear means more responsibility during the stream
Each camera adds cables and adapters that can get bumped or unplugged. If you’re producing solo, you’re also the one who has to notice and fix problems while staying live.
How to minimize it: Secure cables with tape or clips, reduce adapters where possible, and do a quick visual check before going live.
5. The upfront cost is higher than using a iPhone or webcam
Hardware costs add up quickly. This can be a big factor if you’re just getting started or scaling slowly.
How to minimize it: Start with one HDMI camera and build from there. Use it for your most important angle first, then add cameras over time as your needs grow.
6. There’s a learning curve.
Learning camera settings, signal flow, and live switching can feel technical at first, especially if you’re also presenting.
How to minimize it: Practice without an audience. Run short test streams, rehearse switching between shots, and get comfortable with your setup before relying on it live.
Is an HDMI camera worth it for livestreaming?
The short answer: It depends on how you stream and what you need your setup to do. So, let’s take a closer look.
Yes: An HDMI camera is worth it for livestreaming if you stream professionally or monetize your content.
If live streaming helps you earn revenue through ticket sales, memberships, sponsorships, donations, or paid classes, investing in an HDMI camera often makes sense. Higher-quality video and a more consistent production can support trust, retention, and perceived value.
No: An HDMI camera probably isn’t necessary if you’re a casual streamer or you value mobility and simplicity more than production value.
If you go live occasionally for informal updates or simple conversations, an HDMI setup may be more effort than it’s worth. A iPhone can get you live quickly and still look good enough for casual streams. And if you’re constantly moving, traveling, or switching locations, a i will usually feel easier.
The 3 best types of HDMI cameras for live streaming
Choosing the right HDMI camera comes down to how you stream, where you stream, and how much control you want over your setup. Below are the most common camera types streamers use, and where each one tends to shine.
1. Mirrorless cameras for livestreaming

A mirrorless camera uses an electronic viewfinder instead of a physical mirror. That design makes the camera smaller and lighter than traditional DSLRs while still delivering high image quality.
Mirrorless cameras are known for strong low-light performance and interchangeable lenses, which give you control over framing and depth. You can use a wide lens shot one day and a tighter lens for a close up shot the next.
Typical price range of a mirrorless camera: $500–$2,000+, depending on the body and lens.
Who is it best for? You’ll feel comfortable with a mirrorless camera if you want a smaller, lighter setup and you’re streaming in dim rooms, or producing shows where lighting changes throughout the stream.
2. DSLR cameras for live streaming

A DSLR is a digital camera that uses a physical mirror and optical viewfinder. While they’re older in design than mirrorless cameras, many DSLR models still deliver excellent image quality for live streaming.
DSLRs often have larger sensors that create a more cinematic look, and some models offer reliable autofocus that works well for livestreamers who move naturally. They’re also widely available on the used market, which can help lower costs.
Typical price range: $400–$1,500.
Who is it best for? DSLRs can be a good option if you’re streaming video where the subject or object stays mostly in one place. If you already own a DSLR, it can be a practical way to step into HDMI streaming right away.
3. Dedicated HDMI and streaming cameras

Dedicated streaming cameras are designed specifically for live video. They’re built to stay on, stay powered, and output a clean HDMI signal.
Many of these cameras are “PTZ” cameras, which stand for “pan, tilt, and zoom.” Unlike mirrorless or DSLR cameras, they let you pan, tilt, and zoom remotely while you’re live, often with saved presets you can switch between instantly. That means one camera can cover a wide shot, a medium shot, and a close-up without anyone touching the hardware.
Typical price range: $700–$3,000+, depending on features and control options.
Who is it best for? These cameras are ideal for professionals. However, if your shot never changes or you’re happy with a fixed angle, a standard camera on a tripod or ceiling mount may be just as effective and more affordable.
HDMI camera tips
No matter which category you choose, a few features matter more for live streaming than specs on paper. Look for:
-
A clean HDMI output so your stream doesn’t show camera overlays
-
Support for continuous power instead of battery power
-
Settings that allow long, uninterrupted live sessions
Essential equipment for an HDMI camera live streaming setup
A livestreaming HDMI camera setup only works well if each piece has a clear job. Here’s what you actually need, why you need it, and how to choose based on how you stream:
-
An HDMI camera, of course
-
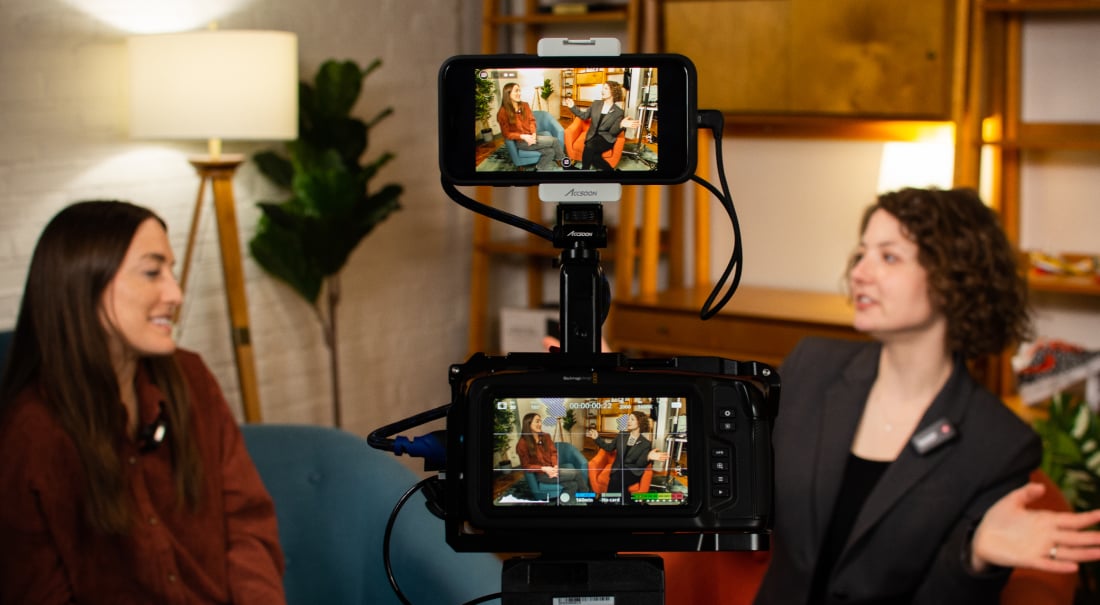
Capture card or capture device: HDMI cameras don’t connect directly to streaming software. You need a capture device to convert the HDMI signal into a usable video input.
If you’re streaming from a laptop, a USB capture card fills this role. If you’re streaming from an iPad or iPhone, devices like Accsoon SeeMo handle this instead.
The outcome is the same either way. Your HDMI camera shows up as a selectable shot in your live production. - A mounting solution: A mount keeps your camera framed and stable for the entire stream. Without one, even a great video quickly becomes distracting.
Tripods work best if you move your setup often. Wall or ceiling mounts make sense if you stream regularly from the same space.

- External power supply: Most HDMI cameras are not designed to run long streams on battery alone. External power keeps the camera on without interruption.
- Quality audio gear: Your camera handles video. Your microphone handles sound. A dedicated microphone and audio interface gives your audience a clear, consistent sound, which is equally important in most live streams.
This is especially important for where poor audio will cause viewers to leave quickly.
6 tips and tricks for better HDMI livestreaming
Once your HDMI camera is connected, small setup choices make a big difference in how smooth your stream feels. These tips are less about a perfect video and more about avoiding problems while you’re live.
1. Do a short pre-stream check every time
Before you go live, take two minutes to confirm the basics:
-
Your camera is powered externally
-
Sleep timers and auto shutoff are disabled
-
You’re getting a clean HDMI feed with no menus or overlays
This quick check prevents the most common “why did my camera turn off” moments and helps you start the stream worry-free.
2. Set your camera once and avoid touching it mid-stream
HDMI cameras work best when you dial in your settings ahead of time and then leave them alone.
-
Lock exposure and white balance (as long as your lighting won’t change)
-
Use autofocus only when your subject is moving
-
Avoid adjusting settings while you’re live
3. Give each camera one clear job.
In a multicamera setup, every camera should have a purpose:
-
One camera for your main shot
-
One for details or demonstrations
-
One for the room, audience, or wide angle
Deciding this before you go live makes switching faster and keeps your production from feeling chaotic or erratic.
4. Practice switching without an audience
Live switching gets easier when your hands know where to go.
-
Run short test streams
-
Practice switching shots while talking
-
Learn where your most-used shots live
5. Treat cables as part of the production
Most stream-ending problems come from loose cables or dead batteries.
-
Tape down the HDMI and power cables
-
Use as few adapters as possible
-
Keep spare cables nearby
6. Don’t overbuild your setup.
You don’t need every camera on day one.
-
Start with one strong HDMI camera.
-
Remember that a clean single shot beats a messy multicamera stream
3 examples of HDMI live streaming setups
If you’re trying to picture how this works in real life, here are a few common setups:
1. Simple sessions: One HDMI camera

Use one HDMI camera for your main shot, powered externally and mounted securely. This works well where reliability and clarity matter more than multiple angles, such as coaching, therapy, commentary, and static demonstrations.
2. Hands-on classes or shows: Two-camera setup

Use one HDMI camera on the presenter and a second camera for demonstrations, instruments, or workspace views. This setup is ideal for cooking classes, art instruction, fitness training, or interview-style shows where switching angles adds clarity and increases engagement.
3. Events: Mixed HDMI and iPhone setup

Use HDMI cameras for locked shots, like stages or wide angles, and iPhones for roaming or flexible shots. This works well for conferences, worship services, panels, and multi-session events where you want stability without giving up mobility.
Start live streaming with an HDMI camera
Streaming with an HDMI camera can feel complicated at first. There are cables to think about, settings to learn, and decisions to make about cameras, power, and audio. That hesitation is normal. You’re stepping from simple into more capable, and that always comes with a learning curve.
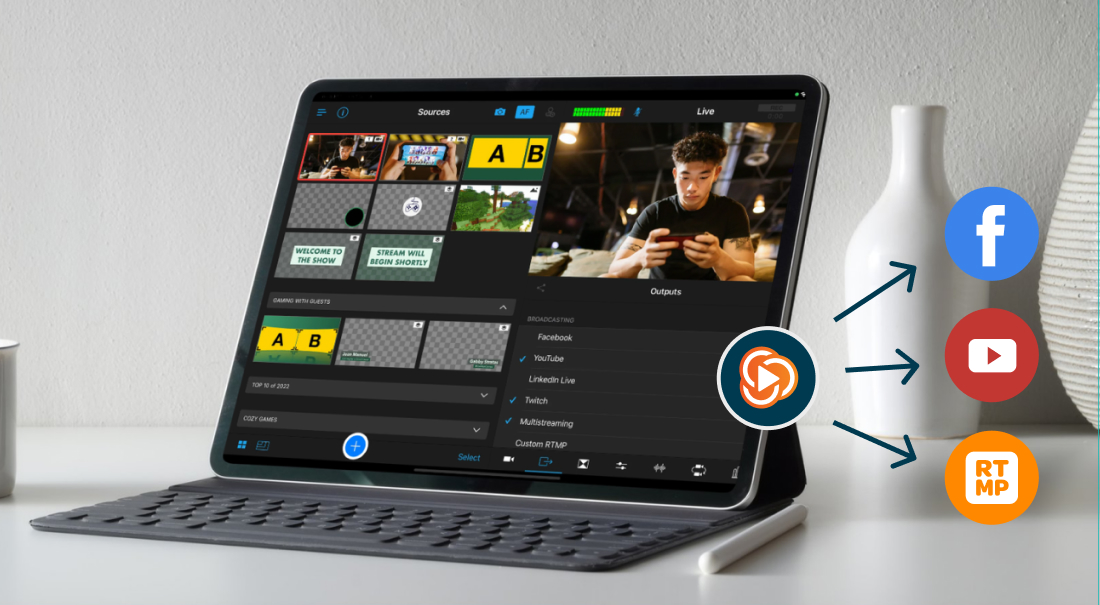
The good news is that this setup is very doable, especially when you’re using tools designed to work together. Devices like Accsoon make it practical to bring HDMI cameras into an iPad or iPhone setup without dragging a laptop and capture cards everywhere. Switcher pulls it all together so you can switch shots, manage scenes, and stream to multiple platforms from one place.
If you’re ready to explore what a live stream HDMI camera setup can do for your content, try Switcher Studio today and see how easy pro livestreaming can feel when your tools are built for it.
Subscribe to the blog
Sign up to receive notifications whenever a new blog post is published. You may unsubscribe at any time.