A multicam workflow gives you control over what your audience sees, when they see it, and how your content flows in real time.
This guide walks you through building one that stays simple, reliable, and effective, whether you’re streaming with two cameras or 20. But first:
Why use multiple cameras in live streaming?
When you’re live streaming, two things happen at the same time:
-
You do something in real life
-
Your audience sees a version of it
With a single camera, you can only give the audience one scene. One angle. One point of view.
With multiple cameras, you decide which angle is most impactful, what detail they should notice, and how close or immersed they should feel.
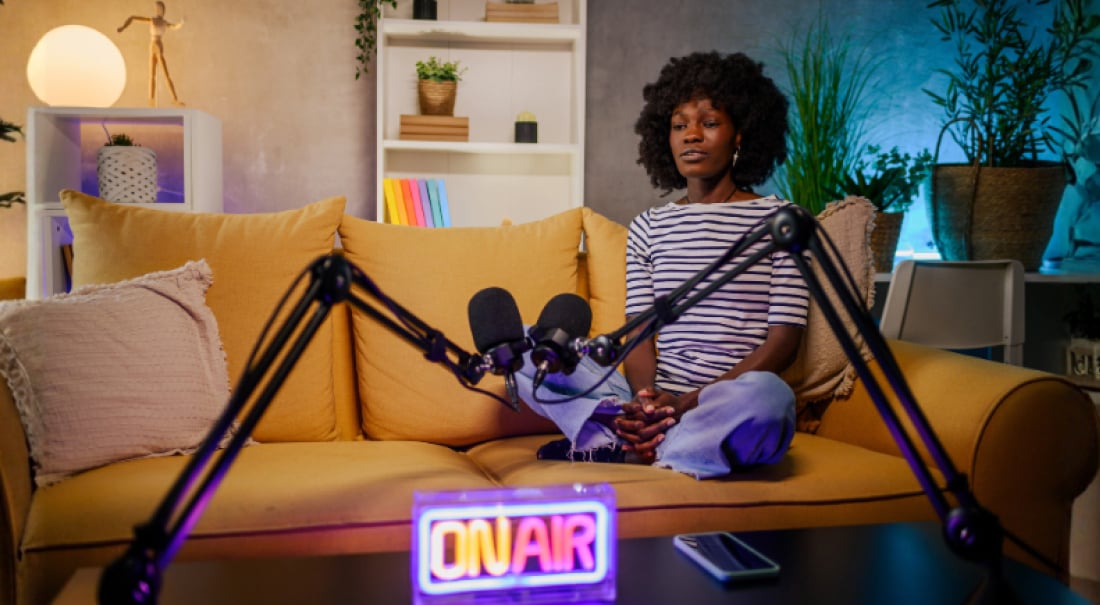
You can see this clearly in something like a live podcast. With a single camera, both speakers stay on screen the entire time. With multiple cameras, you can:
-
Cut to the person speaking
-
Switch to a reaction shot
-
Move to a tighter angle during an important moment
Instead of passively showing what’s happening, you’re actively directing attention and shaping the conversation visually.
What is a multicam workflow?
A multicam workflow is the system you use to capture, manage, and deliver multiple camera feeds during a production. In live streaming, it’s how you connect your cameras, switch between them, and broadcast one polished production.
Why your multicam workflow is more important than your gear or setup
It’s tempting to think better streams come from better gear, or even more gear. In reality, your live streaming workflow has a bigger impact on the success of your livestream.
A clear, simple workflow helps you:
-
Stay focused on your delivery: You’re not thinking about your angles and switching timing while you’re live. You’re present, flowing naturally, and actually connecting with your audience, which makes your stream feel more confident and engaging.
-
Create a consistent streaming experience: When your workflow runs the same way every time, it’s easier for you to go live without friction, and your audience starts to recognize the feel and flow of your streams.
-
Make your stream more visually engaging: Instead of a static shot, your stream has rhythm and variation that hold attention.
-
Deliver better content overall: Because you’re not limited by a single perspective, you can demonstrate, explain, and react more effectively, which improves your viewers’ experience.
A complicated workflow does the opposite. It introduces friction, increases the chance of mistakes, and makes it harder to go live with confidence.
3 Types of multicam workflows for live streaming
There are a few different ways to run a multicam workflow, depending on whether you’re switching live, editing later, or doing both.
Here are the three main approaches to designing a multicam workflow.
Multicam flow design #1: Live-switching workflow
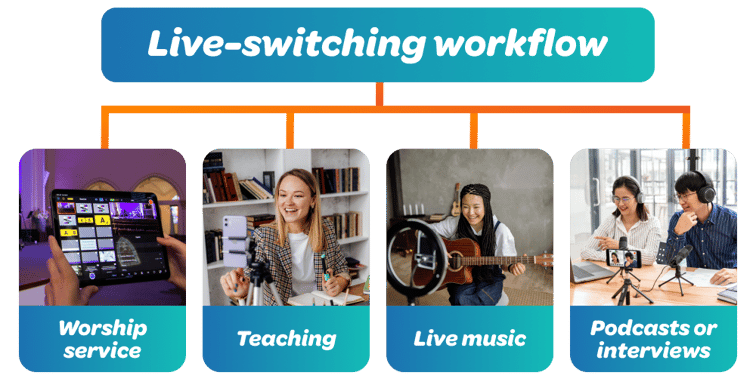
This is the most common setup for live streaming. You switch between camera angles in real time, and what your audience sees is the final output, and can’t be changed.
It works best when you can predict, with some accuracy, when you’ll need to switch cameras and angles. That way, you can guide attention in real time so the audience benefits from seeing the right thing at the right moment. For example:
-
Teaching, like yoga or fitness, where viewers need different angles
-
Worship services where you switch between the speaker, band, congregation, and media
-
Podcasts or interviews, where you can focus on whoever is speaking
-
Live music, so you can cut to the lead instrument or performer
Tradeoff: Because you’re executing your switching in real time, effective timing is critical. Anything you miss or mistime gets broadcast as-is.
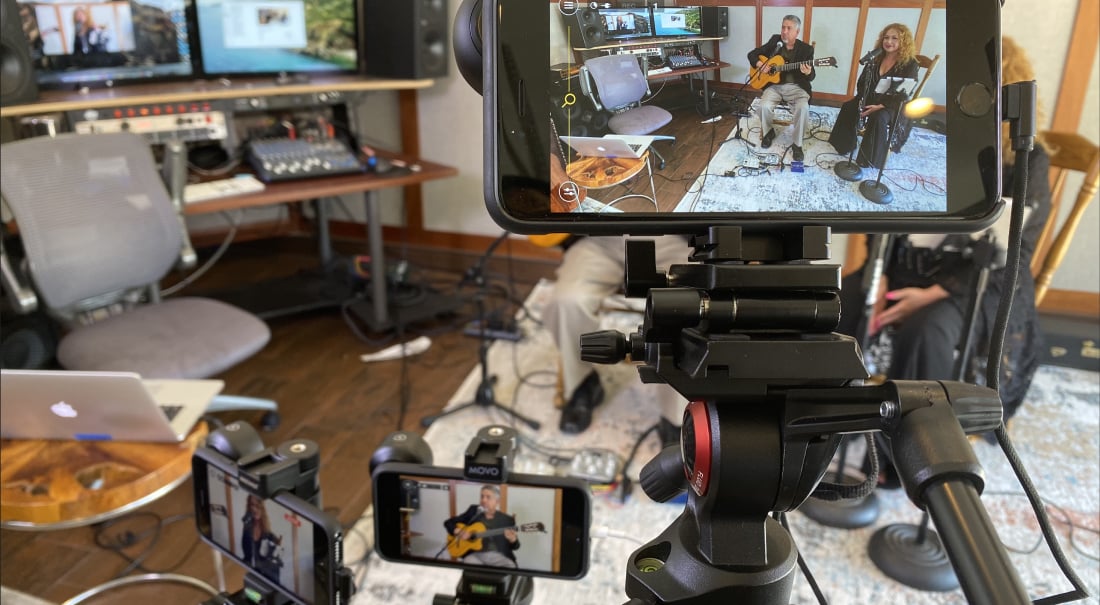
Multicam flow design #2: Recorded (ISO) workflow
In this setup, each camera records separately, and you decide how everything comes together after recording, during editing.
A recorded workflow is best when the final edited content matters more than the live experience.
For example, if you’re running a webinar but plan to clean it up and redistribute it afterward, or recording a course that people will watch later on demand, you don’t want to lock in your camera switches live. You want the flexibility to choose the best angles, tighten pacing, and remove mistakes before you ship the final version.
Tradeoffs: You now have extra post-production work: organizing files, editing, polishing, packaging, and publishing.
Multicam flow design #3: Hybrid workflow
A hybrid workflow is best when the live moment is important, but the content is too valuable to leave as-is afterward. You go live and switch cameras in real time, and at the same time, the system records each camera separately in the background.
For example:
-
You’re doing a live interview or podcast and want to clip high-quality segments for distribution later
-
You’re hosting a paid workshop or training, where the live version needs to be interactive, while the recorded version needs to feel clean and professional
-
You’re streaming an event or performance, but you’ll reuse the footage for marketing, social clips, or future content
In all of these cases, you don’t want to choose between “live” and “edited” — you want both. Luckily, Switcher auto-records your live sessions with Director Mode so you can have this freedom and choice.
Tradeoffs: You’re adding complexity and more to manage, because you’re essentially running a live production and editing material for post-production.
How to build a multicam workflow in 5 simple steps
A multicam workflow is a set of decisions you make about how you use cameras in your stream. And you need a workflow that you can run the same way every time.
Every solid multicam workflow is built around five things:
-
Setup
-
Output
-
Switching
-
Audio
-
Control
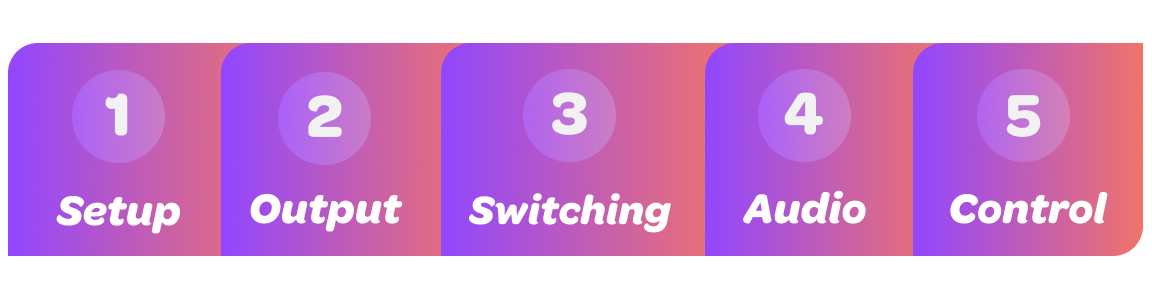
Let’s take a closer look at each of them.
Step 1. Camera setup: Decide how many cameras to use and what each is for
Wondering, “How many cameras should I use?” Each camera should exist to solve a specific problem for your viewers, so it helps to start by asking, “What do I need to show, and when?”
Take a yoga class, for example.
-
One camera might show the full pose so the viewer understands the movement.
-
Another might be a side angle that makes alignment clear.
-
A third might be positioned for close-ups when you need to show hand placement or small adjustments.
This way, you’re making sure nothing important gets lost, and that your viewer has the full picture.
Pro tips:
-
Once you decide what each camera is responsible for, label it. That way, you won’t get confused during the livestream. Sticky notes, tape, or even different colored stickers work,
-
Place your cameras where they will be during the stream, and don’t move them. You’ll need steady mounting setups for your cameras so you can capture smooth video.
-
Frame your shots in advance. Where will you be? Where will the product be? And do all elements of the shot fit inside the frame?
-
Have a backup plan: If one camera fails, what will you do?
Step 2. Audio: Determine where your audio comes from, and how to keep it consistent when you switch cameras
Most viewers will tolerate imperfect video, but they won’t tolerate bad audio. If your sound cuts out, changes volume, or suddenly feels distant when you switch cameras, people disengage fast.
The mistake to avoid is tying audio to your cameras. Your audio should come from a single, reliable source, and it should not change when you switch cameras.
To illustrate this point, take a worship service: If your audio is coming from the active camera and you switch from the preacher to the audience, the preacher’s voice might drop or disappear entirely. That breaks the experience immediately.
Instead, your audio should come from something stable:
-
Lavalier microphone (or lav mic/lapel mic): This is a small mic you clip onto your shirt. It’s best when you’re moving around while speaking, such as when you’re demonstrating and presenting.
-
Shotgun mic: This mic sits off-camera and picks up sound from a specific direction. It works well when you’re mostly staying in one place, like at a desk or demo setup.
-
Mixer: This is what you use when you have multiple audio sources — like several mics or instruments — and need to combine them into one clean feed. It’s common in setups like worship services, panels, or music concerts.
This way, no matter which camera you switch to, your audio stays consistent and clear.
Pro tips:
-
Do a quick switching test before going live: Switch between cameras and listen carefully. Your audio should not change at all.
-
If you’re using multiple mics, balance them ahead of time so you’re not adjusting levels mid-stream.
To learn more, read: Live Streaming Audio Setups: From Beginner to Pro
Step 3. Changing shots: Determine how you’ll move between camera angles (and when)
Switching is how you guide your viewer through the stream and decide what they should be looking at in each moment.
Think through your content ahead of time and decide what your cues for switching will be, and match those to the camera setup you’ve already created.
For example, in a podcast, your main shot is usually on whoever is speaking, but you’ll cut to reactions to capture the mood of the speakers. In a worship service, you might stay on the speaker, then switch to scripture when it’s being read.
Pro tips:
-
Write down a simple flow for your camera changes. For example:
-
Beginning: Start with your main camera on your host
-
Guest introduction: Switch to each guest as they’re being introduced
-
Caller questions: Change to a wide shot to show all participants
-
Reactions: Zoom in on the strongest reactions
-
Don’t switch too fast: Make sure to let each shot breathe so viewers can follow.
-
Practice switches before you go live, so you’re comfortable with the production workflow.
Step 4. Output: Decide where you want to broadcast online and how to manage your production
Everything you’ve set up — your cameras, audio, and switching — has come together before you go live.
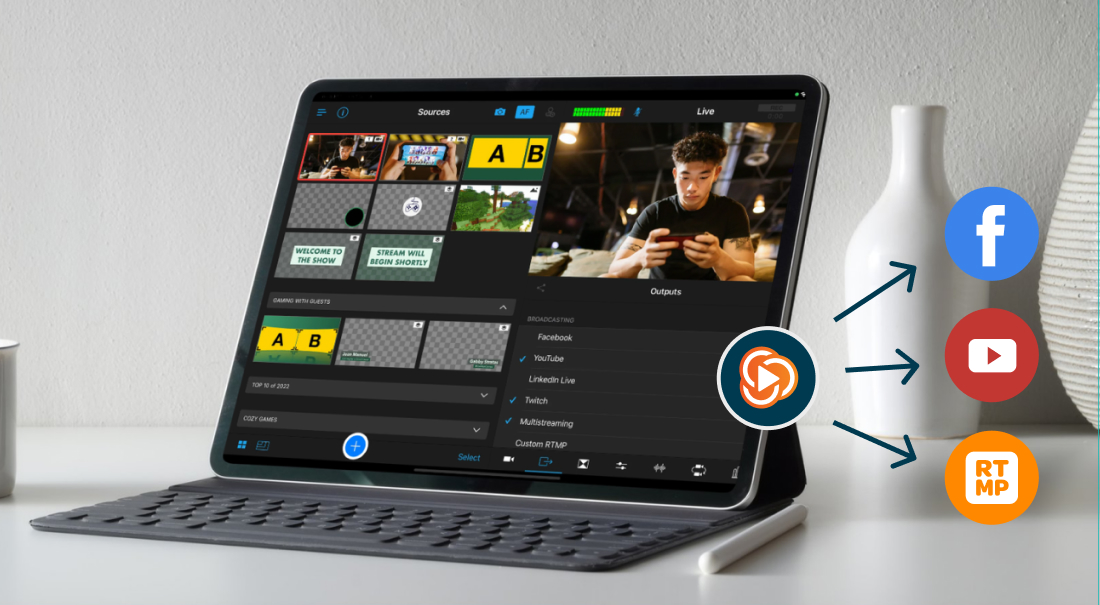
If you’re running things yourself, you want everything happening in one place. Ideally, you’ll simply sync your cameras, change between them, and go live everywhere online, all from the same device.
This is why solo creators and small teams use Switcher: It keeps multicam and multistreaming workflows simple and manageable.
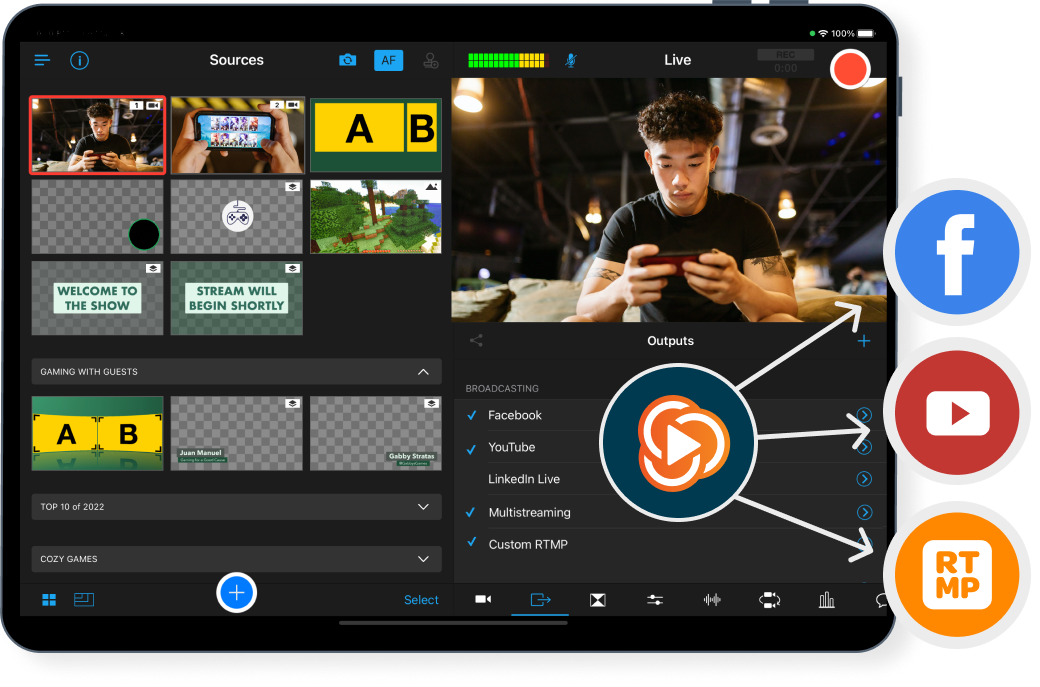
You can also split this up. Your cameras can feed into one platform, which sends video to another device or platform that broadcasts your stream. This type of setup is more common in larger productions with trained operators because it adds more steps and complexity.
The decision is simple: Do you want one place to run everything, or multiple pieces working together? The more you split it up, the more you’ll need to manage while you’re live.
Pro tip: Learn your setup inside out before you go live. Know exactly where to tap, click, or switch without having to think too much. That will allow you to focus more on creating a great stream and engaging with your audience.
Step 5. Control: Determine who should run the stream
Control is about deciding who’s responsible for switching cameras during the stream, and how your setup enables that.
-
If you’re doing something simple, you can run it yourself. For example, in a cooking class or guitar lesson, you might only be switching between two angles: your face and your hands. In that case, it makes sense to keep control of your device and switch as you go. It’s predictable, and it won’t interrupt your flow.
-
If you’re moving around or your content is less predictable, it’s usually better to have someone else handle switching. Think of a presentation or a fitness class; you’re focused on delivering, moving, and interacting, so having someone else follow your script and switch angles keeps the stream smooth without pulling your attention away.
-
If you’re running a larger production, you’ll likely need a team. Concerts, conferences, or large worship services often involve multiple cameras, multiple moments happening at once, and a higher expectation for polish. In those cases, one person typically handles switching while others manage cameras and audio.
The goal is simple: don’t build a workflow that requires more people than you have, or fewer than you need.
Pro tips:
-
If switching ever pulls your attention away from what you’re saying, your setup is too complicated.
-
Set up your controls so each camera is always in the same place, and don’t rearrange them between streams.
-
If someone else is switching, make sure they understand the flow of your content, not just the buttons.
Simplify your multicamera workflow with Switcher
The simpler your setup, the more reliable your multicam workflow, and the better your stream will feel. Every extra device, connection, or step adds friction, and when you’re live, friction shows up as hesitation, missed moments of connection, and unhappy viewers who click away.
Switcher is designed to remove that complexity. Instead of stitching together multiple tools, you can:
-
Use every device you have as a camera: iPhones, iPads, webcams, Androids, and dedicated cameras
-
Effortlessly switch between angles
-
Keep your audio and video aligned
-
Add graphics, overlays, media, remote guests, and more
-
Go live directly to every online platform at the same time
Everything happens in one system, so you’re not juggling while you’re trying to deliver your content.
That means:
-
Less setup time
-
Fewer failure points
-
A workflow you can run and repeat with confidence
-
A more polished and professional broadcast using the gear you already have
Try Switcher today and see how much easier you can create and execute a multicam workflow.
Subscribe to the blog
Sign up to receive notifications whenever a new blog post is published. You may unsubscribe at any time.