Switcher Studio 5.6 is here and packed with plenty of shiny new features to make your live and recorded videos gold medal-worthy! Our latest updates are focused on giving you more control over content customization and organization — allowing you to better prep your streams before actually going live.
With Switcher 5.6, you’ll be able to:- Create video clips from past productions
- Overlay videos — including HEVC video with alpha
- Convert dark screen backgrounds into transparent backgrounds
- Organize assets into groups right in the Production panel
- Prefill Multiview slots with specific video sources
Before we pass the Switcher 5.6 baton on to you, let’s take a closer look at each new feature.
Create video clips from past production recordings
In Switcher 5.2, we introduced the ability to trim the beginning or end of prerecorded videos within Switcher. Now we’re taking video clips one step further! Clip any portion of a past production recording to easily reuse on social media, your website, or even a future livestream! You can get creative with your clips and make intros, outros, highlights, teasers, special segments, and more! Clips can be as short or long as you desire — five seconds, 30 seconds, two minutes, etc.
You can also set the pace of your clips by controlling the playback speed to slow them down or speed them up. Once you’ve created your clip, you can either use it immediately in a broadcast or save or export it to your device, YouTube, Final Cut Pro X, or CTpro.
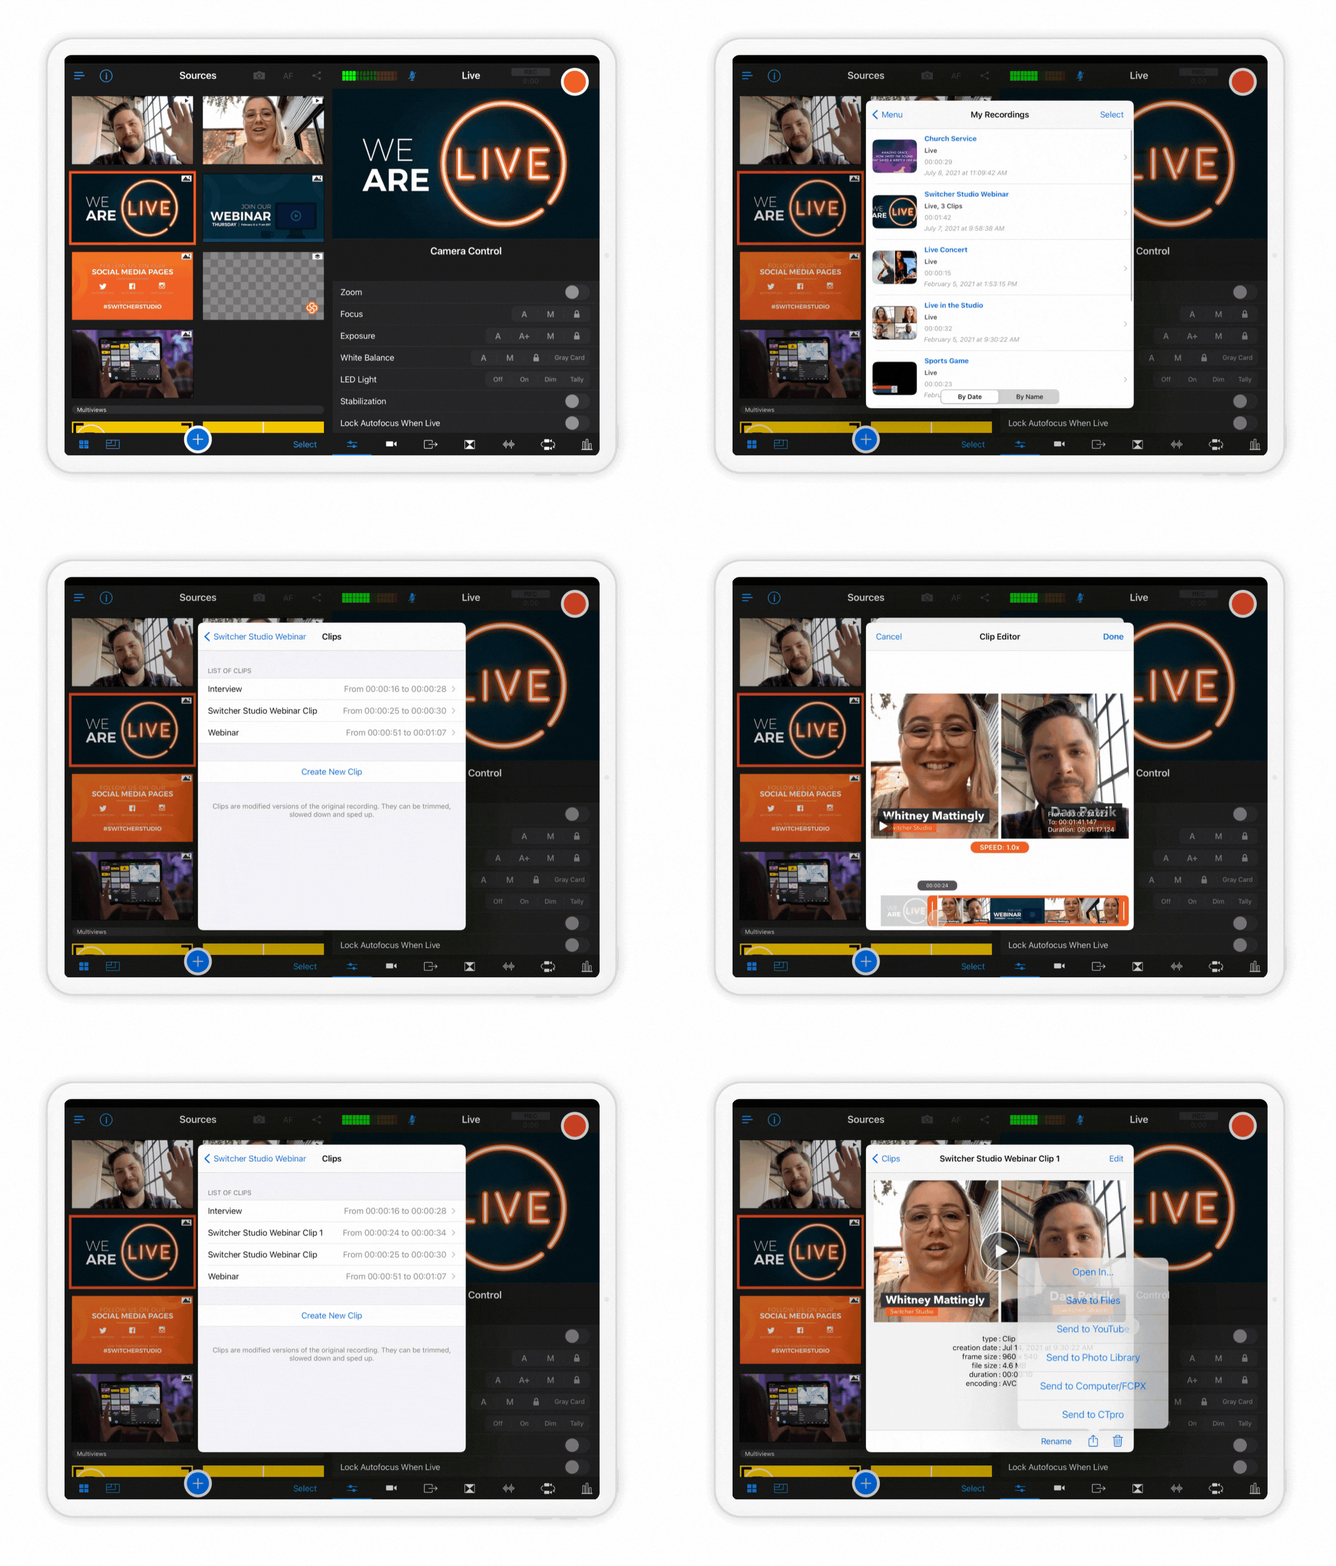
Clips can be created in recording-breaking time! Just choose a video from My Recordings on the Home Screen Menu, and then tap on Clips in the bottom left corner. Tap Create New Clip, and then drag the left and right sliders to create the exact clip you want.
Add video assets as overlays (including HEVC video with alpha!)
Video sources (like your live camera feed) and video assets (prerecorded videos) can now be used as overlays in addition to being full-screen! This new video overlay feature lets you overlay your live camera feed on top of a prerecorded video and provide commentary or even overlay a prerecorded video on top of an image — the ball is in your court!
We’ve also added support for HEVC video with alpha, letting you overlay videos with transparent regions. This allows you to add your own custom video assets featuring scrolling text or countdown clocks over transparent backgrounds!
Speaking of overlays, Switcher users already had the ability to add either full-screen images or logo overlays (think of a logo in the bottom corner of the screen) to live or prerecorded videos. Now you can interchange these options — the same graphic can be used as a full-screen image or as an overlay.
Making an asset appear as full-screen or an overlay is simple. Just navigate to the asset’s Properties window by tapping and holding your desired asset, and then choose Edit. Next to Layering, choose whether you want your asset to appear as Full-Screen or an Overlay. 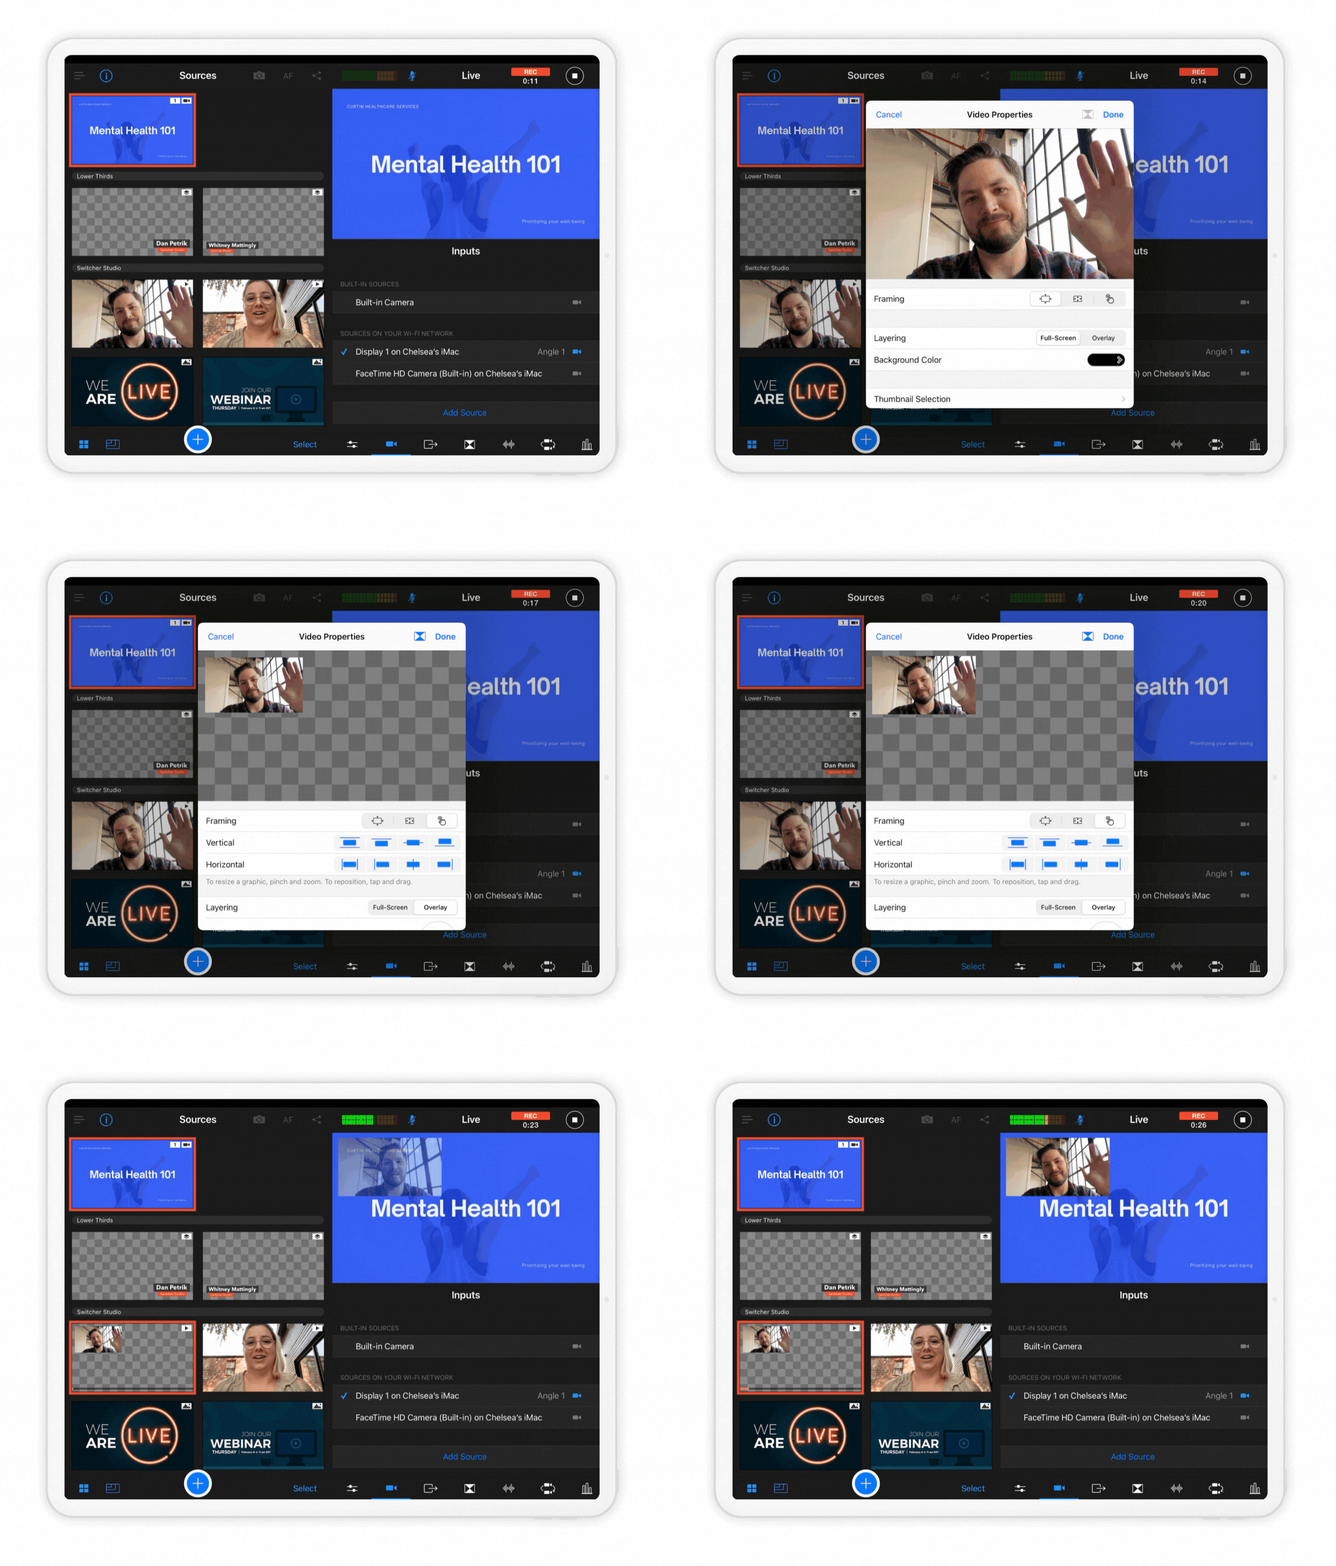
In the asset’s Properties window, you'll also see new customization options like Framing and Alignment and Transition Duration. The framing and alignment options ensure your assets are located exactly where you want them to be. The transition duration option lets you choose how long it takes for a video overlay to fade in on-screen. Choose from any duration between 0-16 seconds.
Convert dark screen backgrounds into transparent backgrounds
Not only can you overlay videos, but our new dark background transparency feature lets you fade out the dark backgrounds of screenshared sources too!
Once you screenshare your Mac or PC screen into the Switcher Studio app using Switcher Cast, you can then use the dark background transparency feature to convert dark screen backgrounds into transparent backgrounds — perfect for overlaying white text lyrics, subtitles, or other text from a screenshared source!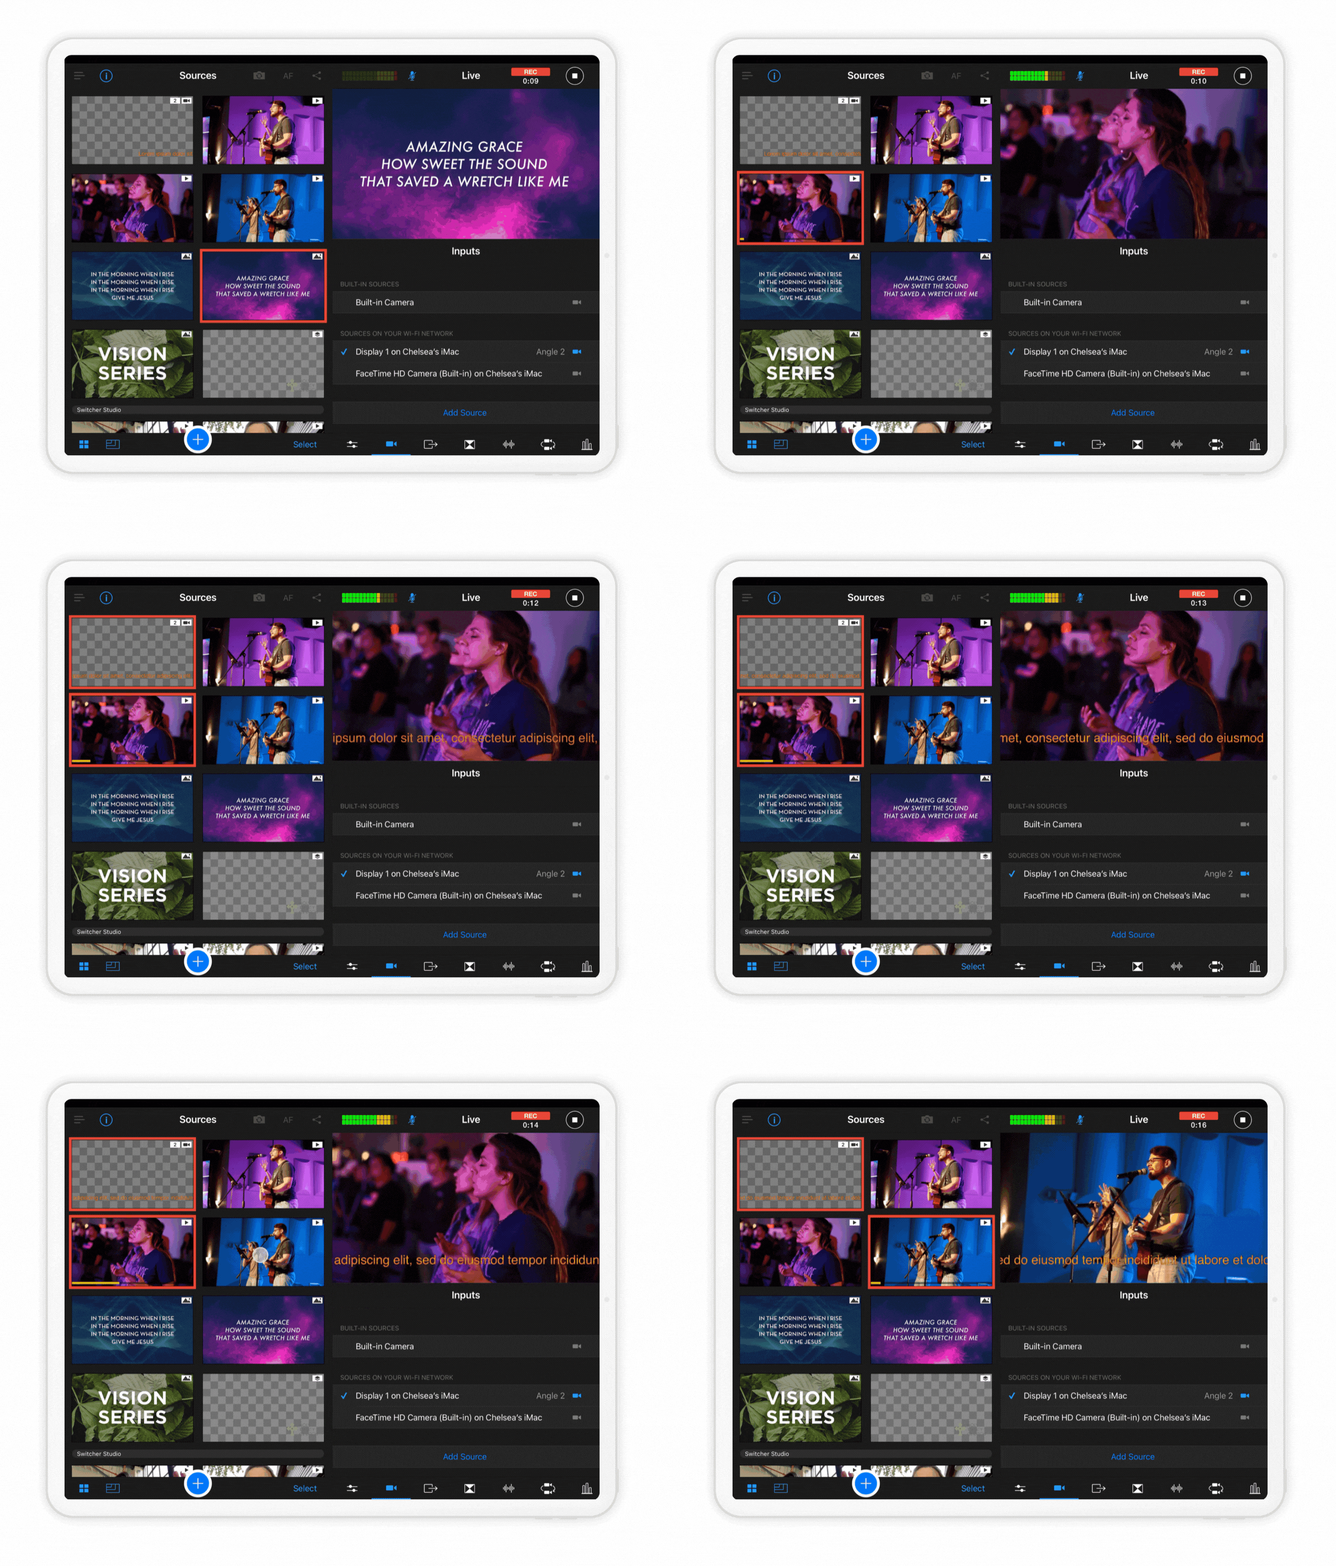
To fade out the background of a screenshared source, open the Switcher Cast app on your desktop device. Then navigate to the Cameras and Screens tab in Switcher, and select your desired display (please note that you can’t make a live camera feed transparent). From the Production/Sources panel, tap on your screenshared display and select Edit. Next to Layering, tap Overlay. You’ll then see the Fade Black to Transparent slider. The farther right you move the slider, the more transparent your display’s dark areas will be.
Organize your multimedia with Production Groups
With the new production groups feature, you can leave clutter in dust! Easily organize your multimedia assets by grouping them together in the app’s Production/Sources panel. Production groups give you a head start on your video production and allow you to prep for more than one livestream at time — making everything you need for your broadcast super easy to find, edit, and ultimately use.
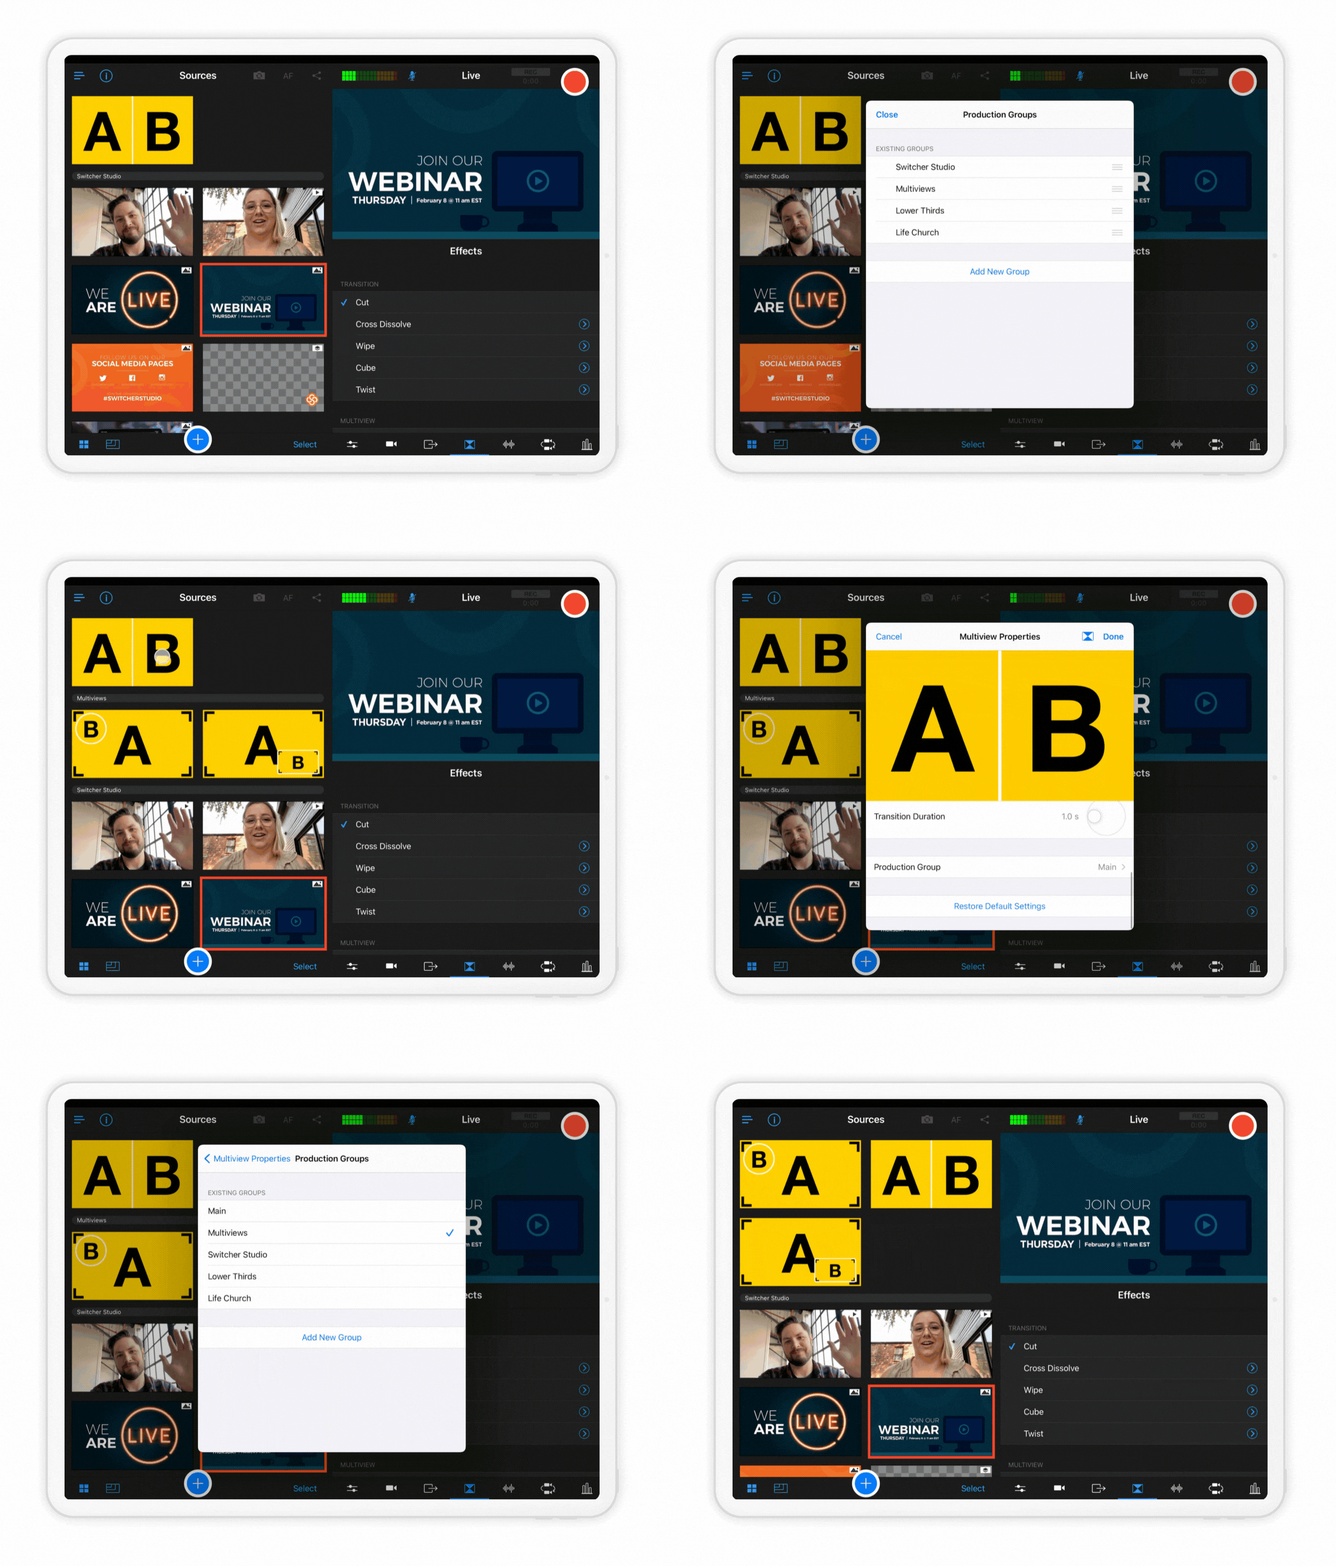
Whether you want to keep all assets for a particular project together or create a group specific to your brand logos and graphics, the new production groups feature lets you arrange your multimedia assets however you want. Group anything from video recordings, graphics, and images to logos and sound effects.
To create a production group, just tap on an asset and press Edit. Then select an existing group, or tap Add New Group and give your group a name.
Prefill your Multiview Template slots with camera and screen sources
Wouldn’t it be cool if you could add specific live video sources (your camera, a remote guest’s camera feed, a screenshare, etc.) to a Multiview template and then save that Multiview to use any time you wanted to go live in the future? With our new prefilled Multiview feature, you can stay ahead of the game and do exactly that!
Previously with Multiview templates, you had to first choose your desired Multiview template, and then pick which video sources you wanted to add from the Production/Sources panel. Now you have the option to create prefilled Multiviews using new slot assignment options — which let you add and preview video sources while you’re customizing your Multiview in the Properties window. Once you’ve created a Multiview featuring your desired video sources, it will automatically save on the Production/Sources panel — along with the video sources you added — so you can use that exact same template again in the future and so that you don’t have to tap your A, B, and C sources, etc., every time you tap that Multiview.
The slot assignment options give you three ways to add your video sources to a Multiview template:
- Select each time: As before, select your video sources and assets each time you choose that Multiview. (This is the default option.)
- Preselect: Preselect your video sources from within the Multiview Properties window. (This option allows you to preselect camera and video sources only.)
- Reuse current source: Preselect all but one of your video source slots — the last remaining slot will automatically be filled with your current (last selected) vide
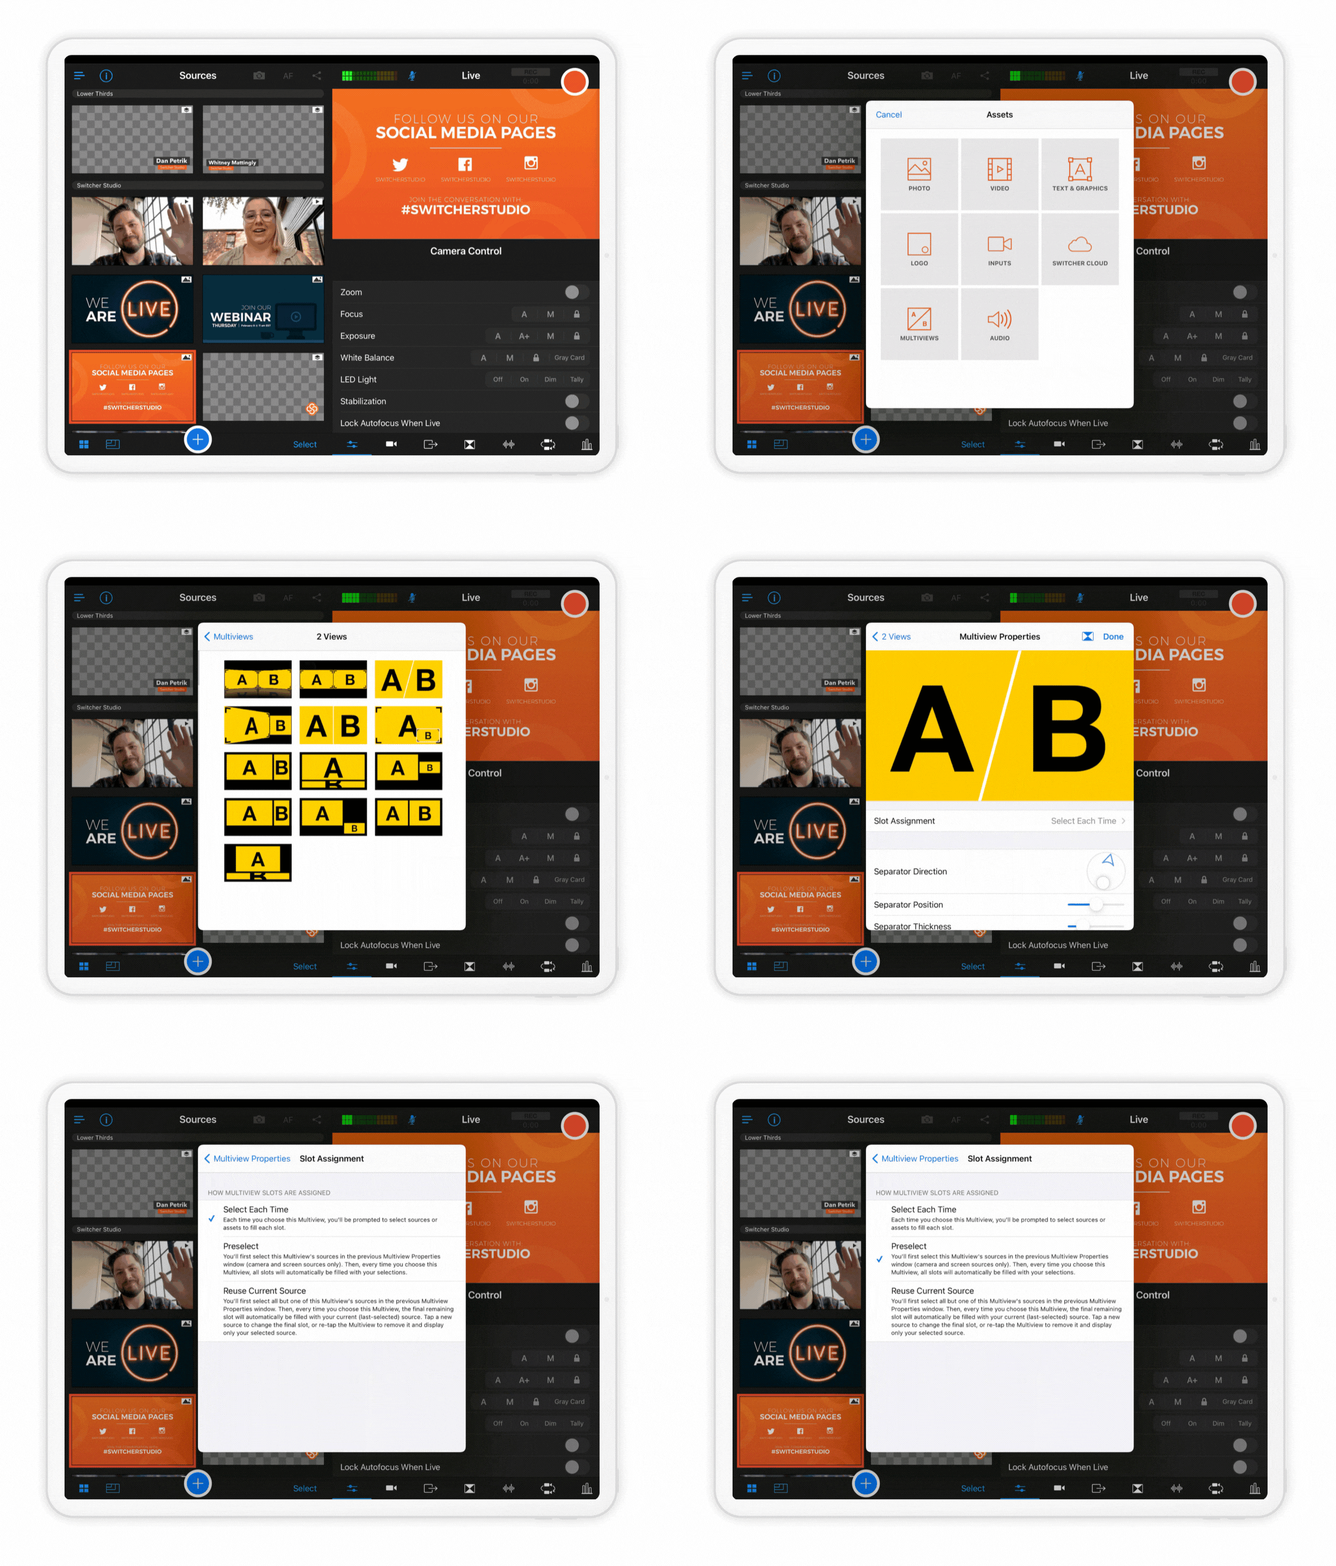 o source, and you can tap a new source to change the final slot.
To choose how your video sources are added to a Multiview, just tap Slot Assignment in the Multiview Properties window, and choose either the Select Each Time, Preselect, or Reuse Current Source options — depending on your preference.
What else is new?
In 5.6, we also added audio output details — access them on an iPhone from the Home Screen Menu under About Devices; access them on an iPad by tapping the info icon in the top left.
That’s the rundown on what’s new in Switcher Studio 5.6! To learn more about these features, tune in on Tuesday, July 20, for the English Facebook Live at noon ET, or the Spanish Facebook Live at 2:30 p.m. ET.

