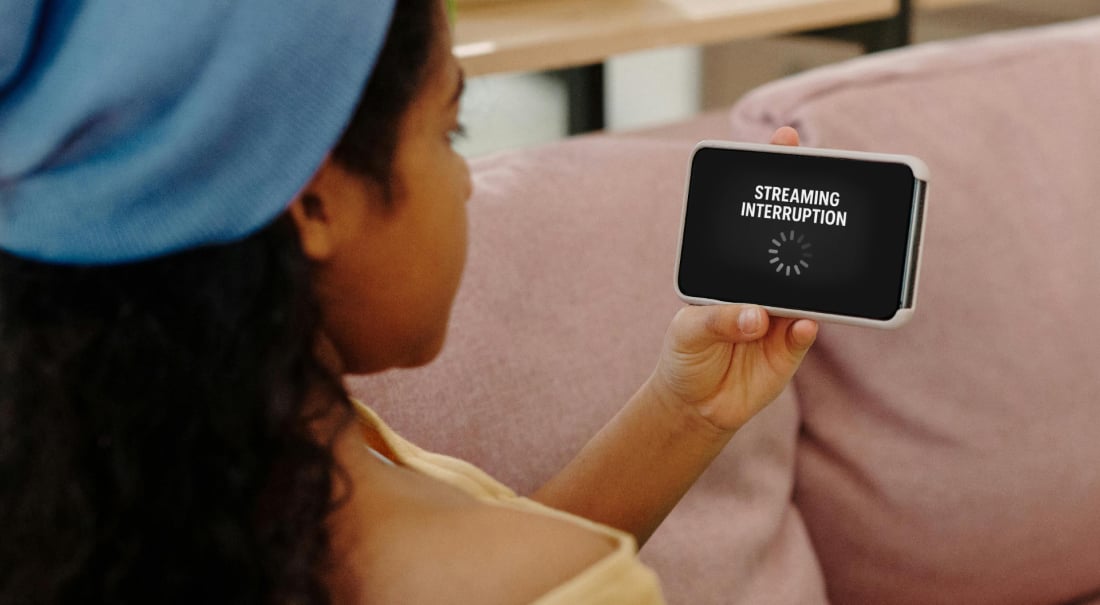

If you’ve ever noticed your live stream freezing, your audio dropping out, or viewers complaining about buffering, packet loss when live streaming could be the culprit.
Whether you’re streaming with Switcher or another platform, understanding packet loss when live streaming is the key to keeping your broadcasts smooth and professional.
But what is packet loss? And how can you check and avoid packet loss when live streaming? Let’s find out.
What is packet loss?
When you go live, your video and audio data is broken into tiny pieces called “packets.”
These packets travel across your network — from your device, through your router, and out to your viewers via the internet.
Packet loss happens when some of the data packets fail to reach their destination.
Even a small amount of packet loss can cause big problems for live streaming. Why? Unlike watching a pre-recorded video (where your device can buffer and fill in the gaps), live streaming relies on a steady, uninterrupted flow of data. If packets go missing, you’ll see dropped frames, glitches, or even complete stream interruptions.
How packet loss impacts your live stream
If you’re experiencing packet loss when live streaming, you might notice:
-
Dropped frames: Your video looks choppy or stutters.
-
Buffering: The stream pauses to “catch up.”
-
Pixelation: Video quality drops suddenly.
-
Audio glitches: Sound cuts out or becomes distorted.
-
Stream disconnects: The broadcast ends unexpectedly.
These issues don’t just frustrate you — they can also drive viewers away.
What causes packet loss during live streaming?
There are several reasons you might experience packet loss when live streaming, and understanding them is the first step to fixing the problem.
Let’s take a closer look at six common culprits and how they can impact your stream’s quality and reliability.
1. Network congestion
Network congestion happens when too many devices are sharing the same internet connection at once.
Imagine your home or office Wi-Fi as a busy highway: when everyone’s streaming, downloading files, or joining video calls simultaneously, the network can quickly become overloaded. This digital traffic jam makes it difficult for your live stream data to travel smoothly, resulting in packets getting delayed or even dropped entirely.
If you’re streaming during peak hours or in a shared environment, you might notice more buffering, stuttering, or even temporary disconnects. Monitoring your network usage and scheduling streams during less busy times can help minimize congestion-related packet loss.
2. Limited upload speed
A stable, high upload speed is essential for live streaming, but not all internet plans are created equal. If your upload speed is too low or fluctuates frequently, your stream won’t have enough bandwidth to send video and audio data reliably. This can lead to choppy video, audio dropouts, or even total stream failure.
Remember, bandwidth isn’t just about the maximum speed advertised by your provider — it’s also about how consistently that speed is delivered. If your internet plan doesn’t provide enough upload bandwidth for your chosen streaming quality, packet loss is almost inevitable. Upgrading your plan or reducing your stream’s bitrate can help ensure smoother broadcasts.
3. Wi-Fi interference
Wi-Fi is incredibly convenient, but it’s also prone to interference from both physical and electronic sources. Walls, floors, and large objects can weaken your wireless signal, while everyday devices like microwaves, cordless phones, and even neighboring Wi-Fi networks can disrupt your connection. These obstacles can cause your stream’s data packets to get lost or delayed, resulting in visible glitches or audio hiccups during your broadcast.
For the most reliable connection, try streaming as close to your router as possible, or consider using a wired Ethernet connection to bypass Wi-Fi interference altogether.
4. Hardware issues
Sometimes, the root cause of packet loss is as simple as faulty equipment. Old or malfunctioning routers, damaged Ethernet cables, or loose connections can all introduce instability into your network. Even high-quality hardware can develop issues over time due to wear and tear.
If you’re experiencing persistent packet loss, it’s worth checking your cables for visible damage, ensuring all connections are secure, and rebooting your router to clear any temporary glitches. Regularly updating your router’s firmware can also help maintain optimal performance and minimize packet loss during live streams.
5. Network settings
Your router’s configuration plays a crucial role in managing network traffic. Features like Quality of Service (QoS) enable you to prioritize certain types of traffic, such as live streaming, over others.
If your router isn’t set up to give streaming the bandwidth it needs, other activities on your network (such as large downloads or online gaming) can “steal” bandwidth from your broadcast, leading to increased packet loss.
Reviewing your router’s settings and enabling QoS for your streaming device can help ensure your live stream remains smooth, even when your network is busy.
6. ISP or external issues
Not all packet loss problems originate within your network. Sometimes, your Internet Service Provider (ISP) experiences congestion or technical issues that affect the stability of your connection, especially during peak usage hours. Additionally, problems on the broader internet — such as outages or routing errors — can disrupt your stream’s data flow before it even reaches your viewers.
While you can’t control these external factors, you can monitor your connection’s performance and reach out to your ISP if you notice persistent issues. Keeping an eye on service status updates can also help you anticipate and plan around potential disruptions.
How to check for packet loss when live streaming
If you suspect packet loss, don’t guess — test! Here’s how to check packet loss on your network:
Run a packet loss test
On Windows:
-
Open Command Prompt.
-
Type: ping -n 100 google.com
-
Press Enter.
-
Look for lines that mention “Lost = X (Y% loss)”. Any loss above 0% is a red flag for live streaming.
On Mac:
-
Open Terminal.
-
Type: ping -c 100 google.com
-
Press Enter.
-
Let it run for at least 50 entries.
-
Stop the test by pressing the ‘Control’ and ‘C’ keys at the same time.
-
Review the summary for packet loss percentage.

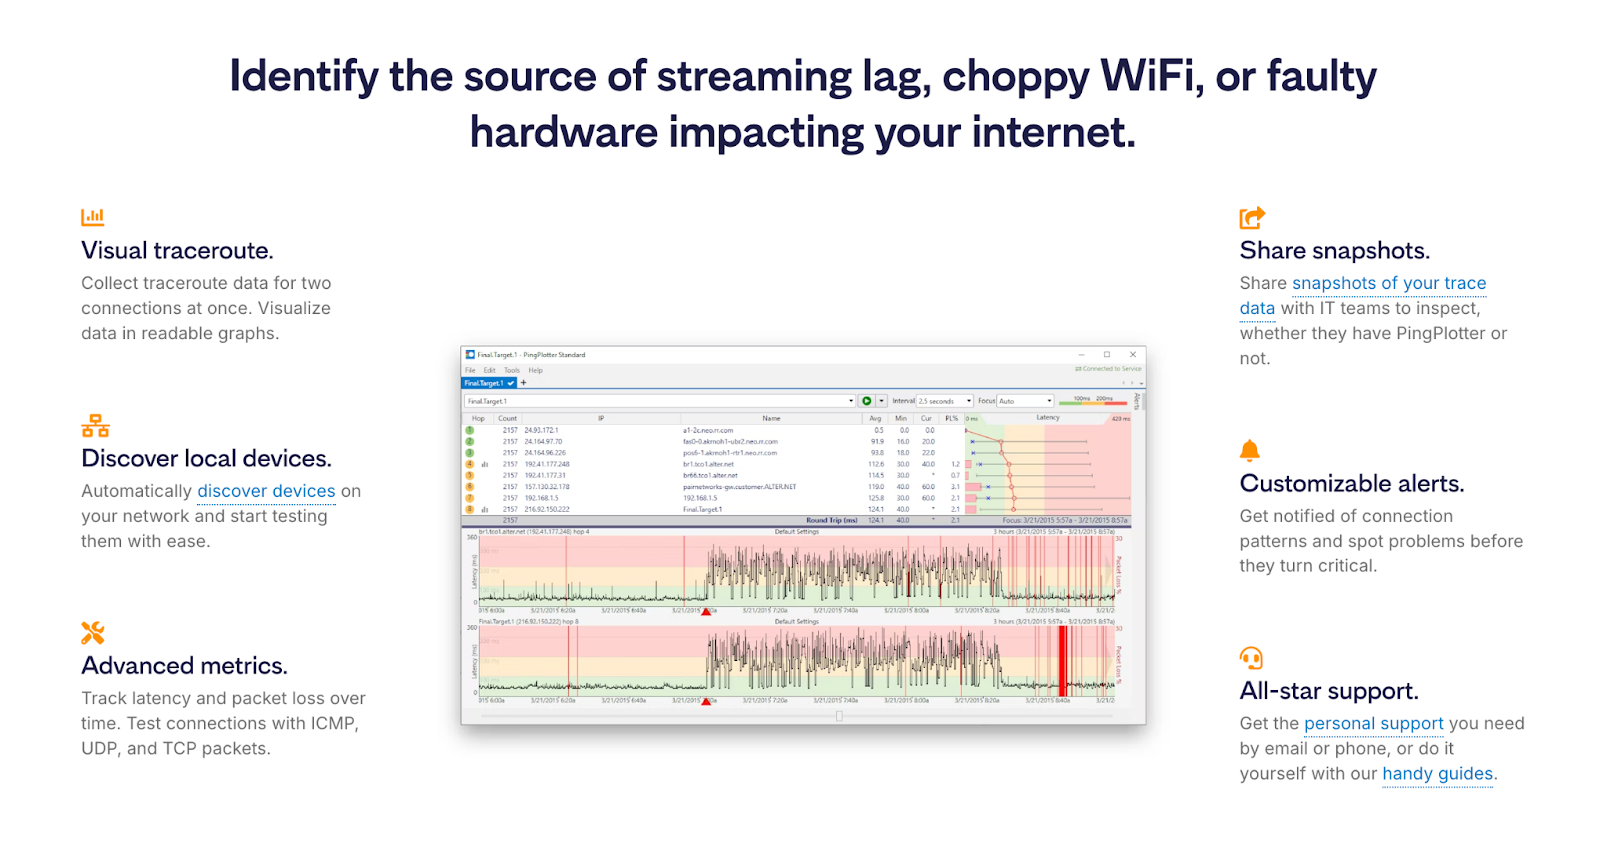
Use network monitoring tools
For a more detailed analysis, tools like PingPlotter and Uptime Monster can help identify where packets are being lost along your network path.
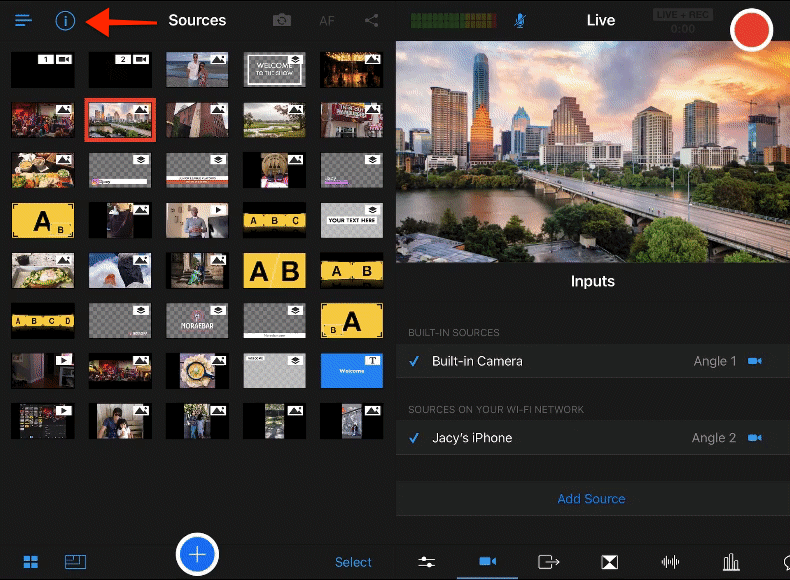
Check Switcher’s Info Panel
If you’re using Switcher, our Info Panel displays real-time stats on packet loss, upload speed, and more. This makes it easy to spot issues before (or during) your broadcast.
To access the Info Panel on an iPad, open the Switcher app and tap the "i" icon in the top-left corner.
To access the Info Panel on an iPhone, open the Switcher app, tap the Hamburger Menu (three horizontal lines), then tap ‘About Devices.’
How to fix packet loss when streaming
Ready to troubleshoot? Here’s how to fix packet loss when streaming and keep your broadcasts running smoothly.
1. Switch to a wired Ethernet connection
Wi-Fi is convenient, but a wired Ethernet connection is more stable and less prone to interference. If possible, connect your streaming device directly to your router.
You’ll need to get an Ethernet cable and an adapter to connect it to your Apple devices — it’s pretty easy to find these online for a few bucks:
-
If you’re using older Apple devices, look for Lightning to Ethernet adapters
-
If you’re using newer Apple devices or Android devices, look for USB-C to Ethernet adapters

Once you’re plugged in, you’ll likely notice an immediate improvement in your stream’s consistency and quality — especially in environments with lots of Wi-Fi traffic or physical barriers.
2. Optimize your Wi-Fi
Follow these tips to optimize your Wi-Fi connection:
-
Move closer to your router.
-
Minimize obstacles (walls, floors, large metal objects).
-
Reduce interference from other devices.
-
Use the 5 GHz band for less congestion.
Switcher’s Wi-Fi Optimization Mode can also help improve wireless performance, giving your stream the best chance at a stable connection without cables.

3. Reduce network congestion
Ask others to pause large downloads or streaming during your broadcast. Disconnect unnecessary devices from your network to free up bandwidth. The fewer devices competing for your connection, the more resources your stream will have to run smoothly.

4. Check and upgrade your hardware
Make sure your hardware is working properly:
-
Restart your router and streaming device to clear any temporary glitches that might be causing packet loss.
-
Inspect your Ethernet cables for signs of wear or damage, and replace them if necessary — old or frayed cables can introduce connection issues.
-
Consider upgrading to a newer router, especially one with advanced Quality of Service (QoS) features that allow you to prioritize streaming traffic.
Investing in up-to-date hardware ensures your network can handle the demands of live streaming.

5. Adjust your router settings
Enable Quality of Service (QoS) and set your streaming device or app as a top priority. This tells your router to allocate more bandwidth to your broadcast, even if others are using the network for different tasks.
Some routers allow you to prioritize by device or by application, so make sure to select Switcher or your streaming platform for the best results.
To enable QoS on most routers, follow these steps:
-
Log in to your router’s settings by entering the router’s IP address (usually 192.168.1.1 or 192.168.0.1) into your web browser.
-
Look for the QoS or Traffic Prioritization section in the menu.
-
Select your streaming device — whether it’s a PC, encoder, or camera — and set it as a high-priority device.
-
Save your changes and restart your router to apply the new settings.
Taking a few moments to adjust these settings can help prevent interruptions and keep your stream running seamlessly.
6. Optimize your streaming settings
If your upload speed is limited, adjusting your streaming settings is one of the most effective ways to reduce packet loss and keep your broadcast running smoothly. Here’s how you can do it, step by step:
-
Run a speed test: Before making any changes, test your internet connection using a tool like Speedtest.net or Cloudflare’s Internet Speed Test. Take note of your upload speed, as this will determine the maximum quality you can reliably stream.
-
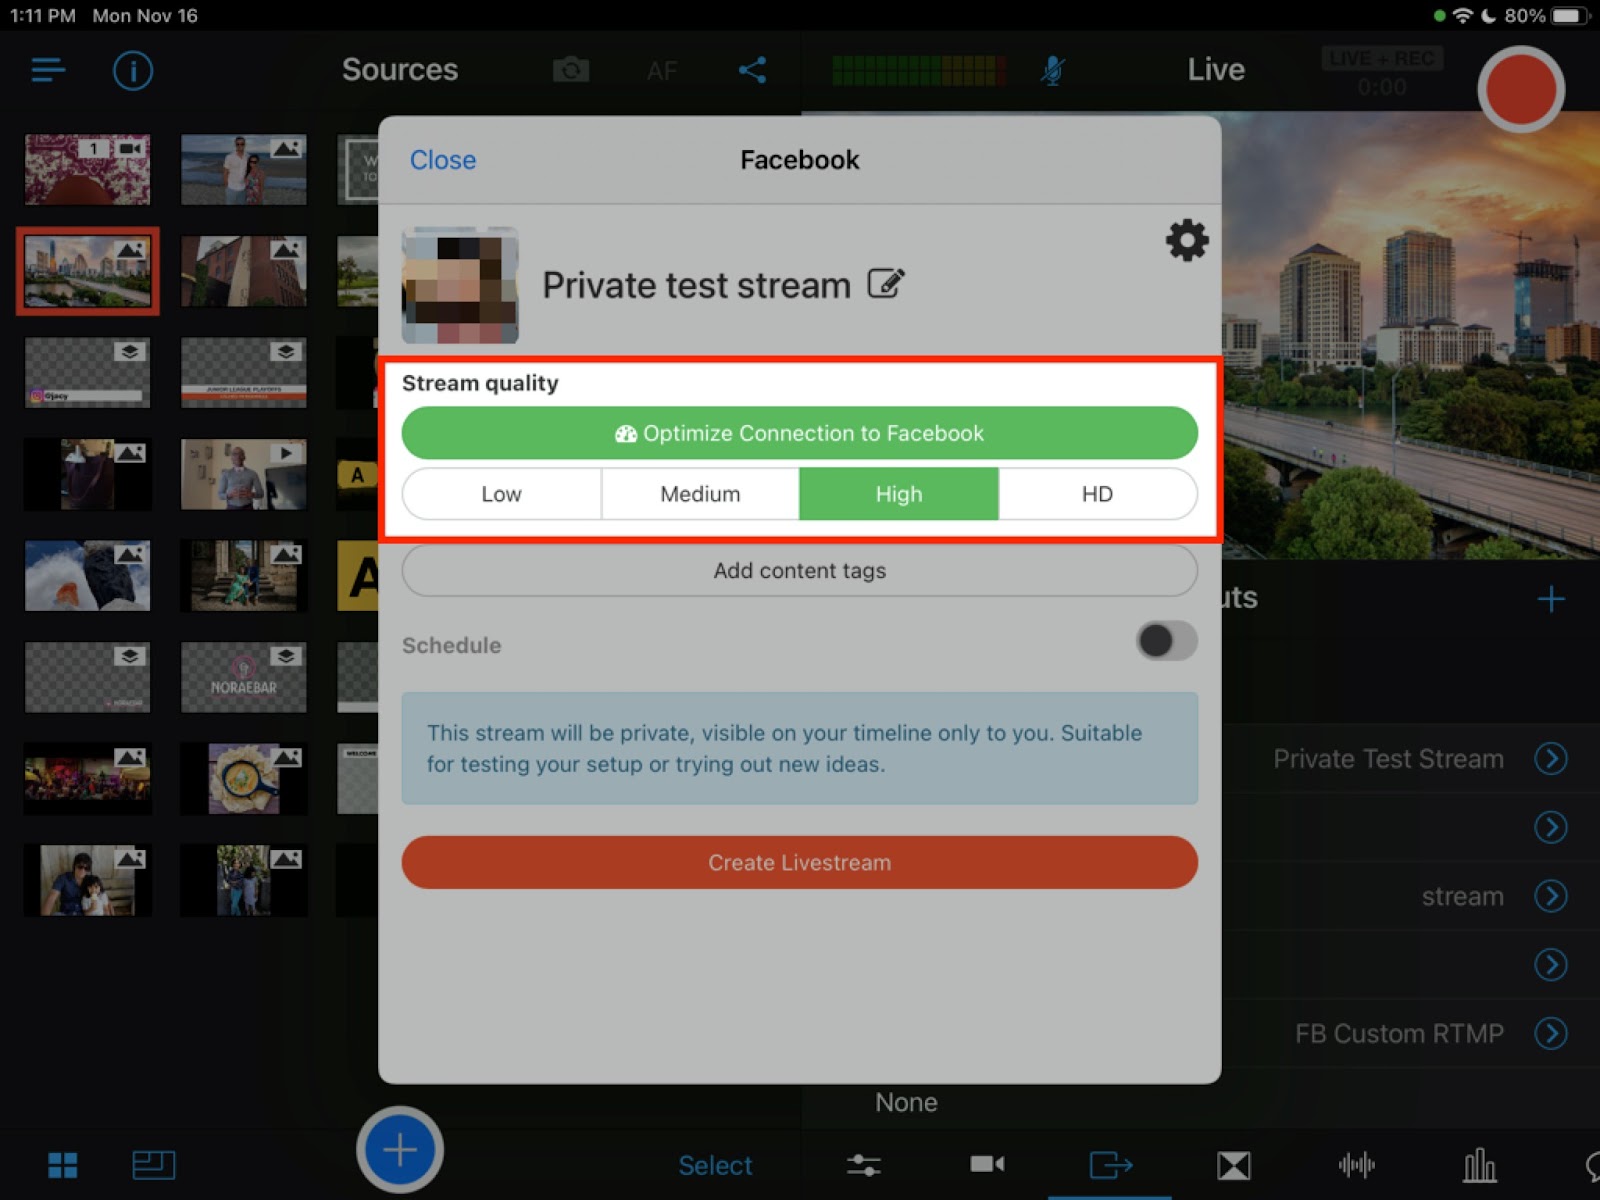
Choose the right resolution and bitrate: In Switcher, you can select your stream quality when setting up a new or scheduled stream. The available options typically include 360p, 480p, 540p, 720p, and 1080p. Each resolution has a recommended bitrate range — for example:
-
480p: 500–1200 kbps
-
720p: 1500–4000 kbps
-
1080p: 3000–6000 kbps
-
-
How to adjust settings in Switcher:
-
When setting up your stream, look for the stream quality or resolution option.
-
Select a lower resolution (such as 480p or 720p) if your upload speed is on the lower side.
-
Switcher will automatically adjust the bitrate based on your selected resolution, but you can also manually adjust the bitrate if needed.
-
For the most stable stream, make sure your upload speed is at least double your selected bitrate (for example, if your bitrate is 2000 kbps, aim for at least 4 Mbps upload speed).
-
-
Experiment and monitor: Try different combinations of resolution and bitrate to see what delivers the best balance of quality and stability for your network. Run test streams and monitor performance using Switcher’s Info Panel, which provides real-time feedback on your connection and stream health.
By dialing in the right settings for your environment, you’ll minimize packet loss and deliver a better viewing experience — even on networks with limited bandwidth.
7. Contact your ISP
If you’ve tried all the above steps and are still experiencing packet loss, it may be time to reach out to your internet service provider. There could be issues with your connection or external network congestion that only your ISP can resolve.
Don’t hesitate to contact their support team — they can run diagnostics, check for outages, and suggest solutions like upgrading your plan or replacing faulty equipment.
Tools and resources
Here are some helpful tools and Switcher resources for troubleshooting packet loss:
Say goodbye to packet loss when live streaming
Packet loss when live streaming doesn’t have to ruin your broadcasts. By understanding what causes packet loss, how to check for it, and how to fix it, you can deliver smoother, more reliable streams every time.
As always, if you have questions or need support, we’re here to help you live stream with confidence. Check out Switcher’s support center or reach out to us anytime.
Subscribe to the blog
Sign up to receive notifications whenever a new blog post is published. You may unsubscribe at any time.

Share
About the Author

River Law is a storyteller who writes for humans, with heart. Whether it’s helping global brands find their voice or giving startups the words to grow, River brings empathy and clarity to every project. An Englishman who calls California home, River finds his rhythm outdoors with his family.
All posts by River Law