

Most Facebook users have seen a Facebook Event before.
Sometimes, it's an invite to a family reunion by a beloved relative. Or it might be a reminder of the local rock band's next performance in your town's arena. Other times, it's as simple as an RSVP for your best friend's birthday party.
As such, Facebook Events are one of the best ways to organize large groups of people together!
With the explosion of Facebook Live, you can now broadcast Live inside of Facebook Events. There are two common reasons to do this:
- You are broadcasting Live prior to when the Event takes place, in order to communicate viable information about the Event (like what to bring for a camping trip, etc.).
- You are broadcasting Live during an Event. This is to show those who cannot attend what is going on in real time (common for weddings and graduations).
To create a new Event for any occassion, go to your Facebook homepage and click on Events. Choose whether you want a public event or a private event. Then, insert the appropriate details for your Event.
The more information you provide, the more informed your guests will be, and the more likely they'll be to attend!
I've Created My Facebook Event. What Now?
When you launch the Switcher Studio app on your iPad, iPhone, or iPod Touch, you will see the Outputs menu. This is exactly where you need to be.
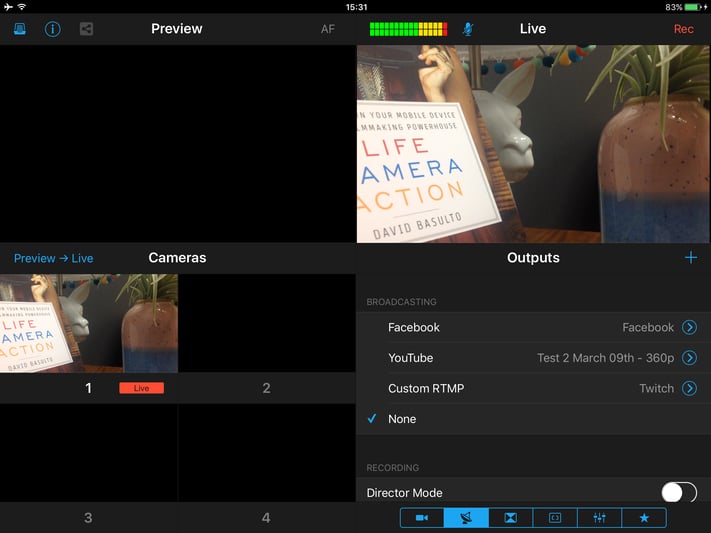
Tap on the blue arrow beside Facebook to get started. You will be taken to the Event Creation screen for Switcher Studio.
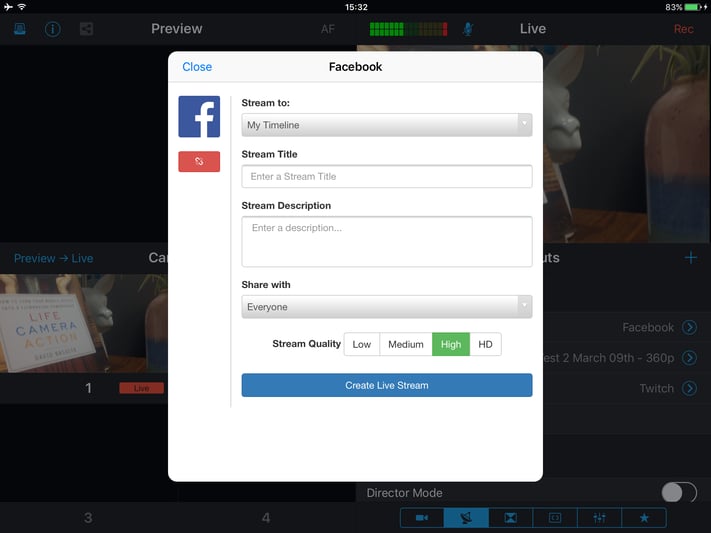
Notice that the default destination is My Timeline. We want to stream to your new Event, so we need to change this.
Tap on My Timeline and select Event. Now, tap on the correct Event.
After this, fill out the rest of the fields.

Make sure to be as detailed as possible. Being detailed informs your potential viewers of why you are live and why they should be tuning in. This way, they can prepare themselves for what they will be learning.
When you finish, tap on Create Live Stream.
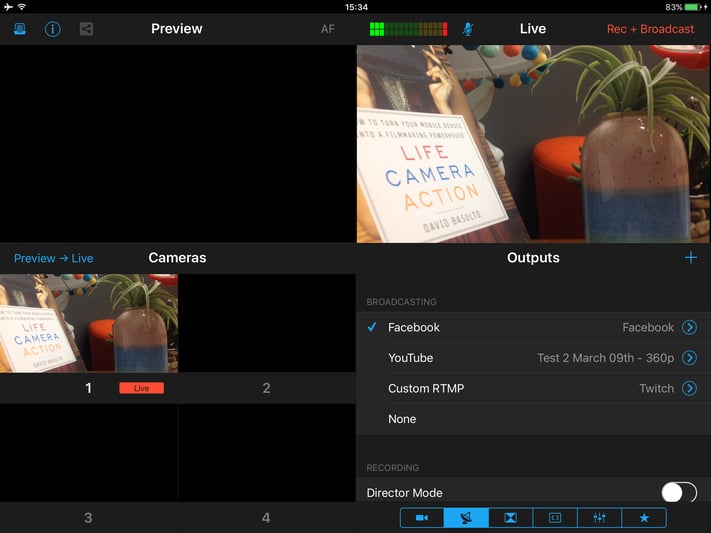
There should now be a blue checkmark beside Facebook. This means that everything was set up and is now ready to go!
When you are ready to go Live, tap on Rec+Broadcast in the top-right corner. This will push your broadcast to your Facebook Event.
Interact With Your Facebook Live Guests!
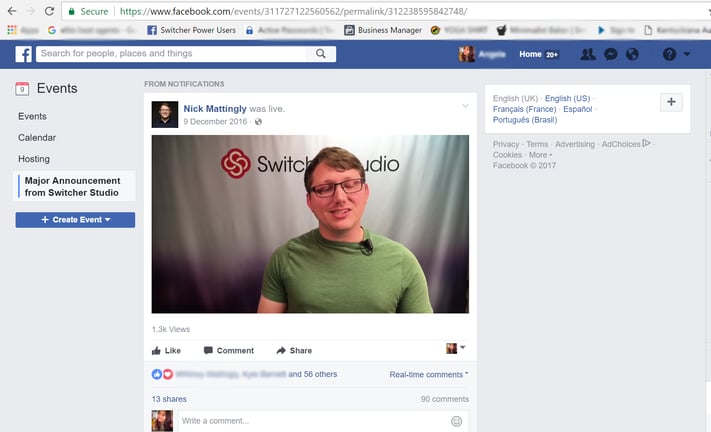
The Event's invited guests will be notified when you go Live. This way, they will be able to tune in and watch your broadcast!
Some guests may leave comments or ask questions while you are Live. Be sure to engage with them, thank them for watching, and answer any questions they have. This keeps people from tuning out, and also makes them more likely to view future streams!
When it is time to end the stream, tap on "Rec+Broadcast" inside of Switcher Studio again. This will end your Live broadcast.
Give Facebook a few minutes to process your now-archived broadcast. This will allow future visitors to your Event Page to view your broadcast and all of the Guest Comments.
This process works for both Public Events and Private Events.
The next time you put together an Event, take some time to engage in a pre-Event broadcast to drive up support! You'll notice a larger number of attendees than if you'd never gone live at all.
For additional help setting up a Facebook Live broadcast with Switcher Studio, be sure to visit our Help Center.
#GetOut. #GoLive. #BeAwesome.