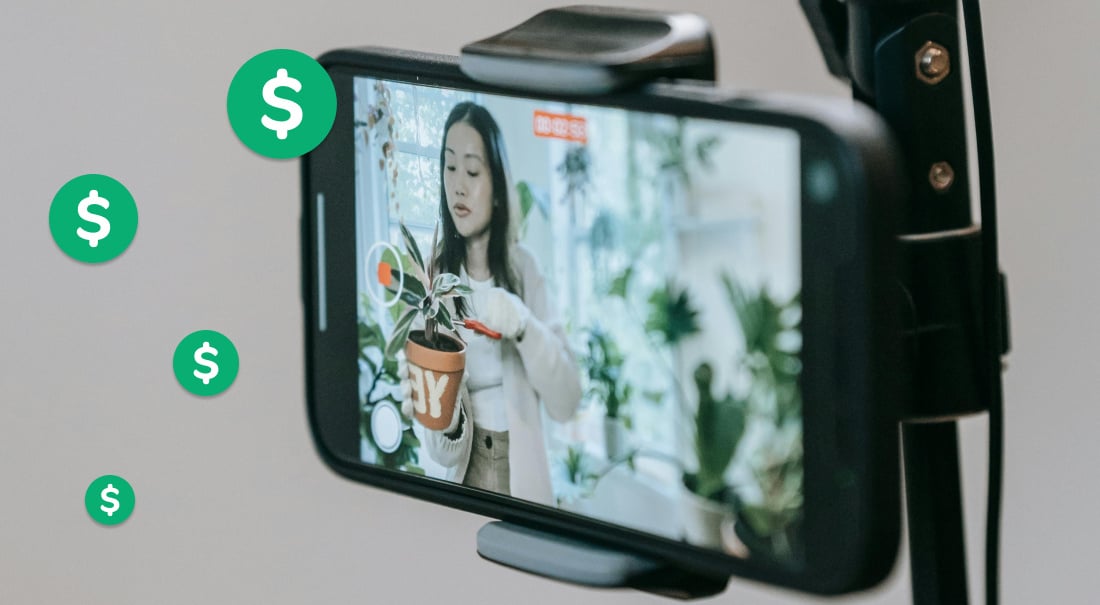
Businesses, entertainers, and content creators alike have had to adapt how they interact with their audiences during the pandemic. With social distancing in place and many public venues either closed or limited to reduced maximum capacities, this has been an especially challenging time to host paid live events. Livestreamed events provide a great alternative, but only if they can remain profitable. Luckily, Facebook has created a way to set up online ticketed events — allowing for paid virtual events and providing a way for livestreamers to monetize their live videos.
In this blog post, we’ll walk you through the following steps:
Creating a ticketed event on Facebook
The first step in hosting paid online events and monetizing your livestreams is to create a Facebook Live ticketed event through your Facebook page. It’s important to note that you must have a Facebook page, or help manage one, to be able to create a ticketed event. Though you can create a livestreaming video event for your personal profile, there’s currently no way to charge an admission price directly through Facebook.
To help you navigate through the process of creating a live ticketed event on Facebook, we’ve outlined the steps below.
- While logged in to your Facebook page, navigate to the left side of the page and click Events.
- Click Create Event.
- Choose Online.
- Choose Paid.
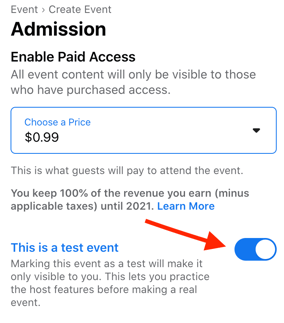
- Fill out your Event Details (Event Name, Start and End Dates and Times, Location, Description, and Category).
- Click Next.
- Choose Facebook Live and click Next.
- Select your desired ticket price and click Next. (Please note that if you would like to practice creating an event before going live, you can toggle on This is a test event.)
- If desired, select a cover photo.
- Click Create Event.
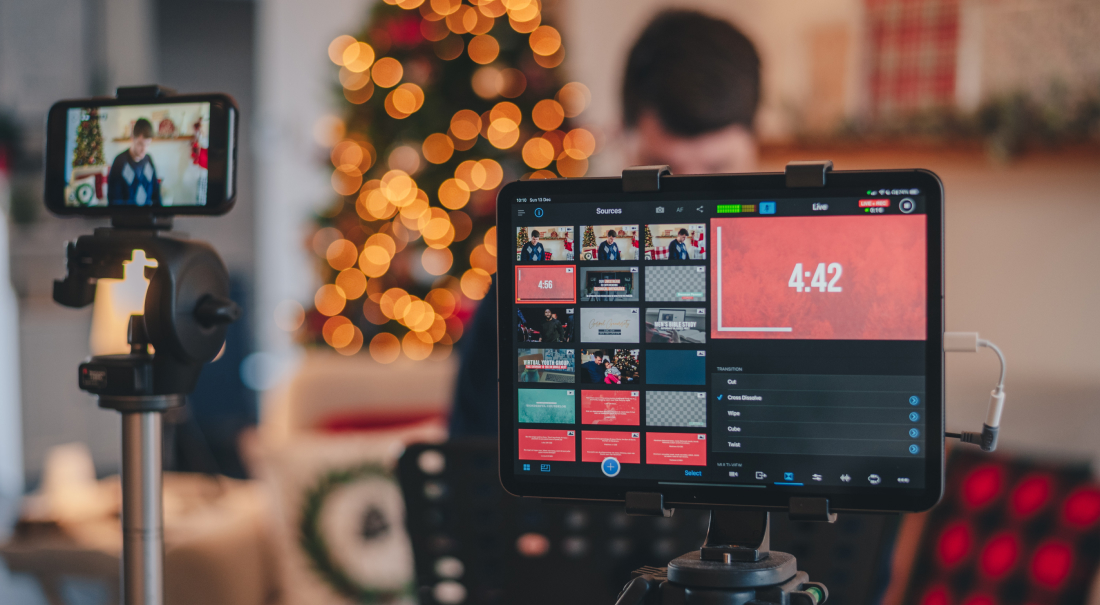
Livestreaming your ticketed Facebook event with Switcher
Now that you’ve created your ticketed event on Facebook, you’ll need a way to livestream it! Switcher lets you create professional-quality livestreams with just iPhones and iPads. To stream to Facebook from Switcher, you’ll need to set up a Custom RTMP channel. There are two different ways to set up a Custom RTMP channel, but we recommend setting up a Custom RTMP channel through the Switcher Studio Dashboard.
Using the Switcher Studio Dashboard to set up a Custom RTMP channel
Using the Switcher Studio Dashboard to set up a Custom RTMP channel is generally easier because you can use a desktop computer to retrieve and copy and paste the RTMP parameters. You can, however, also set up a Custom RTMP channel using an iPhone through the Switcher Studio app.
To set up a Custom RTMP channel using the Switcher Dashboard:
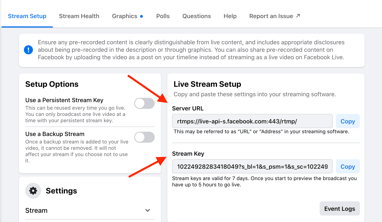
- Go to Facebook and locate your stream key and server URL.
- You can find your stream key and server URL by visiting your Facebook page and finding the ticketed event you just created.
- Click the blue Set Up Live Video button.
- Under the Stream Setup tab, scroll until you see the Get Started section.
- Click Use Stream Key. You should see the server URL and stream key under Live Stream Setup.
- For now, keep this window open!
- In a new window, log in to the Switcher Studio Dashboard using your account information.
- Navigate to the menu on the left side of your screen, and click Custom RTMP.
- Click the orange Add Channel button.
- Enter a nickname for the custom channel.
 Refer back to your Facebook window and copy the server URL and stream key and paste them into the server URL and stream key fields in your Switcher Dashboard window.
- Click the orange Speed Test button. Switcher will automatically select the best quality setting for your stream. (Your broadcast options will automatically update to best suit your Wi-Fi speed.)
- Click the green Save Channel button.
Using Switcher to livestream your ticketed Facebook event
Now that your Custom RTMP channel is set up, you’re almost ready to go live to your ticketed event! The final step is to livestream your Facebook event through Switcher.
To livestream your ticketed Facebook event through Switcher:
- Open the Switcher Studio app on your main switching device (iPhone or iPad).
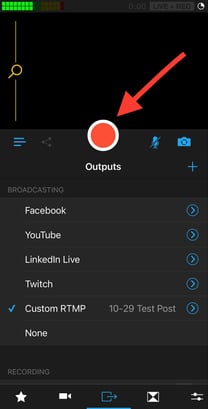 Tap the Outputs tab, and then tap the blue arrow next to Custom RTMP.
- Tap the RTMP channel you created specifically for your ticketed Facebook event. You should see a blue check mark next to the channel name once selected. Tap Done.
- You’ll be directed back to the Outputs tab, where you should see a blue check mark next to your RTMP channel name.
- Tap the red record button, and you should be livestreaming on Facebook. (To ensure that you’re live on Facebook, you can always check your Facebook page to confirm that the livestream is working correctly.)
Get more value from your live videos
So there’s actually one last step … pat yourself on the back for a job well done! As you host more ticketed Facebook events, this process will only get smoother.
Now that you know how to create a ticketed event on Facebook and livestream it with Switcher, you’re all set to begin hosting paid virtual events and monetizing your live videos! If you’re not a Switcher user yet, start your free trial and start getting more value from your live videos.
Subscribe to the blog
Sign up to receive notifications whenever a new blog post is published. You may unsubscribe at any time.

Share
About the Author
As Switcher's associate product manager, Jared aims to educate and entertain readers on all things live video. He's spent his career in digital content strategy, helping brands to better connect with their audiences.
All posts by Jared Applegate