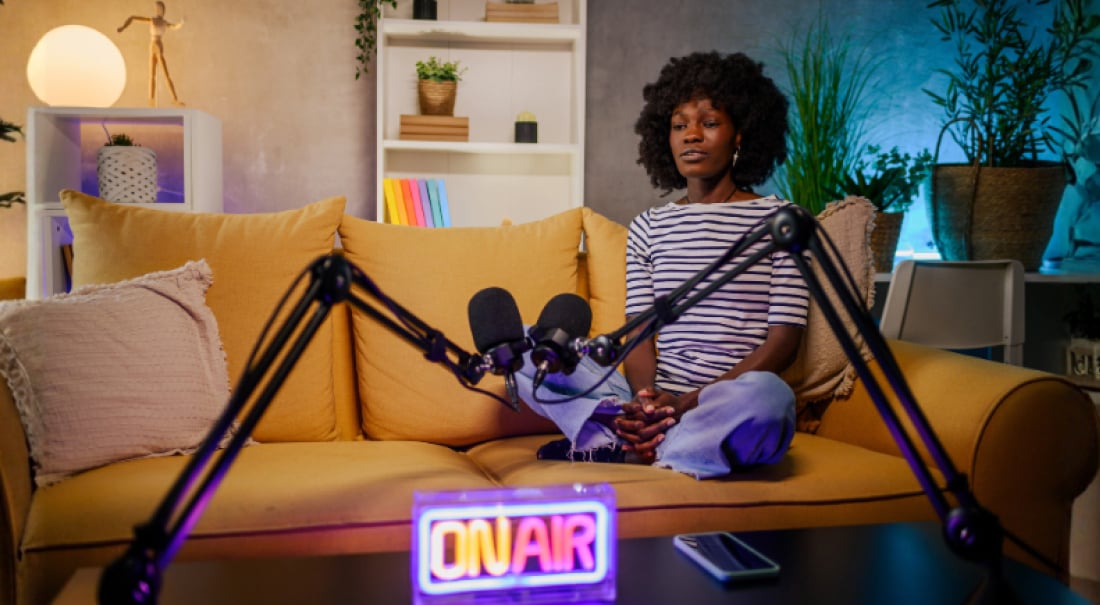

Nothing kills a live stream’s energy like lag. When your video’s delayed, real-time interactions fall flat.
Low-latency video streaming fixes that by shortening the delay between your camera and your viewers. It lets you engage instantly. No awkward pauses, no dead air.
In this guide, you’ll learn how to spot what’s slowing down your live video and the exact steps to improve your setup and stream in real time.
What is low-latency video streaming?
Latency is the delay between what your camera captures and what your audience sees. Low-latency video streaming means that delay is minimal, making your live video feel truly live.
Why does latency matter for live video?
Latency can make or break your live streaming viewing experience. When delay creeps in, your viewers can start to feel disconnected, conversations with remote guests get awkward, and the whole experience can become uncomfortable for everyone involved.
You can transform your broadcasts from one-way shows into interactive experiences with low-latency video streaming. This way, you can respond to comments in real time, keep conversations with remote guests flowing, and ensure that your audience feels connected and engaged with you.
What causes high latency in streaming?
A few things can slow your stream down:
-
Video processing time: Live video has to be encoded, buffered, and processed before it’s delivered. Each step adds a little delay.
-
Internet speed and stability: A slow connection or an unstable network can cause lag.
-
Hardware limits: Even with a great camera, a slow processor can hold you back.
-
Streaming protocol: The method you use to send video data (your streaming protocol) affects how quickly it travels.
One of the biggest culprits isn’t your internet or streaming app; it’s the protocol your stream runs on.
How streaming protocols affect latency
A streaming protocol is the behind-the-scenes tech that decides how your video travels from camera to screen. It’s a set of rules that determines how audio and video data is delivered over the internet in real time.
If you’re just new to streaming, you probably won’t choose your protocol manually, but when you understand what’s happening behind the scenes, you can troubleshoot high-latency issues more easily.
Here’s a quick look at the most popular streaming protocols and how they stack up:
-
RTMP: Great for stability, okay for speed. RTMP adds several seconds of delay, which makes it fine for some content, but not ideal for live interaction.
-
HLS: Used by Facebook and YouTube. Reliable, but higher latency because it sends video in chunks.
-
LL-HLS & LL-DASH: Modern upgrades designed for low latency. Great balance of reach and responsiveness.
-
WebRTC: Fastest protocol available — real-time or near it. Ideal for one-on-one interaction, but it struggles to handle a large number of viewers or participants without performance issues.
-
SRT: A solid option for pro-quality streams. Lower latency than HLS, more flexible than WebRTC.
It’s worth noting that if you’re using Switcher, the app optimizes for the best balance of low latency and stream quality, so you don’t have to wrestle with settings yourself.
9 Ways to reduce latency and live stream in real time
Latency doesn’t have to slow down your live streams. With the right setup and a few key habits, you can strengthen your live stream connection, optimize your setup, and keep your live video feeling real-time.
These tips walk you through simple ways to strengthen your connection, optimize your setup, and get the most out of Switcher’s mobile-first, professional-grade platform.
-
Combine multiple internet connections
-
Use a wired Ethernet connection
-
Set up a mesh Wi-Fi network
-
Adjust your encoder and platform settings
-
Choose streaming servers close to you
-
Close background apps and limit competing traffic
-
Update old hardware
-
Prioritize streaming in your Wi-Fi settings
-
Test your setup before you go live
1. Combine multiple internet connections
Want a rock-solid connection? Try bonded internet. Bonding takes two or more internet sources — like Wi-Fi, cellular, and ethernet — and merges them into one stronger, more reliable connection.
A bonded device (like a LiveU Solo, Teradek, Vidiu Go, or a router running Speedify) is a piece of hardware or software that handles the “bonding” for you. It connects to multiple networks at once, then blends their speeds and stability into a single output that your iPhone or iPad can use for streaming.

Think of it like a power strip for the internet: instead of just one plug, you’ve got several feeding into the same line, so your stream stays powered even if one source drops.
Bonding helps prevent lag spikes, buffering, and interruptions — even if one connection completely fails mid-stream.
How to set it up with Switcher:
-
Get your bonded device: Buy or rent one from a provider like LiveU, Teradek, or use a Speedify-compatible router.
-
Connect your internet sources: Plug in your ethernet cable, connect to Wi-Fi, and insert SIM cards for cellular internet.
-
Bond the connections: Use the device’s built-in interface or app to link the connections into one.
-
Connect to your iPhone or iPad: Use Wi-Fi or an Ethernet adapter to hook your Switcher device to the bonded device’s network.
-
Stream with Switcher: Open Switcher and start your broadcast — you’re now streaming with the combined speed and stability of all your connections.
2. Use a wired Ethernet connection
If you can plug in, do it. A wired Ethernet connection is faster and more stable than Wi-Fi. It reduces interference and gives you the cleanest, most reliable streaming quality.

To use Ethernet with Switcher:
-
Get a Lightning-to-Ethernet or USB-C-to-Ethernet adapter, depending on your device.
-
Plug the adapter into your iOS device and connect it to your router or modem with an Ethernet cable.
-
On your iPhone or iPad, confirm the Ethernet connection is recognized in Settings.
-
Open Switcher and go live with a stable, direct line.
This is especially useful in fixed setups like studios or venues where Wi-Fi can get congested.
3. Set up a mesh Wi-Fi network
If you’re streaming across a large space — like an auditorium, sports field, or multi-room venue — a regular Wi-Fi router might leave you with weak spots or dead zones. A mesh Wi-Fi network solves that by using multiple devices (called ‘nodes’) to blanket the entire area in a single, seamless Wi-Fi signal.
Instead of one router trying to push a signal to every corner, a mesh system uses several small access points. The main node plugs into your modem, and the extra nodes talk to each other wirelessly (or via Ethernet) to keep your signal strong everywhere you go. Your devices automatically connect to the closest node without you having to switch networks.
Mesh Wi-Fi gear examples: Eero, Google Nest Wi-Fi, TP-Link Deco. The hardware usually looks like small pucks, towers, or cubes.

How to set up a mesh network for live streaming:
-
Pick your system: Choose a mesh setup with enough nodes to cover your streaming area.
-
Connect the main node: Plug it into your modem with an Ethernet cable.
-
Place your extra nodes: Put them near streaming locations or where the signal normally drops.
-
Sync the nodes: Use the mesh system’s app to connect and test signal strength.
-
Connect your Switcher device: Before you go live, link your iPhone or iPad to the nearest node for the strongest connection.
With mesh Wi-Fi, Switcher stays connected and stable — even if you move from one end of the venue to the other.
4. Adjust your encoder and platform settings
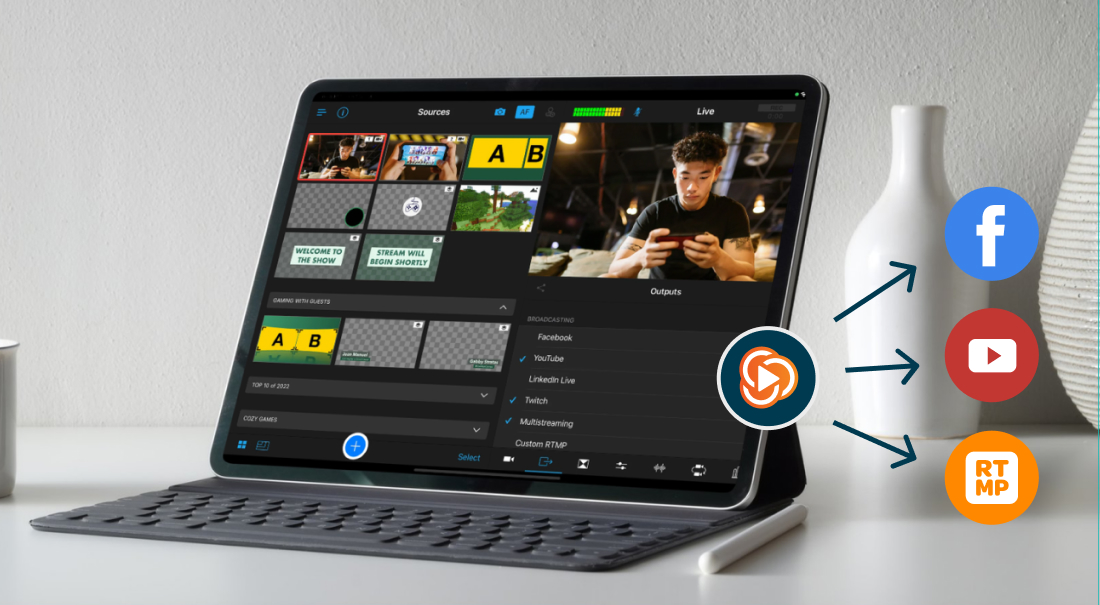
An encoder is the tool that takes your raw video and audio, compresses it into a streamable format, and sends it to your chosen platform (like Facebook Live or YouTube). Without encoding, your viewers would need massive bandwidth to watch your stream.
In some streaming setups, the encoder is a separate piece of hardware or standalone software. In Switcher, it’s built right into the app — no extra box or cables needed. That means Switcher handles the heavy lifting for you, but you can still adjust certain settings to fine-tune your latency.
In Switcher:
-
Tap the Outputs tab and select your streaming platform.
-
For Facebook Live and YouTube, choose Low Latency mode if it’s available when setting up your stream.
-
If you’re using Custom RTMP, stick with the default low-latency settings unless you’re troubleshooting — Switcher already prioritizes speed and stability.
5. Choose streaming servers close to you
A server is a powerful computer that receives your live video, processes it, and sends it out to viewers — like a relay station for your stream.
For lower latency, the key is choosing a server physically close to you. Shorter distance means your video reaches it faster, reducing the delay for your audience.
With Switcher:
-
Built-in platforms: If you stream directly to YouTube, Facebook, or Twitch, Switcher automatically uses the closest server — no setup needed.
-
Custom RTMP platforms: Use a Custom RTMP setup when you want to stream to a platform that doesn’t have a direct integration with Switcher, like TikTok or Instagram. If that platform offers multiple server locations, choose the one closest to you, then paste its RTMP URL into Switcher Studio > Outputs > Custom RTMP.
This small step can noticeably cut delay, especially during high-traffic events where every second counts.
6. Close background apps and limit competing traffic
Your streaming device should focus only on streaming. Background apps or other people using devices on the same network can silently eat up bandwidth and slow you down.
Before going live:
- Close all apps on your iPhone or iPad except Switcher Studio.
- Enable ‘Do Not Disturb' to prevent interruptions from calls or notifications.
- Make sure no other devices are uploading files, streaming video, or running backups on the same network.
- If you're on a mesh system, double-check that your device is connected to the nearest node.

These quick steps help your stream stay smooth and responsive, especially on shared or public Wi-Fi networks.
7. Update old hardware
Old devices = slow encoding, weaker Wi-Fi, and more lag. Using up-to-date gear helps keep your latency low and your stream stable.
Tips for using hardware with Switcher:
-
Use the most current iPhone or iPad you have access to — newer models handle video better.
-
Update your devices to the latest version of iOS.
-
Update the Switcher app to the latest version through the App Store.
-
Restart your device before going live to clear memory and background processes.
Switcher is optimized for a wide range of Apple devices, but newer hardware will always give you better performance.
8. Prioritize streaming in your Wi-Fi settings
Some routers and mesh systems let you assign priority to specific devices. This way, you can tell your network to give your main streaming device the bandwidth it needs — even when other devices are connected.
Here’s how to do it:
-
Open your router or mesh network’s app (e.g., Eero, Google Home).
-
Locate the Device Priority or Quality of Service (QoS) settings.
-
Select your main streaming device and set it to ‘high priority.’
-
Save your changes before you go live.
9. Test your setup before you go live
A quick test run is the best way to catch issues early. In Switcher:
-
Open your project.
-
Tap ‘Preview Mode’ to simulate your stream without going live.
-
Tap the gear icon and check your Stream Health metrics.
-
Look for dropped frames or slow upload speed.
If you see issues, move closer to your router or mesh node, close background apps, or restart your device. Even a one-minute test can make the difference between a flawless stream and a frustrating one.
Frequently asked questions about low-latency live streaming
What is considered low latency in video streaming?
Low latency typically means a delay of 1 to 5 seconds between your live feed and what viewers see. Ultra low latency takes it further — often under one second — giving you near-instant interaction with your audience. Switcher’s streaming setup aims to keep latency as low as possible so your live experience stays smooth and responsive.
Do social media platforms support ultra-low latency video streaming?
Platforms like Facebook Live, YouTube, and Twitch offer low-latency modes, but ultra-low latency can be limited due to their scale and protocols. For most creators, these modes provide a latency low enough for real-time interaction. Switcher works seamlessly with these platforms to help you get the best possible live experience.
How do I combine multiple internet connections?
Combining cellular, Wi-Fi, and wired connections using bonding tools like Speedify, LiveU, or Teradek creates a more stable internet connection. This reduces dropouts and buffering that cause high latency. Switcher supports streaming from setups using bonded internet.
What’s the best protocol for low-latency video streaming?
It depends on your needs. LL-HLS and SRT balance low latency and video quality well, while WebRTC delivers ultra-low latency but can be harder to scale. Switcher optimizes protocols for you.
How can I monitor latency during my live streams?
Keeping an eye on latency helps you troubleshoot in real time. Switcher's built-in analytics provide live feedback on your stream’s health — including latency metrics — so you can make quick adjustments and keep your broadcast running smoothly.

Will using Wi-Fi increase latency?
Wi-Fi can introduce more latency compared to wired connections due to signal interference and instability. Using a mesh Wi-Fi setup or switching to a wired Ethernet connection when possible helps reduce latency. Switcher is designed to perform well in both Wi-Fi and wired environments.
Can older hardware affect latency?
Yes. Older smartphones, tablets, or computers may struggle with encoding and processing video quickly, increasing latency. Using up-to-date devices and closing background apps can help. Switcher’s studio-quality app is optimized to run efficiently on a wide range of devices.
Is ultra-low latency always necessary?
Not always. It depends on your use case. For church events, sports commentary, or interactive Q&As, ultra-low latency is critical. For other streams like concerts or lectures, a few seconds’ delay is usually fine. Switcher lets you adjust your settings based on what your audience needs.
Does Switcher support low-latency video streaming?
Switcher is built from the ground up to help you stream with minimal delay and maximum ease. Our mobile-first, professional-grade app cuts technical complexity and speeds up your workflow, so you can focus on what matters: your content and audience.
Ready for real-time live streaming?
Low-latency streaming isn’t just about technology; it’s about creating genuine connections with your audience. When your live video feels truly live, you get better interaction, faster delivery, and professional-quality broadcasts.
Switcher makes it easy to achieve real-time streaming without the hassle. Whether you’re managing multiple cameras or streaming on the go, our platform is built to keep your latency low and your production smooth.
If you’re ready to take your live streams to the next level, start your free trial today.
Subscribe to the blog
Sign up to receive notifications whenever a new blog post is published. You may unsubscribe at any time.

Share
About the Author

River Law is a storyteller who writes for humans, with heart. Whether it’s helping global brands find their voice or giving startups the words to grow, River brings empathy and clarity to every project. An Englishman who calls California home, River finds his rhythm outdoors with his family.
All posts by River Law