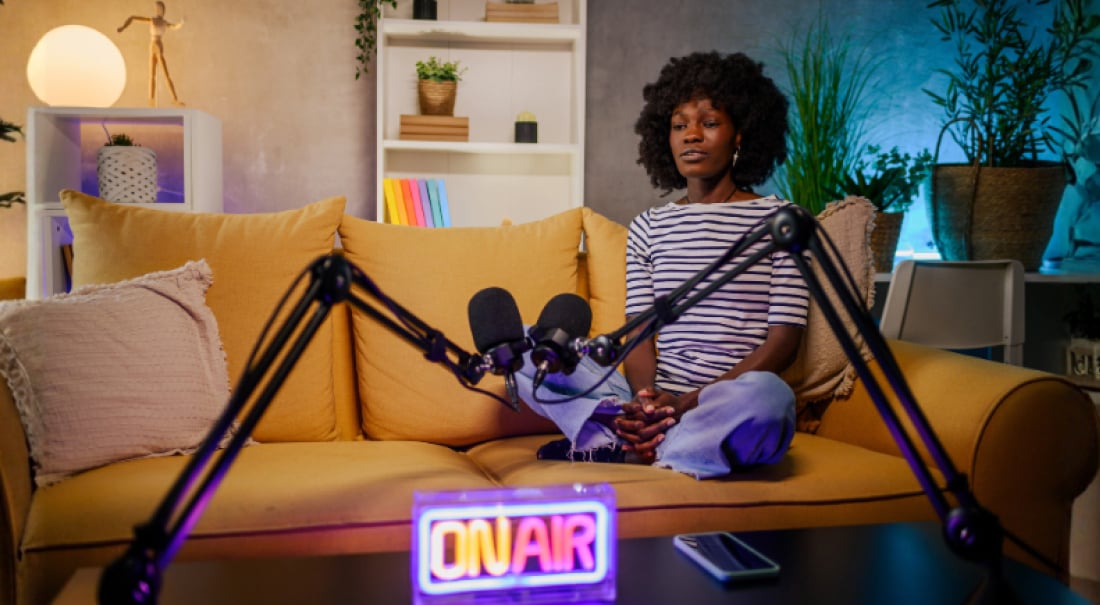
Arguably the most reliable way to use Switcher Studio when streaming live video is to hardwire all of your devices to the same local network via ethernet. This is easily achievable using newer iOS devices using a few adapters. In 2017, Switcher had the opportunity to stream day two of Summit.Live’s event in Los Angeles using this method. The event was held at the Millennium Biltmore Hotel in downtown Los Angeles, and used three cameras — and of course, Switcher Studio — to capture the speakers' presentations.
Our Complete Set-Up for Streaming Summit.Live
Here's how we made it happen.
The setup:
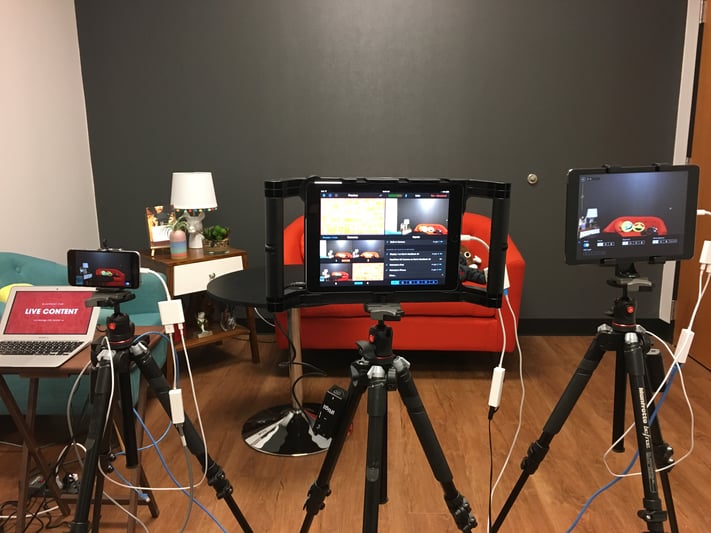
We decided on a three-camera setup to capture the action, and a MacBook Air running PowerPoint to bring in the presentations for the production. Since the cameras were hardwired over ethernet, we didn't have to worry about wireless interference or dropped frames for our local recording. We used our main mixing Switcher iPad as our wide shot, then had two other devices recording closer to the stage.

Here's the complete list of the gear we used:
- iPad Pro 9.7 (Main Switcher and Cam 1)
- iPhone 6 (Cam 2)
- iPhone 6s+ (Cam 3)
- MacBook Air (Switcher Cast)
- 3 Manfrotto Tripods
- Ubiquiti Edge Router X
- 4 Apple USB to Ethernet Adapters
- 4 Apple USB to Lightning Adapters
- 3 Anker USB external batteries
- iRig Pre
- Charge cables
- Ethernet cables
- iPad mounts for tripods
- Gaffer tape
Recreate This Setup for Your Live
Here are the steps to create a similar setup using wired ethernet to sync devices:
- Connect your router to a hot ethernet port for your outgoing internet connection. Most venues will be able to set this up, just make sure to check in with them at least a week before your event. If you are working at a large venue they may provide a static IP address. You will need to configure your router accordingly. Note: setting up a dedicated data drop at a venue or new location may require a fee for setup and data access.
- Next, connect the ethernet to your iPad. For this, you will need a Lightning-to-USB adapter, USB-to-ethernet adapter, charge cable, and a power source (we used Anker external chargers).
- Plug the ethernet-to-USB adapter into the USB slot on the Lighting adapter.
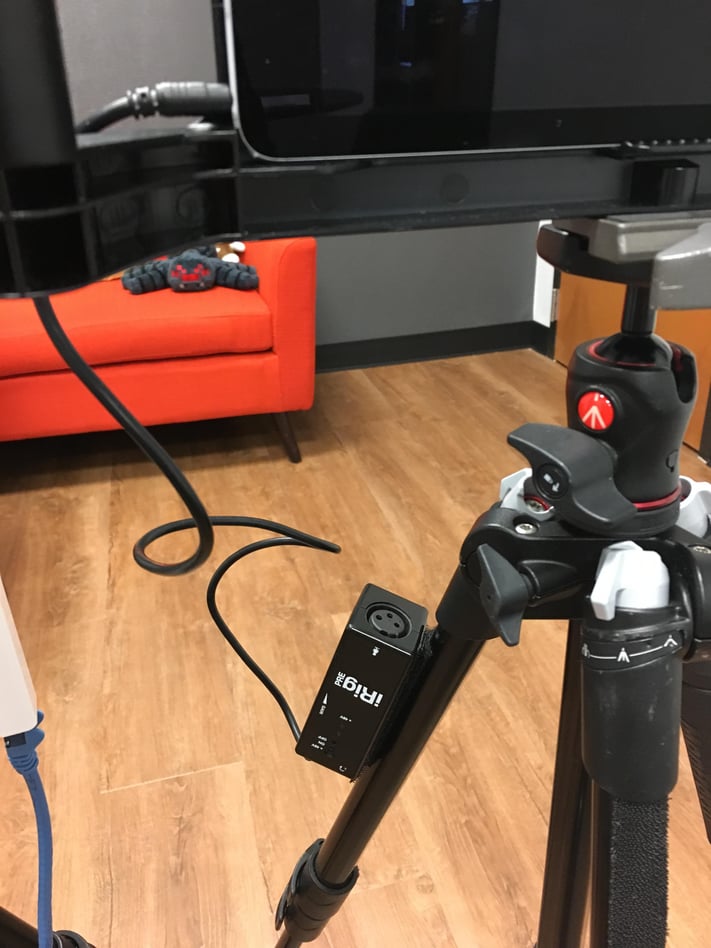
- Now take the charge cable and connect it to the battery and the USB-to-Lightning adapter. When you're done, it should look something like this.
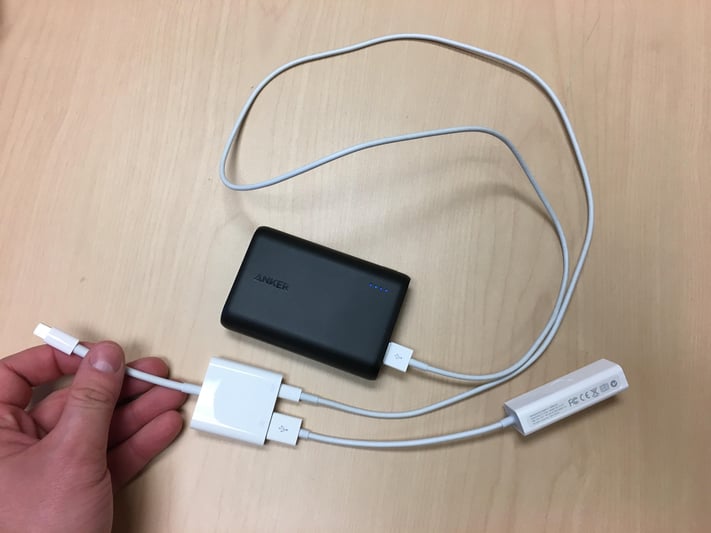
Note: use the official Apple adapters, otherwise your device may not register the connection.
- Now you're ready to plug the adapters into your iOS device. First, connect the USB-to-Lightning adapter to the open Lightning connection on the iPhone or iPad. Next, take an ethernet cable and connect one end to your router and the other to the ethernet dongle attached to your iPhone or iPad.
Note: this connection requires power and WILL NOT WORK if you don't have the device plugged into a power source.
Pro Tip: Add a small piece of Velcro to your tripod and an external USB battery so the connections are close together and secure.
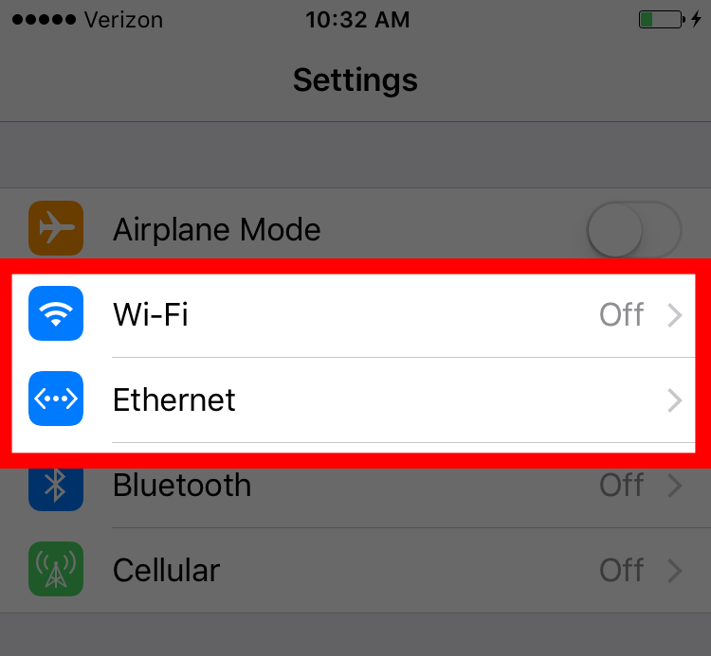
- Repeat these steps to connect your other devices to your router via ethernet. Now open the general settings tab on each of your iOS devices and make sure WiFi is disabled. An ethernet option should appear below WiFi and you can tap to select the ethernet connection instead.
- For our audio, we were able to get an XLR line out from the audiovisual company running audio for the event. Then, we routed the XLR audio through an iRig connected to our primary device. This way we were able to get a clean mix from the in-house sound system and weren’t relying on room sound. We attached the iRig Pre to our tripods with Velcro, just like we do with the batteries.
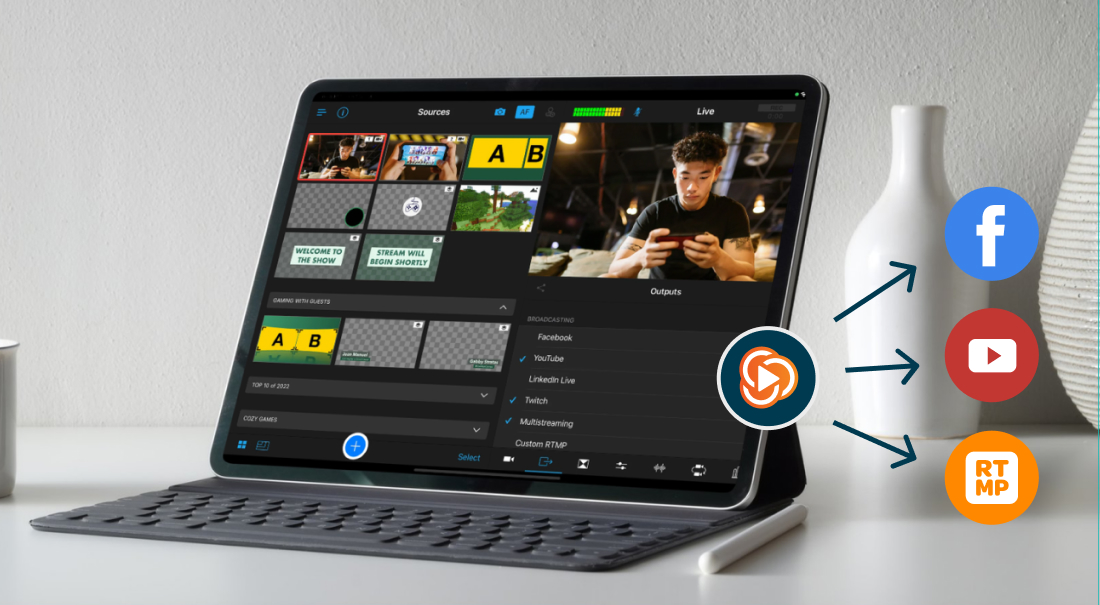
- Now that you have your hardware set up, it's just a matter of launching Switcher Studio on all of your devices, connecting them in the “Inputs” tab, and going live!
Check out the presentations we shot with Switcher Studio at Summit.Live.
Subscribe to the blog
Sign up to receive notifications whenever a new blog post is published. You may unsubscribe at any time.

Share
About the Author
Dan is Switcher's customer success manager and a co-founder of the company. He is a live video expert, helping companies like Golf Channel and Korbel create amazing livestreams with Switcher. Prior to co-founding Switcher, Dan spent 4 years working at an agency that helped businesses create and stream live video.
All posts by Dan Petrik