The problem with video content creation
Video content is about speed. The faster you work, the more content you can create — and the more content you can get in front of your audience.
Unfortunately, and conversely, actually creating video content is slow. It can be a long process with several stages and iterations. Coming up with a concept, writing a script, and planning the shoot? That's just the start. Then you have to film the video … and then you have to put the whole thing together. Depending on what type of video content you’re trying to make, that’s at least a few hours of computer editing, creating animations, working on graphics, and so on.
TL;DR: creating video content the traditional way takes a long time and a lot of effort.
But there’s a cheat code here — a faster, leaner, and way more efficient way of creating video content. Using this method, all you need is an iPhone or iPad to turn video around at a lightning-fast pace, creating a steady stream of content that retains (and grows) your audience. The best part? It takes even less effort than traditional video creation.
Welcome to the speedy world of live editing.
Video creation is changing
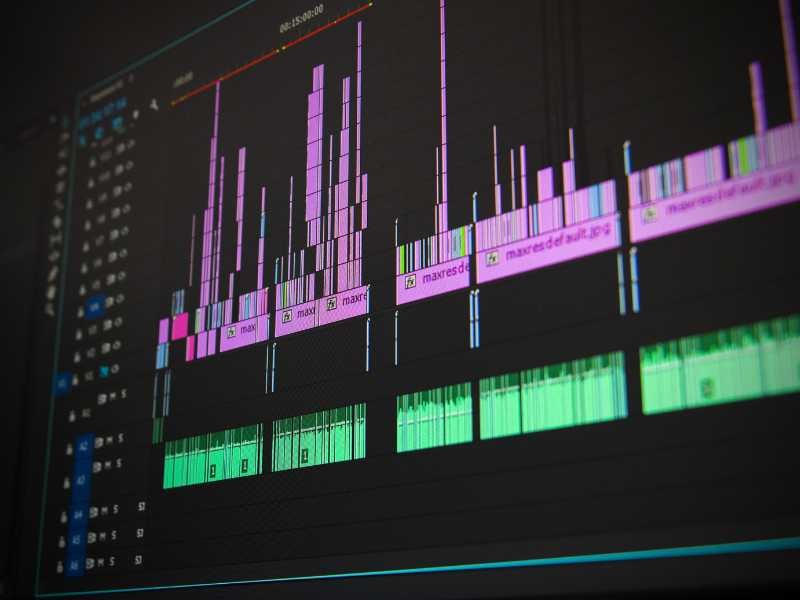
When it comes to making great videos, editing is the backbone of the entire process: It’s where you put together all of the pieces that make up your video. Traditionally, video is edited in an NLE, or nonlinear, editor, such as Adobe Premiere, Final Cut, or Avid. There are countless other NLE video editing programs like these.
Today, the world of video is completely different. The surging popularity of TikTok continues to drive the popularity of short-form video, and we can see the effects on nearly every social media platform out there. Meta-owned Instagram and Facebook have been adjusting their algorithms regularly (sometimes it feels like constantly) to prioritize short-form videos to compete. Even YouTube, arguably the leading platform for video content, is getting in on the game with its YouTube Shorts functionality.
With the average length of video content decreasing, and the amount of video content increasing, what does this mean for you as a video content creator?
To cultivate and grow your audience, you need to release quality video content frequently and consistently.
How to edit videos faster? Live editing.
OK, so you know you need to create more content regularly. But how? A fast-paced content world requires a workflow that can keep up, and that’s where live editing comes in.
Live editing simplifies video content creation by eliminating the post-production video editing process.
With live editing, you can add multiple camera angles, graphics, transitions, sound effects — and any other component of your video — in real time. That means when you hit “stop” on your recording, you have a complete video ready to post.
Live editing goes hand-in-hand with livestreaming and broadcasting, and that’s where you typically see it done. Those control room scenes in news movies like Anchorman and NightCrawler? That’s live editing! Those people huddled around screens and buttons are piecing together video elements in real time.
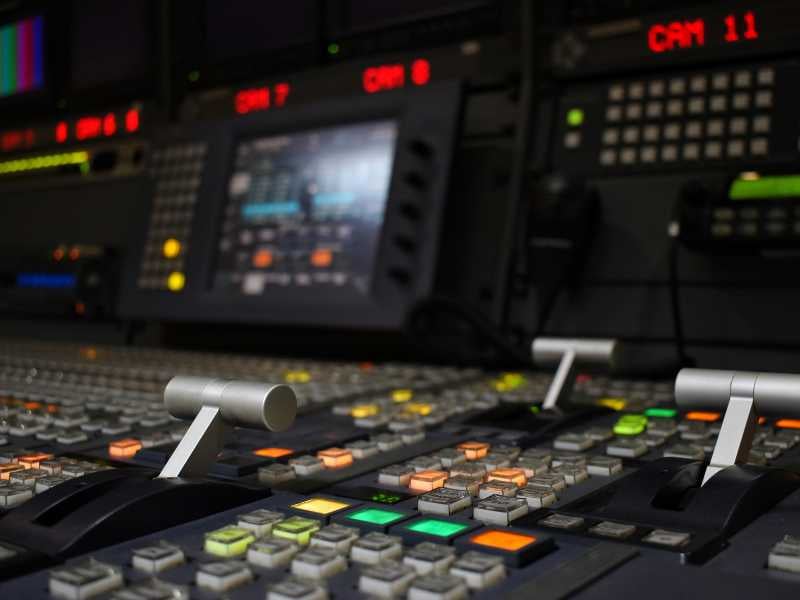
Those live video principles are widely applicable — in the end, the goal is to make a polished video, whether for a live audience or for viewers to watch later. Luckily, you no longer need a control room filled with editing software, 20 screens, and five people to edit live. Thanks to the Switcher Studio live editing iOS app, anyone can edit live and create great videos.
Live editing in action
The best way to explain how live editing works is by showing it in action. So let’s go through two quick examples of how you can use live editing to create a video with the Switcher Studio iOS app. First, we’ll make a simple announcement video for an upcoming event.
Creating a simple announcement video with live editing
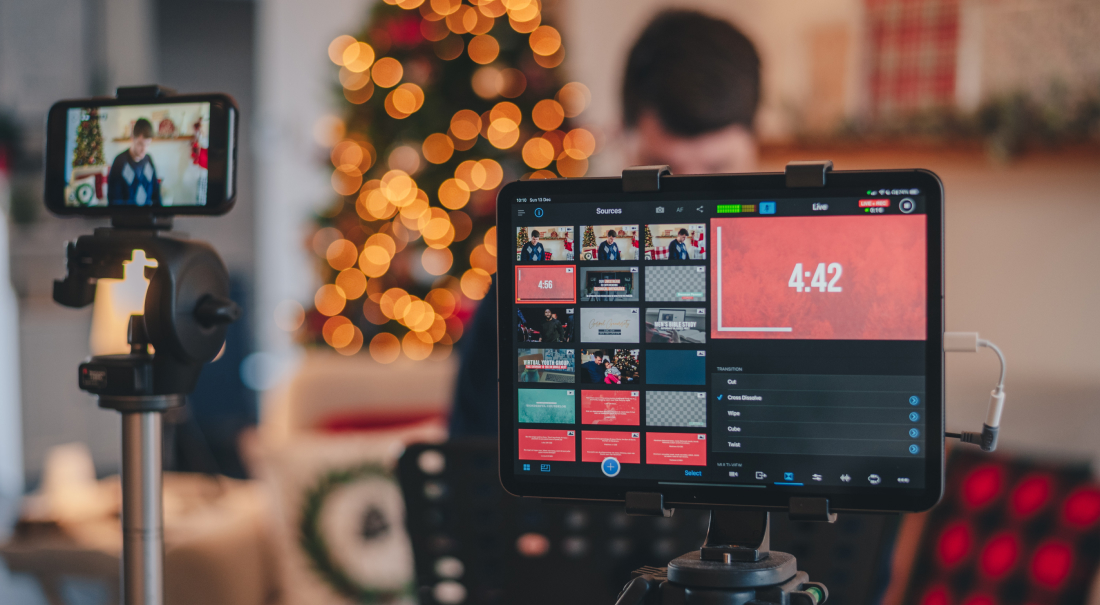
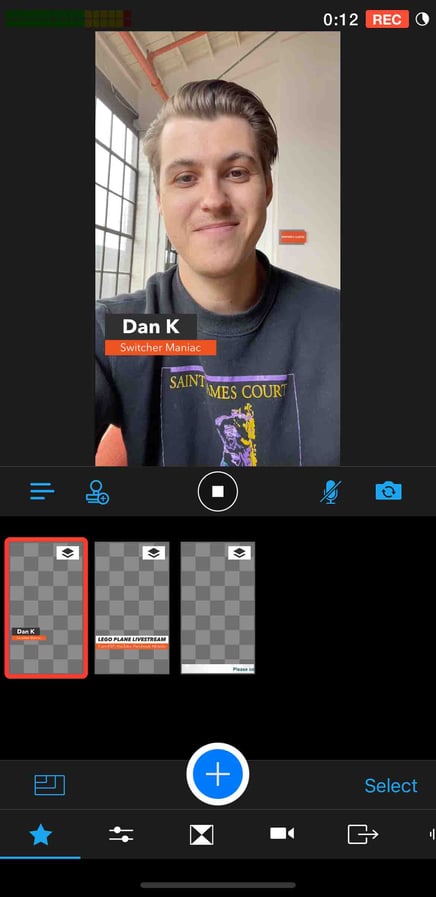
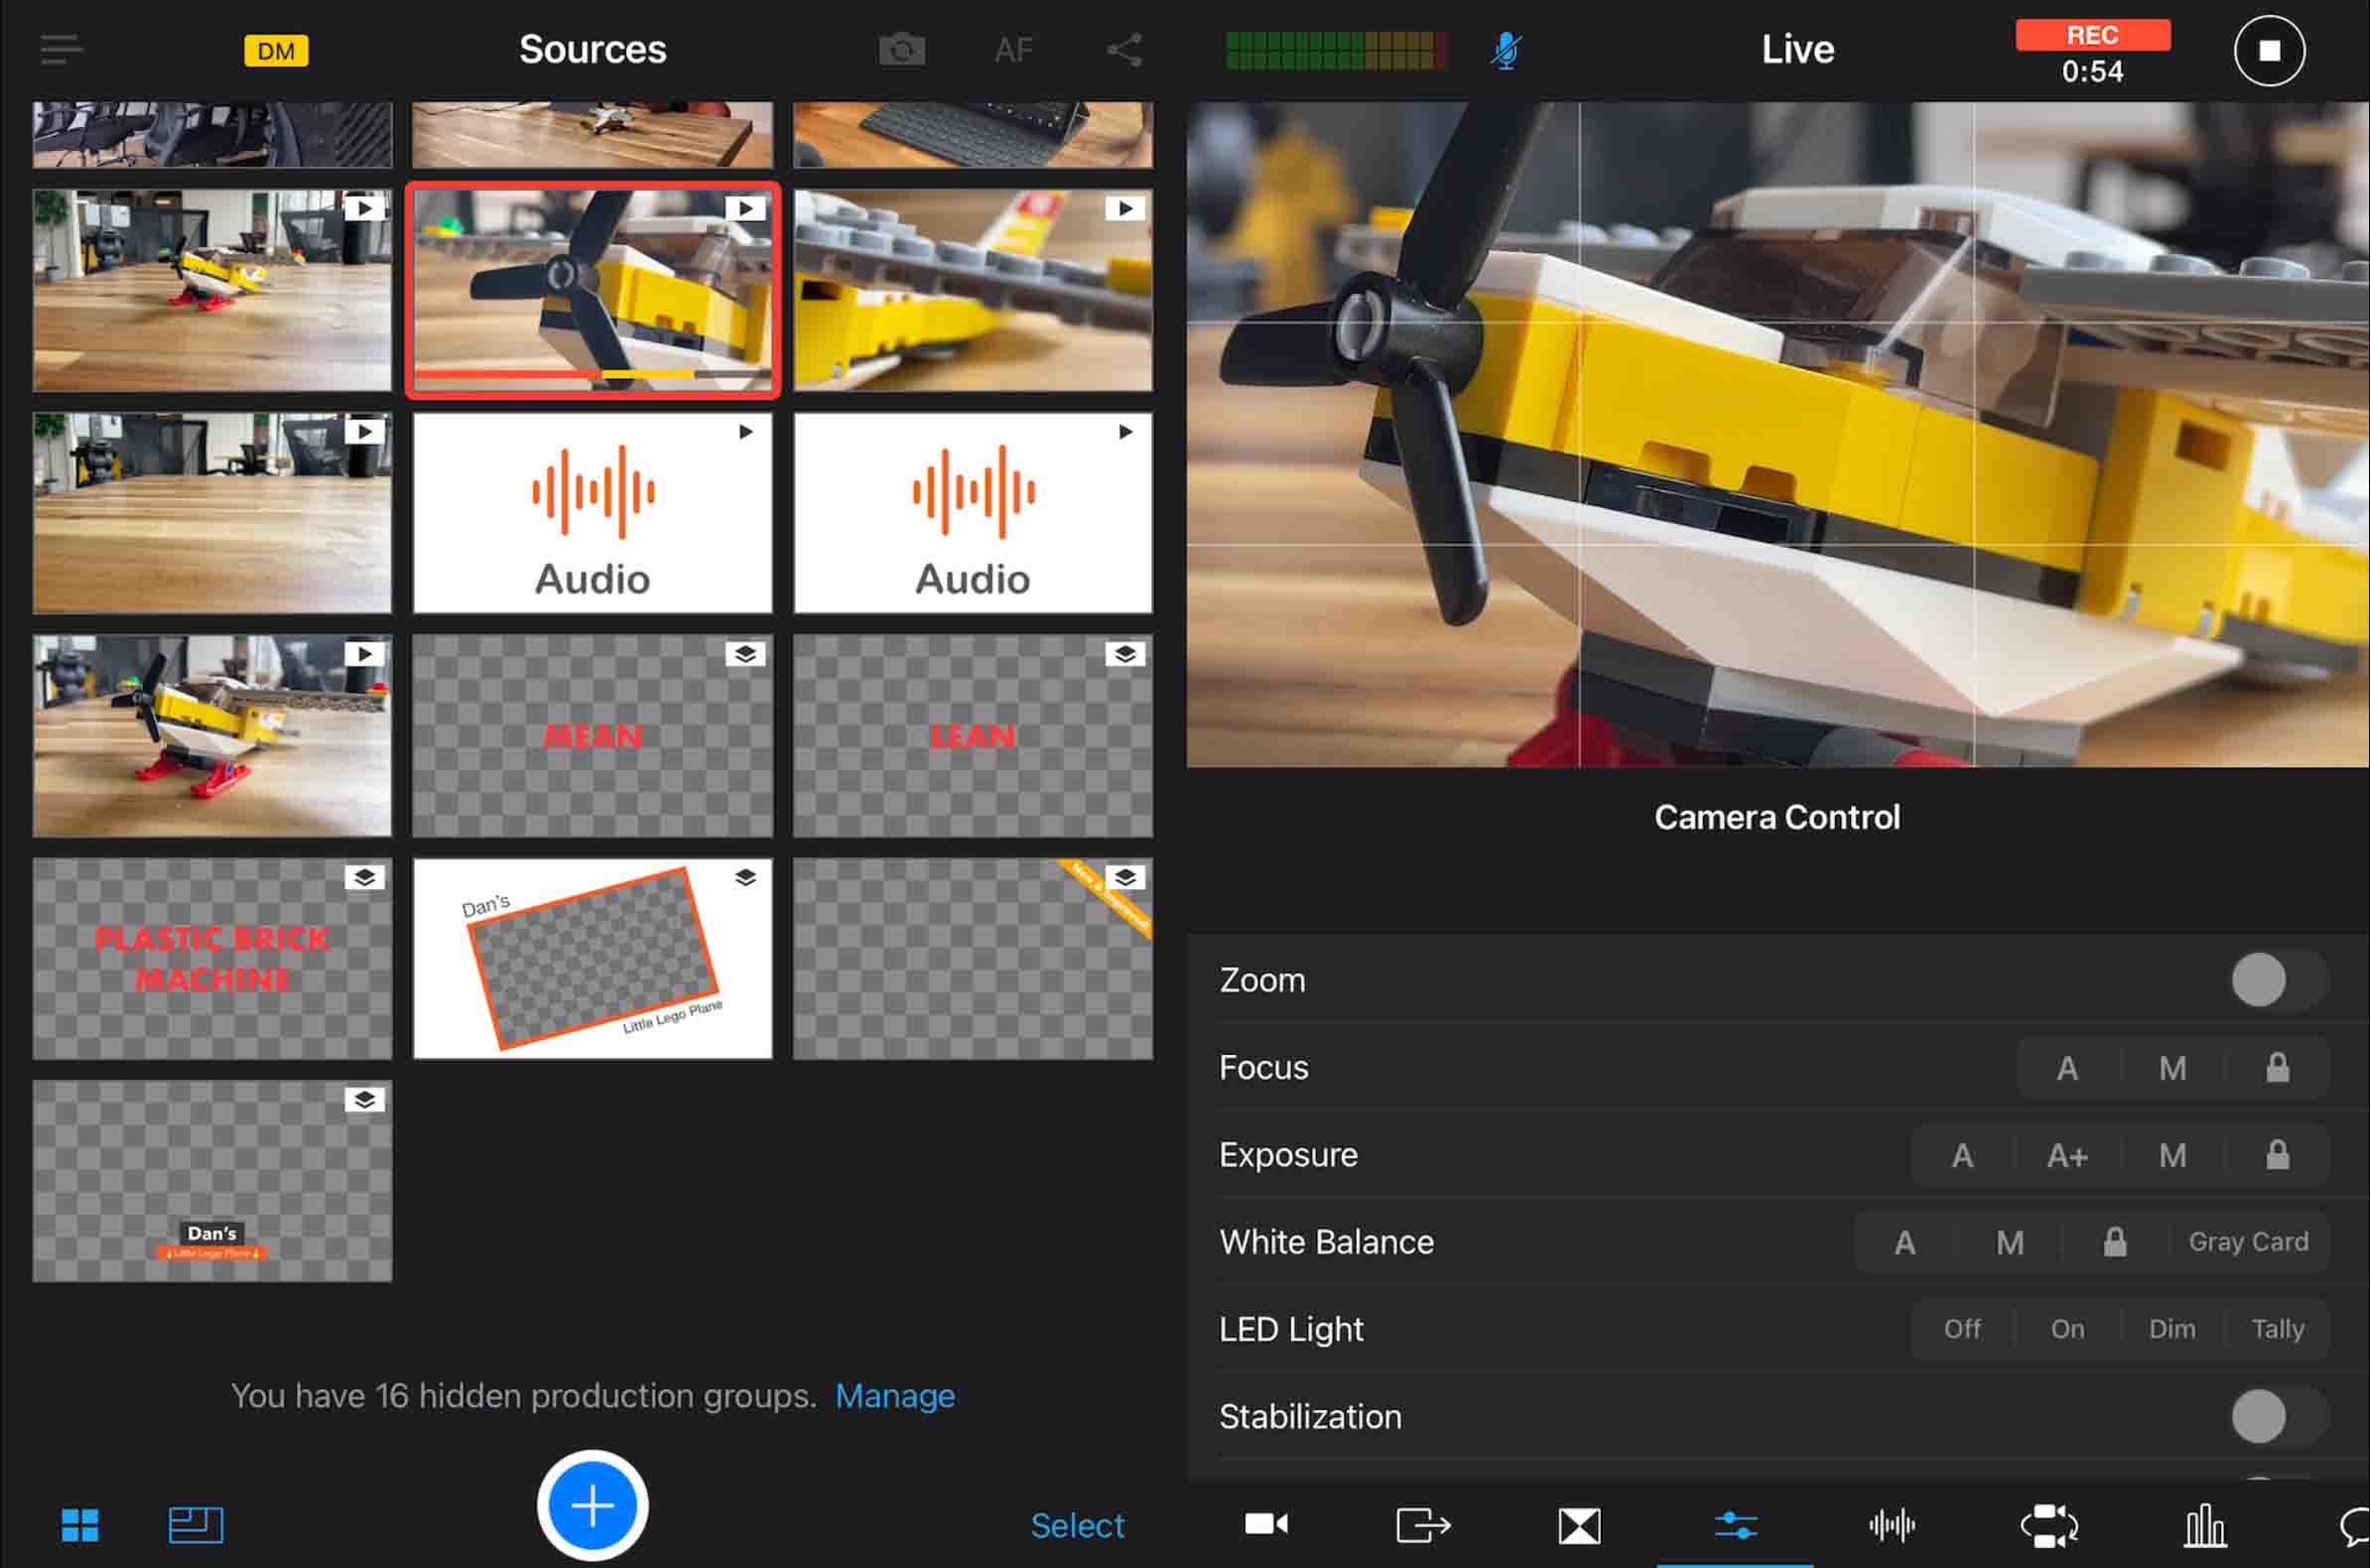
I want to announce an upcoming event, letting my audience know when (and why) to tune in. For this video, I only need one device, so I’m using an iPhone. In the Switcher Studio app, I start by gathering all the assets I want to use: a lower third for the person on camera, a graphic with the date and time of the event I’m promoting, and a scrolling ticker at the bottom with additional information.
All of these assets are easy to make in the app using Switcher’s built-in templates. You can customize the size, color palette, font, and other properties to match your brand or identity. Just select the big blue plus (+) icon in the Switcher Studio interface to see the options for customizing, creating, or importing graphics and visual assets.
Once we have all the assets prepared, all we have to do is bring them on-screen at the right time while recording the video. Just tap the asset in the Sources tab when you want it to appear, then tap it again when you want it to go away. With recent Switcher Studio app updates, this process is even easier: You can now set a duration for how long you want elements like graphics and photos to appear, and they’ll automatically disappear once that time is up. In this case, we could set the lower third graphic duration to 4 seconds — then we can focus on the content of the video and not worry about removing the graphic.
If you’re having trouble keeping up with graphics while you’re speaking on camera, you could appear distracted — which isn’t going to be a great viewing experience for your audience. There’s a simple fix: Record the speaking portion of the video first, then add it as an asset within the sources tab. Then, you can use the recording just like any other asset, and add graphics in real time without needing to do two things at once. Even with this extra step, it’s much faster than traditional video editing.
Just a few clicks later, this is what I have:
And that’s it! This video gets the job done, and we’ll just trim the beginning and end in Switcher Studio’s Clips creator. From Switcher, I can post directly to Facebook, Instagram, or TikTok — or I can export the video and share it to any other platform.
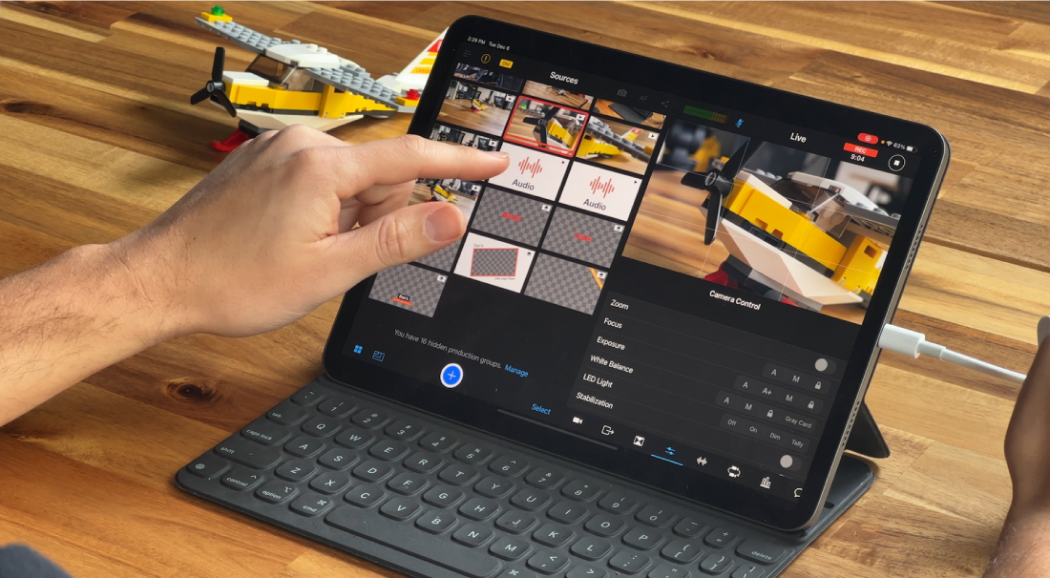
Live editing a video ad for a new product
For this piece, I want to add a few extra assets, like b-roll and music. I can easily do that by adding them to the Sources tab. Again, I just select the blue plus (+) icon to import photos and videos. This time, I’ll edit live on an iPad so we have extra screen space.
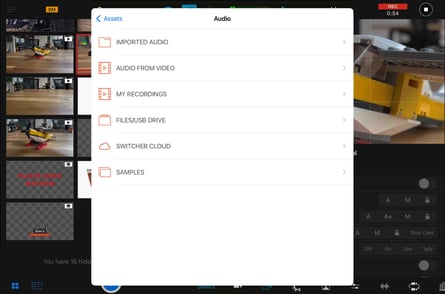
In the Switcher Studio app, you can record video locally (without livestreaming it to an outside platform) simply by selecting None in the Outputs tab. Using this method, I’ve already captured some b-roll. I’m also going to use this method to add a voiceover asset. I record a video locally in Switcher, and then add the recording to the Sources tab, selecting Audio, and then Audio from Video when importing. This allows you to create video and audio assets to use in your production without ever leaving the app.
Now, all I have to do is edit live, keeping in mind the context of the voiceover and the beat of the music. I use b-roll that matches the narration when needed and select graphics that help support the content. It’s a simple, fluid process (and honestly, it’s pretty fun too).
In just a few moments, I have a high-quality video ad:
That’s all there is to it. I can post that directly to wherever my audience is (which is most likely a social media platform). However, if I want that video to go somewhere else, I can just save it and post it later.
You can also use Switcher to post videos directly to your website using our video hosting solution, the Switcher Player. You can host livestreams on your site, upload recorded videos, and even create video playlists without needing to go through an external platform.
Use live editing to boost your brand
When we talk with business owners, the sentiment we hear all the time is, “I know I need to be doing video, I just don’t have the time — I don’t even know where to start”. They’re always amazed at how simple video creation can be with live editing and the Switcher Studio iOS app.
Switcher Studio streamlines and boosts your video production process so you can focus on your content and your business. Download the Switcher Studio iOS app today on the Apple App Store and try it for yourself for free!
Subscribe to the blog
Sign up to receive notifications whenever a new blog post is published. You may unsubscribe at any time.

Share
About the Author
Dan is an Emmy Award-winning video producer who’s worked in journalism, TV news, commercial production, and brand marketing. Dan sees nearly limitless potential in Switcher Studio’s video tools and is excited to share his experience, expertise, and (sometimes "out there") ideas.
All posts by Dan Klapheke