In the fall of 2008, Canon released its EOS 5D Mark II. This consumer video camera featured simple functionality (like the ability to swap lenses), and a groundbreaking full-frame sensor capable of capturing super high-quality video. Paired with its affordable price point (around $2700 at the time), it was a highly anticipated release that paved the way for countless advancements in camera technology.
Now it’s 2024, and practically everyone is walking around with an HD video camera in their pocket. (Camera quality that creators in 2008 were desperate to get their hands on.)
The power to create high-quality, engaging, and meaningful video content is baked right into your smartphone.
These days, you don’t have to save up thousands of dollars to buy expensive video gear! So if you have aspirations of becoming a video content creator, here’s how to simplify video production with your iPhone.
Step 1: Researching video ideas
You hold in your pocket a super-powered search engine in the form of the YouTube mobile app. And many creators have figured out how to make YouTube work for them when it comes to researching content ideas for their channel.
Use YouTube to find your video niche
Enter broad keywords related to your interests in the YouTube search bar. As you type, YouTube is going to suggest autocomplete options based on popular searches. Take note of these suggestions — they reflect what viewers are actively searching for.

Compare and contrast with “related videos”
After you take in the initial search results, scroll down to the bottom of the page to find related videos. The curated content that lives here will give you insights into subtopics and variations within your niche.
Between the related videos and the initial search results, you should have a good sampling of what’s out there, and more importantly, how to get started.
Step 2: Preproduction and planning
Next up, you’ll want to dive into preproduction. And thanks to mobile apps like Google Sheets and Google Docs, this phase has never been easier.
As a quick refresher, “preproduction” in video refers to the planning phase before actual filming begins. It involves brainstorming ideas, developing concepts, and creating a shot list and schedule for the project.
Preproduction is crucial for ensuring a smooth production process and achieving the desired outcome. It positions content creators to anticipate challenges, allocate resources efficiently, and streamline the overall production of the shoot.

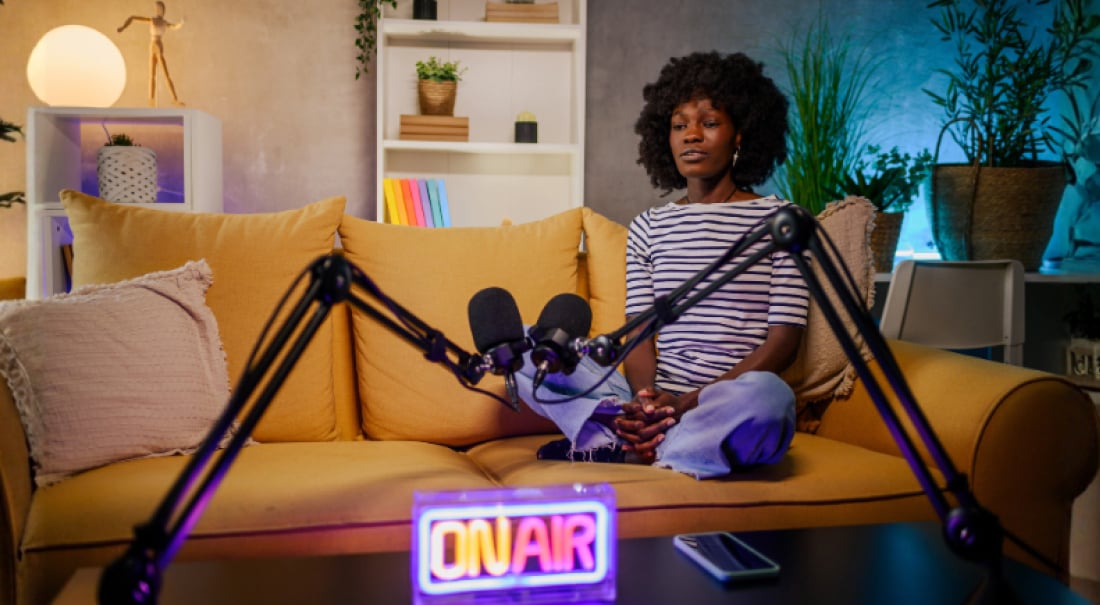
Step 3: Shooting video with iPhone cameras
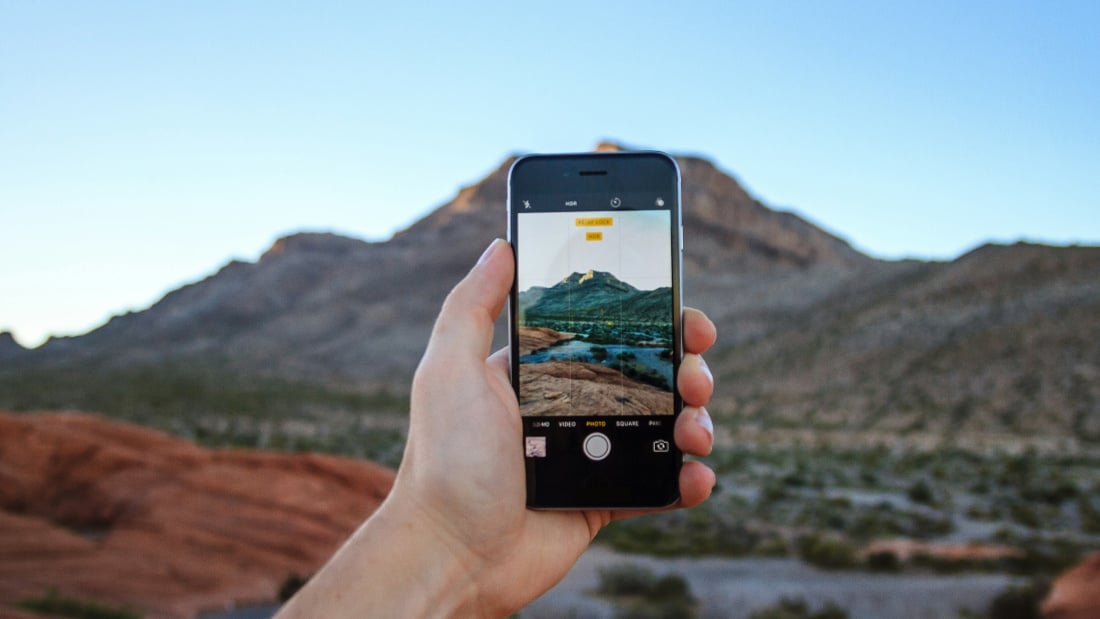
Now comes the fun part: Shooting your video content on your iPhone. iPhones today are packed with features and capabilities that were unheard of even just a few years ago!
With HDR video, multiple lenses, 4K recording, and impressive processing features, you don’t have to invest in a high-end video camera anymore (unless, of course, you have aspirations of purchasing a high-end cinema camera like the ARRI ALEXA mini).
For most video creators looking to scale their content channels, an iPhone will do the job!
Before filming, make sure you familiarize yourself with the most important iPhone camera settings (or bookmark our article to reference later):
Resolution settings
While most viewers won’t notice the difference between 4K and 1080p footage, you can still be intentional and creative with what you shoot in 4K — like wide shots you know you’ll crop for close-ups during editing.
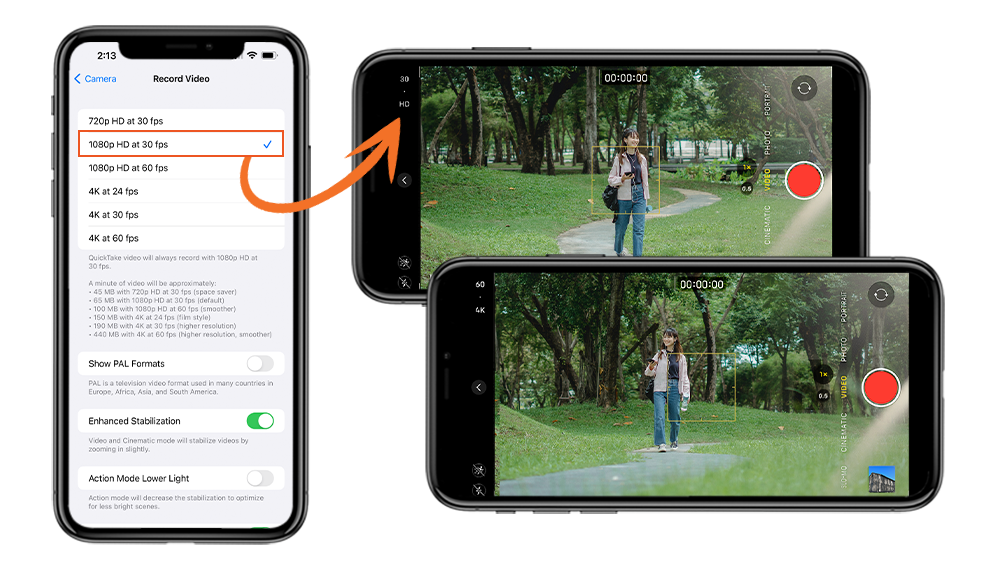
Enabling 4K video on your iPhone is easy. Open the Camera app, switch the camera mode to Video, and look to the corner of your screen. If you’re shooting in 1080p, you’ll see an HD label. Just tap HD to switch to 4K video.
💡 Pro tip: Shoot 4K at 24 FPS for the best quality. It’s the highest resolution available on iPhones and you’ll get lots of detail in the image.
Frame rate settings
When it comes to frame rates, 24 FPS (frames per second) is the film industry standard and is typically used in movies and TV shows. However, 30 FPS is what you probably see most often: It’s the default setting for lots of devices and cameras, and it creates a natural motion blur.
When you’re in video mode, just tap the number displayed next to the resolution. Depending on your phone and version of the Camera app, there will be different options for FPS. On newer phones, you can choose between 30 and 60 FPS if you’re shooting in HD. If you’re shooting in 4K, you can also choose 24 FPS.
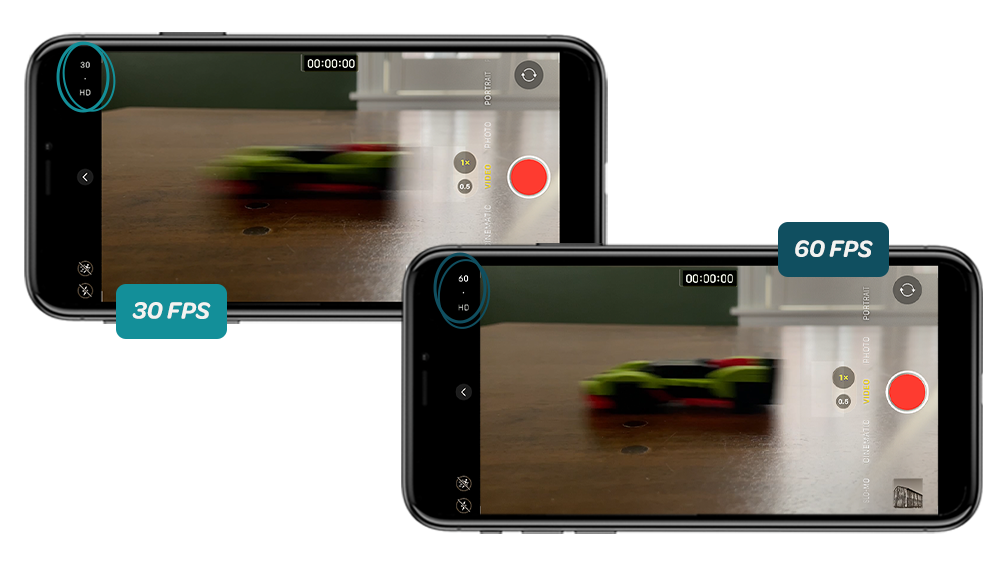
iPhones also let you shoot HD slow motion in either 120 or 240 FPS. Just keep in mind that you’ll see a significant drop in video quality, so it’s recommended to only use this mode to shoot some eye-catching b-roll.
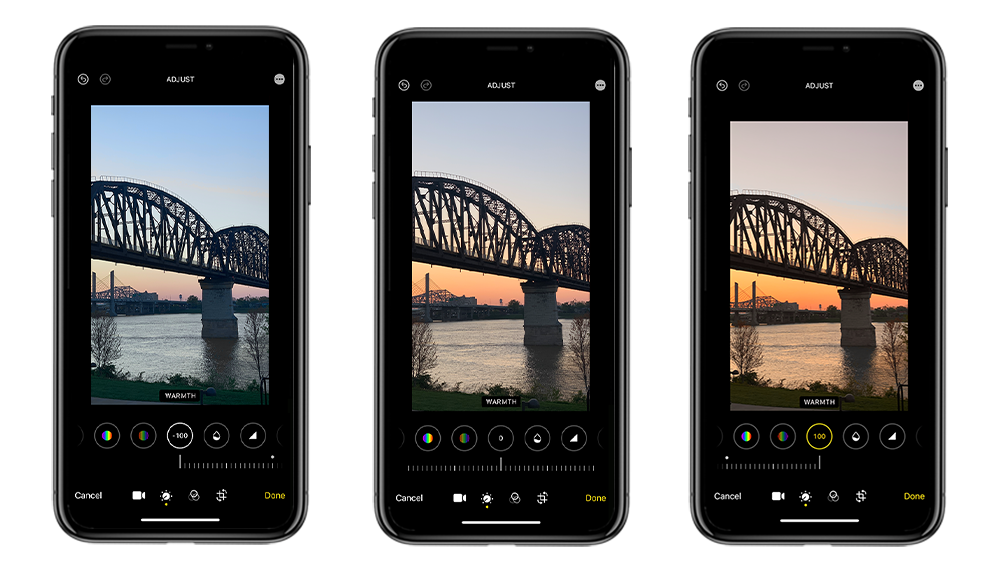
Color temperature
Tools like Switcher enable you to manually adjust color temperature. Use a gray card to set the exact white balance, then adjust the image’s tint if it's looking too green or purple.
You can also still automatically white balance your shot in Switcher, and then lock that white balance so your video has the same natural look throughout your videos.
Step 4: Editing software
The next thing you’ll want to do is choose a video production software or app to streamline your editing process. Let’s take a look at a few popular, efficient options.
Adobe Premiere Rush
Adobe Premiere is a household name, and certainly one of the most trusted video editing softwares out there. Premiere Rush is the mobile-friendly answer to the desktop tool.
It allows for easy video editing on the go with intuitive tools for trimming, adjusting speed, adding transitions, and applying color presets. However, you can’t livestream with Rush, so you’ll have to use another tool altogether to share and distribute your videos.
All in all, this mobile app is great for quick, traditional video editing.
KineMaster
KineMaster provides creators with thousands of trending video templates, making it quick and easy to produce YouTube, TikTok, and Instagram-ready videos.
The app offers a user-friendly interface with powerful editing tools including multiple layers, blending modes, and audio controls. There’s even AI technology built into the app that makes it possible to remove the background from your videos with just a few finger taps.
When you’re ready to publish your edited video to YouTube (or other channels), you’ll have to leave the KineMaster app — insert sad trombone sound — which also means you can’t stream from KineMaster.
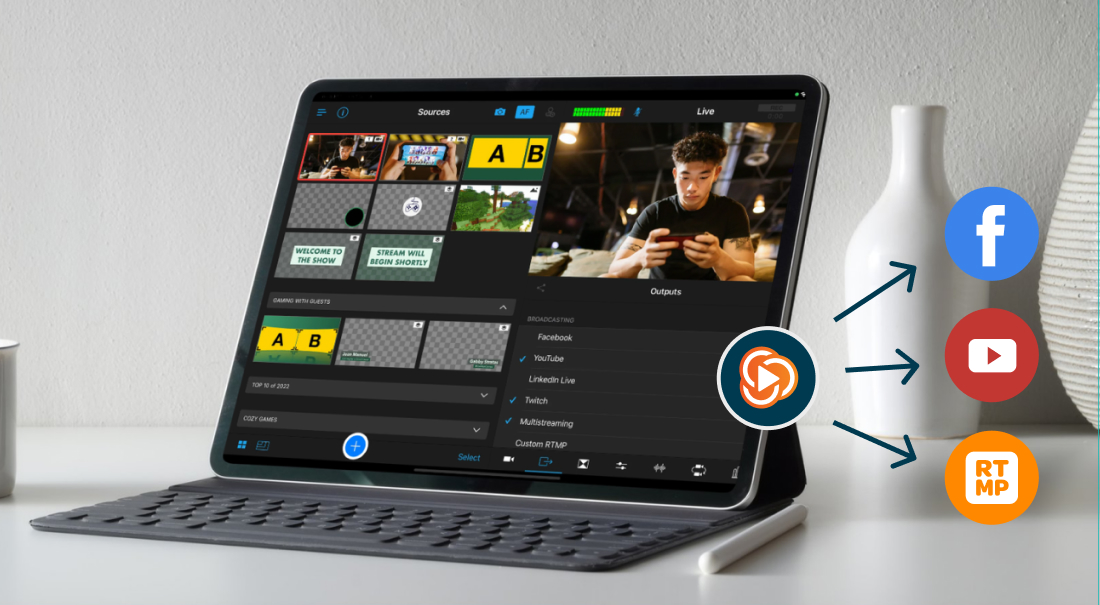
Switcher
Switcher’s iOS app offers powerful and flexible editing capabilities for any kind of video content: Long and short-form, horizontal and vertical, live or recorded. And that’s just the beginning.
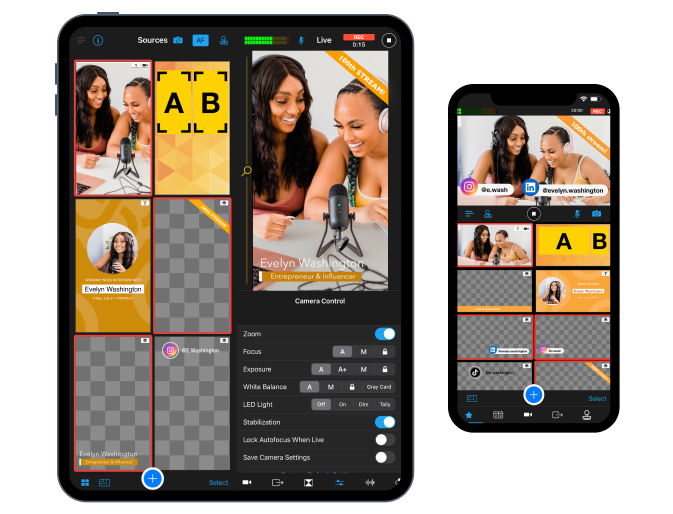
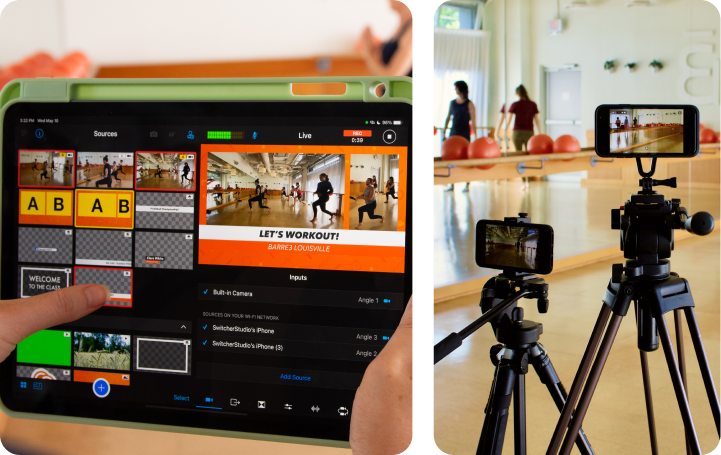
If you’ve been wondering whether multiple iPhones can be synced together for video production — good news. Switcher was made for multicam.
Connect up to nine iPhones to capture every angle during your video shoot or livestream. Then, change the layout with our customizable multiview and picture-in-picture templates.
Switcher also eliminates post-production with live video editing. That means you can edit in real time — on your iPhone — while you record or stream. Switch angles, change layouts, instantly bring in graphics, multimedia, remote guests, external video, and more.
You can also edit your Switcher productions for social media with our in-app Clips creator, and share directly to Facebook, Instagram, or TikTok. If you’re looking for the “one-stop shop” of iPhone video creation tools, you’ve found it.

Step 5: Share, manage, and monetize
Creating video with your iPhone is just one piece of the puzzle. You also want to be able to share that video with your audience, manage your content library, and maybe even monetize.
Of the editing apps we mentioned in the last section, only one of them is a true all-in-one video platform. (It’s Switcher.)
Switcher is a mobile video production studio that fits in your pocket — but it’s also way more. Here are a few of the other features video creators love:
Built-in Multistreaming
Reach your audience where they are — even if they’re on 20 different platforms at the same time. Built-in Multistreaming means you can take your content further without any additional software, bandwidth, or effort.
Video hosting
Manage all your video content in one place. Upload your videos directly to your video library. Then you can store, share, download, or delete your content as you see fit (without filling up your local storage).
Embeddable video player
Ready to own your video content? Switcher’s embeddable video player works with almost any website (or you can share a private link just for your videos). Embed videos from your video library, curate playlists of content — even livestream directly to your website.

Video and livestream monetization
No more minimum viewer counts, no more counting on ad revenue and algorithms. With Switcher, you can monetize your live and recorded video content now. Plus, we offer flexible commerce options, including one-time purchases, subscriptions, and even live selling for Shopify merchants.
Get started
Ready to see how easy it is to create, share, manage, and monetize your video content on your iPhone? Try Switcher free for 14 days. Plus, subscribe to our blog to get more articles about the business of video delivered straight to your inbox.
Subscribe to the blog
Sign up to receive notifications whenever a new blog post is published. You may unsubscribe at any time.

Share
About the Author
Julian R. Vaca is an actor, writer, and marketer. His work has appeared in The Nerd Daily, Writer's Digest, and more. His debut Young Adult series "The Memory Index" is available wherever books are sold. Connect with Julian on Instagram: @JulianRayVaca
All posts by Julian R. Vaca