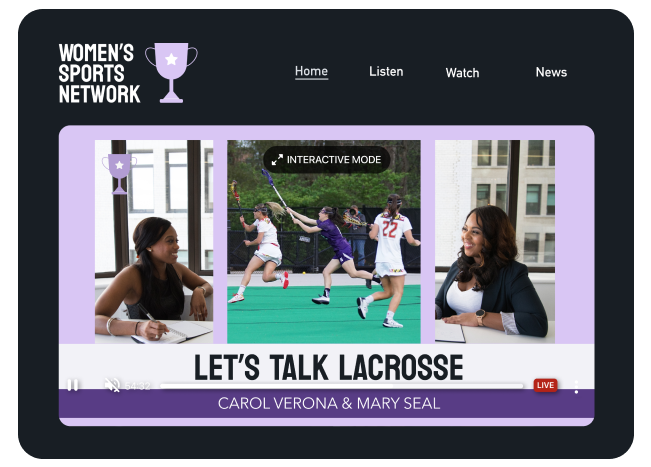
The biggest names in podcasting don’t stop with audio: Podcasts in a range of genres are recording complementary video in their podcast studios. Production powerhouses like Wondery Network and The Ringer are also creating YouTube versions of their popular podcasts.
By adding video recordings to their podcast productions, shows and networks are reaching hundreds of thousands of listeners beyond who they could reach with audio alone.
Despite the dramatic growth of video podcasts, the competition in the space is still minimal compared to that of traditional audio podcasts. This means it’s a great time to create your own live or recorded video podcast for YouTube, your website, or elsewhere.
By adding video to your podcast, you’ll reach new fans, set yourself apart from other content creators, provide a new way for audiences to engage with your show, and even potentially build a regular revenue stream.
How to produce a podcast with video
There are a few different ways to do a podcast with a video component. Some podcasters merely release a video with a static image over their audio recording. This is a low-effort way to get your podcast on video platforms like YouTube but doesn’t make for very engaging video.
Others record full videos of their recording session and edit the video and audio together in post-production. This makes for a more entertaining video-viewing experience, but is also much more labor-intensive.
However, it’s possible to create a multi-camera video podcast setup that captures all of your footage at once (and eliminates the need for post-production editing). And thankfully, building a multi-camera video setup in your podcast studio or space is easier and less expensive than you may think. Let’s get started.
Gathering your video podcast equipment and gear
You might be wondering what equipment you need to film a podcast. The good news is you actually probably already have most of the gear that you need.
Choosing a podcast camera
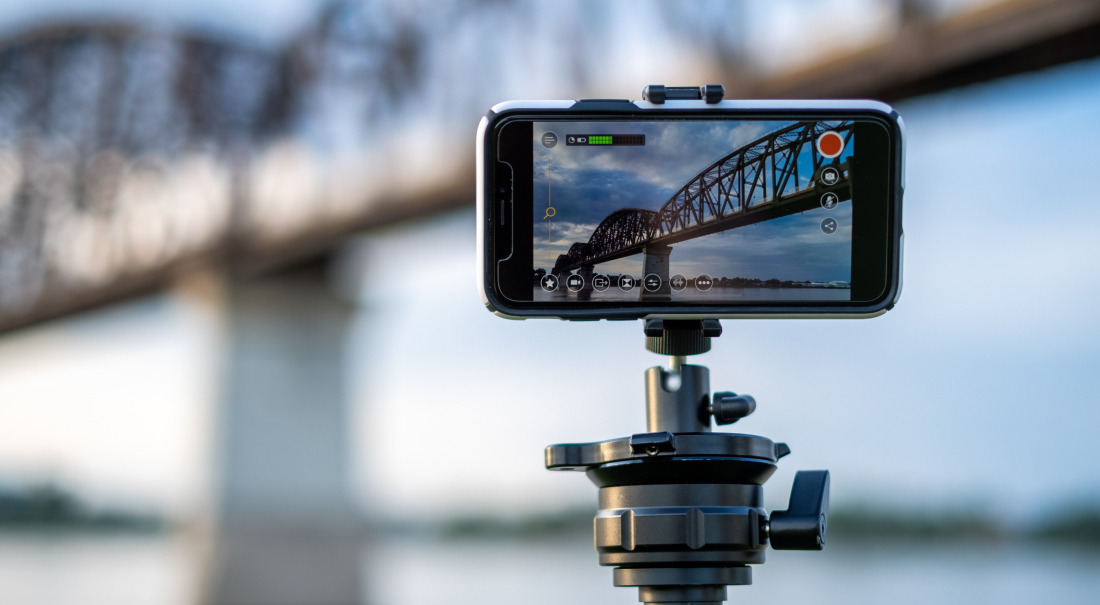
Let’s start with the obvious: To create a multi-cam video podcast, you’ll need multiple cameras. Switching between angles during your video podcast adds a dynamic feel and perspective that you can’t get from a single angle alone (although, if you’re just dipping your toes in the water, single-camera video podcasts can be a great place to start).
Thankfully, if you’ve got access to a couple of iPhones or iPads, you already have multiple cameras ready and waiting.
Some video podcasters rely on DSLR cameras, but that requires buying multiple DSLRs (💰💰💰). It can also require accessories like HDMI cords, capture cards for each camera, and a hardware switcher board, which alone can run you hundreds of dollars.
iPhone cameras are incredible these days, making them ideal for a multi-camera video podcast setup. You can sync multiple iOS devices wirelessly using Switcher, and then you can switch angles and edit your podcast video while you’re recording or streaming. We’ll address how to get Switcher set up a little later in this post.
(P.S. You can even add your DSLR or mirrorless camera to your Switcher setup by using an integrated piece of hardware called the Accsoon SeeMo.)
Setting up your podcast cameras
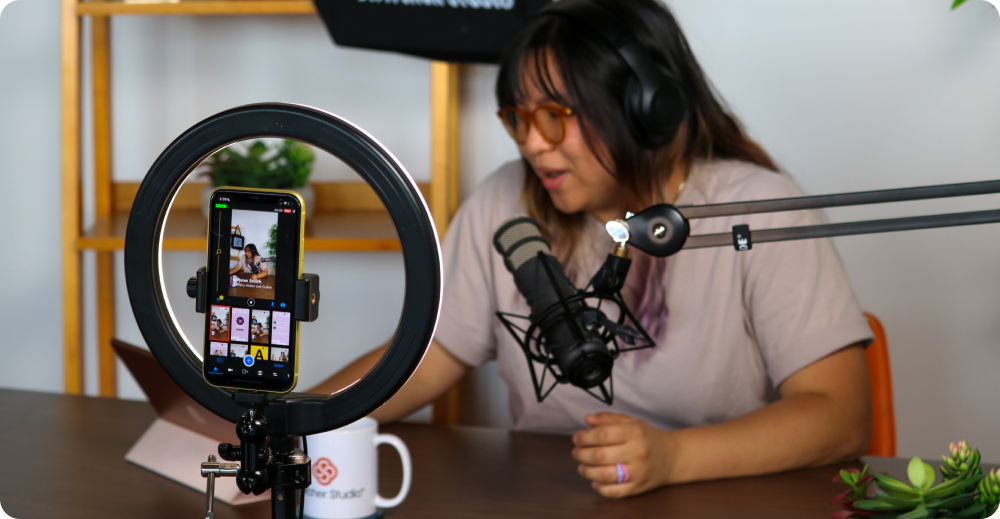
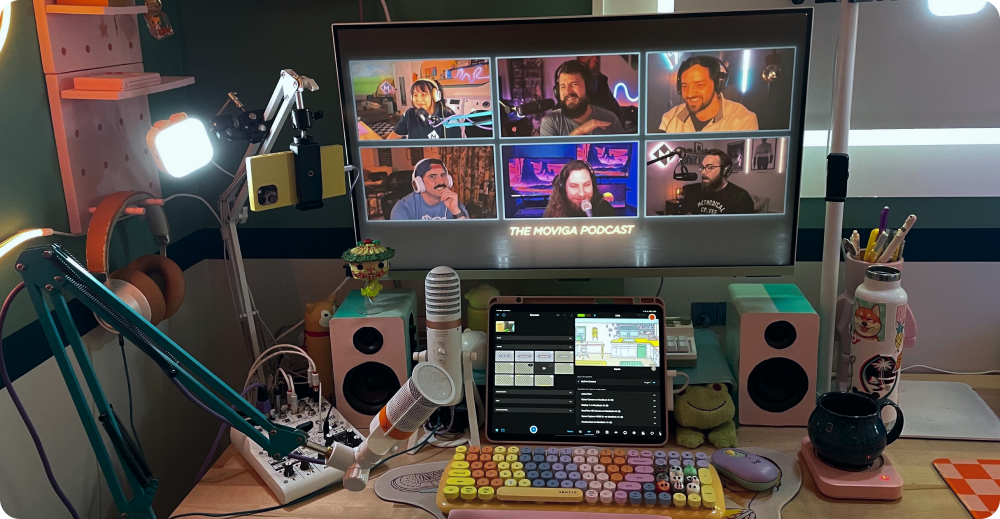
Where you place your cameras will depend on your podcast recording space and the structure of your show. Some podcasters have a dedicated studio, whereas others record in their offices. (Some even record in closets.) A few basic shots that work well for a podcast video include:
-
Wide shot:
Add context by placing one of your iOS device cameras in a spot that captures your entire setup.
-
Main shot on each podcast host and guest:
You’ll want one good shot of each speaker — whether that’s just you, you and another host, you and a guest, etc. Place these cameras so that each speaker is framed similarly. You don’t want a zoomed-in shot on you and a zoomed-out shot on your co-host.
-
Overhead shot:
If you want to add a behind-the-scenes feel, position a camera overhead. The view from on high will capture what you’re doing with your audio mixer, iOS device running Switcher Studio, or computer.
-
Remote guest shot:
OK, this won’t be captured with a camera in your studio, but it’s something to remember at this point. If you have remote co-hosts or guests, you’ll also want a way to bring in real-time footage of them. (More on how later.)
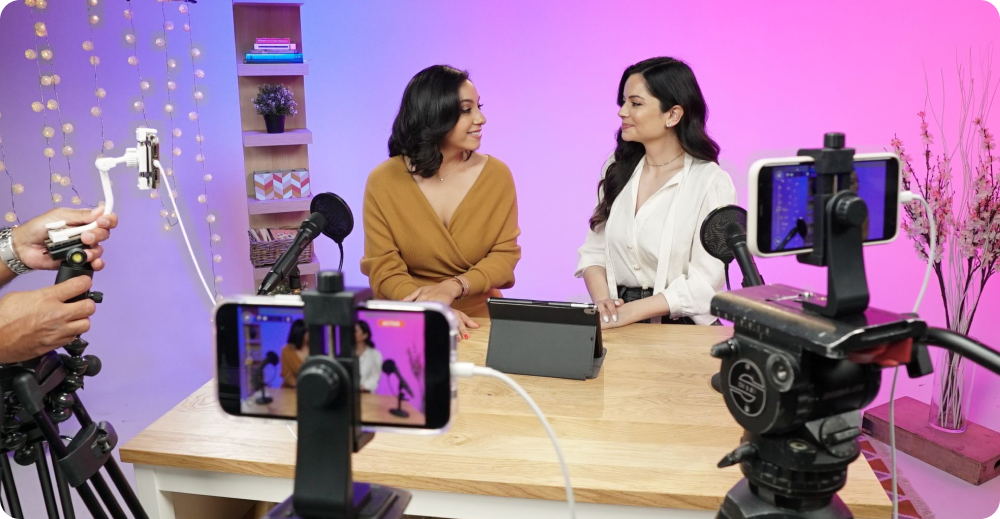
To achieve these shots, you may want to pick up some additional gear, like a small tripod or mount for each iOS device. Use those to position your cameras accordingly. For the overhead shot, you’ll likely want a gooseneck or adjustable phone stand.
Arranging lights for your video podcast
To get clear footage, you need sufficient lighting. And once you place your cameras and determine your shots, you’ll be able to tell where you may need to add lighting and where you may need to reduce it by covering windows.
Adding light can be as simple as strategically placing a few small lamps that you already have on hand. Alternatively, you could invest in an overhead drum light for a diffused glow, a flattering ring light that attaches right to your camera or tripod, or even a studio light kit, which usually includes two or three lights and stands.
Here are some rules of thumb:
-
Aim for three-point lighting, which involves lighting each speaker from the front (key light), from beside (fill light), and from behind (backlight). This will give your video podcast a 3D look.
-
Opt for soft lighting, which is more flattering, and a consistent color temperature among bulbs. In the same way that you don’t want mismatched framing of your on-screen talent, you don’t want a blueish light on one speaker and a yellowish light on another.
Hooking up your podcast microphones and/or audio mixer
This is a podcast after all, which means you want clear sound. If you’re introducing a video version of an existing audio podcast, you likely already have external microphones that you love. You can connect almost any podcast microphones to the iPhone or iPad on which you’re running Switcher and producing your video podcast. (The exact connection method just depends on whether your iOS device has a headphone jack, a lightning port, or a USB-C port.)
If you’re still in the market for mics, you may want to check out the Saramonic Blink 500 system. These wireless mics come in a two-pack — one for you and one for a co-host or guest — and their tiny receiver plugs directly into the iOS device running Switcher, bringing pro-quality sound right into your video production sans wires.
If you choose to connect your new or existing mics with Switcher directly, then after your video podcast recording (or livestream), you’ll want to export the audio file from your Switcher video. You can then import it into Adobe Audition or your audio-editing software of choice to do your usual audio editing. (In this case, be sure to record your video in Switcher’s Director Mode to make sure you get the highest-quality audio.)
There’s one more option for those podcasters who already have the super popular Rodecaster Pro Podcast Production Studio at their disposal: You can hook your Rodecaster directly to both your computer (USB-out) and your iOS device running Switcher (TRRS-out). This lets you record audio on your computer at the same time that audio is being recorded as part of your video, which is perfect for podcasters who want to keep their current audio-mixing and editing process even after they introduce video.
You’re probably starting to realize that there are several different ways you can handle audio for your video podcast, and you’re right about that. This is ideal since podcasters tend to be audio nuts: You get to choose the route that works best for you.
Get it? Route?
Like, audio routing?
Just a little podcast humor for you ... anyway.
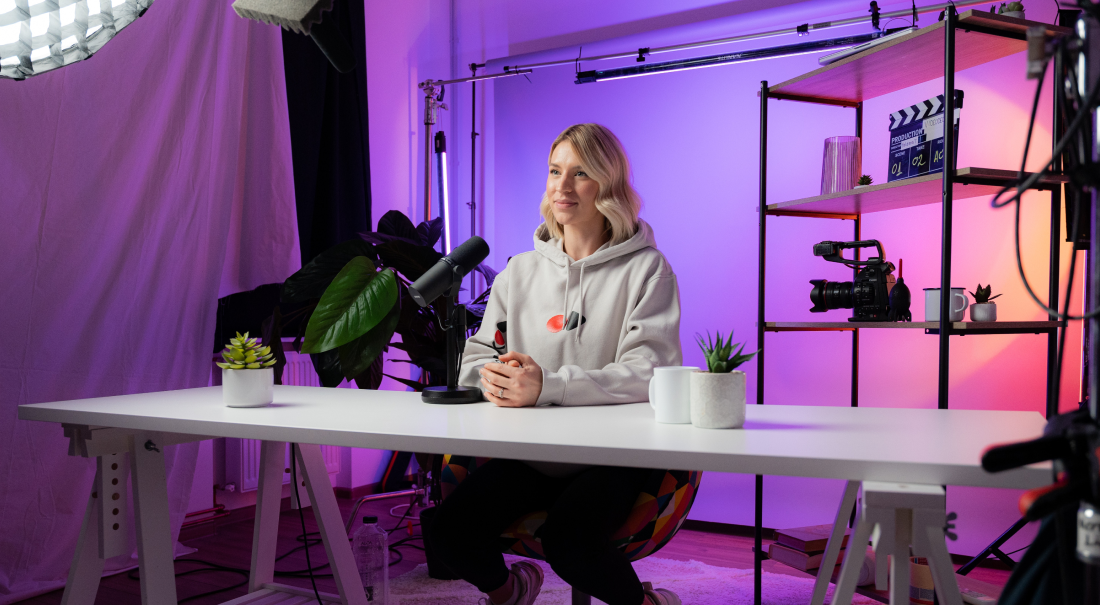
Decorating your video podcast set
Now that you’ve got your tech sorted out, it’s time to consider your multi-camera video podcast set. There’s no right or wrong, but here are some suggestions for creating a functional and attractive set for your podcast.
Consider what will be present in each angle of your multi-camera production.
Of course, you don’t need to try to create a television set — the intent of video podcasting is simply to increase engagement and give added perspective to the conversation for fans.
To that end, feel free to let your microphones and other tech be visible in your podcast video, creating an exclusive, behind-the-scenes feel.
In addition to gear, your set decor could include:
-
Background:
The existing background of your studio or recording space might create the feel you’re going for. However, if you want to create a special background, you can try a seamless paper roll draped from above to create a clean, professional look.
-
Shelves:
Simple, styled bookshelves in your podcast space also make a great background, adding warmth, giving you a chance to display gifts from listeners, and letting you easily change up the decor for different episodes and seasons.
-
Screen:
You may want a computer or TV screen displaying your logo or any photos/videos you’re discussing during your show. You can leave your screen as part of the background or bring it into Switcher as a video source so viewers of your video podcast can get a better look at what you’re seeing.
-
Table or desk:
If you’ve got your gear set up on a table or desk, it will feature prominently as part of your set. Consider pulling your table away from the wall to avoid a cramped feeling.
-
Artwork:
Show the personality of your podcast by curating posters or artwork to display behind you or your guests.
-
Trinkets:
In general, choose a few large pieces rather than a bunch of small pieces. A couple of trinkets on your desk or bookshelf can add personality, but too many start to look cluttered.
-
Mugs:
Gotta keep that throat on its A-game as you’re talking. Video podcasters often have an array of glasses, cups, and plastic water bottles scattered around their spaces. You can keep things looking neat, cozy, and even branded by using mugs with your show logo.
-
Sound blankets or panels:
You may also consider adding some sound blankets or sound-absorbing panels to your space to dampen ambient sound. These could be off-camera — or you could drape them behind your on-screen talent so they serve double-duty as sound dampeners and background set pieces.
Producing and editing your multi-camera video podcast
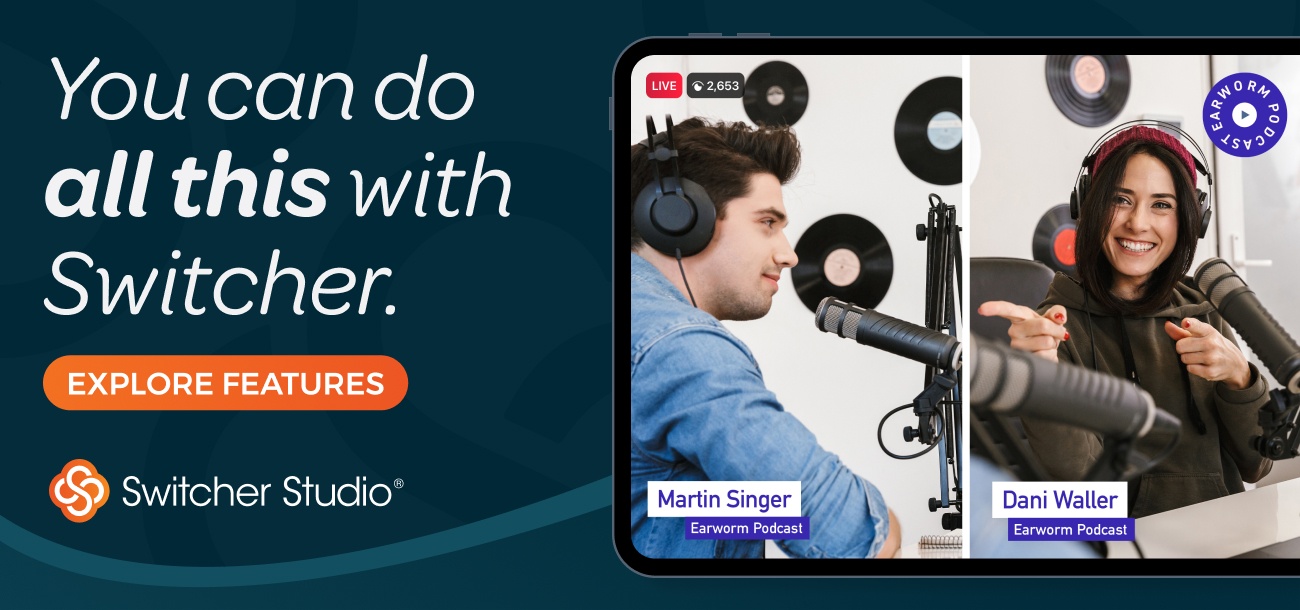
Step one: Choosing a video podcasting software. As mentioned earlier, Switcher is the video podcast software that lets you connect up to nine iPhone and iPad cameras over Wi-Fi. (You can start a free trial here to test it out for your podcast.) Though Switcher is often used for livestreaming video, many podcasters also use it for recording and live-producing video podcasts that they then post after the fact.
Here are a few reasons Switcher is ideal for streaming or recording video podcasts:
Use less gear
As mentioned above, Switcher runs on iOS devices, so there’s no need for expensive cameras, capture cards, or wires to trip over.
Free up your computer
It’s taxing for a computer to run video-switching software, audio recording software, and remote interview software simultaneously. Switcher handles the video-switching and interview part, freeing up your computer to handle the audio (or to display comments as they roll in).
Switcher eliminates the need for video post-production, but if you want to edit your audio, you can easily export quality audio to edit in post-production.
Add branding and live-edit your show
There’s no post-production for your video podcasts because Switcher was made for live editing. This means you can change angles, add in graphics and b-roll, display text, and share your screen all while you’re recording or streaming.
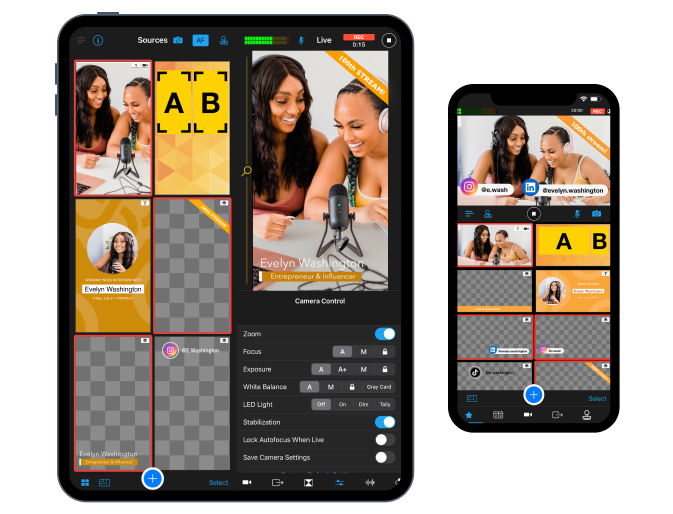
Plus, Switcher has literally hundreds of editable graphics and layouts templates so you can add your branding to every frame.
Stream live or record for later
That’s right, you can do either one.
Share your screen
If you want to show a website, a game, or anything else on your computer in your video podcast, it’s easy to share your Mac, PC, or phone screen right into your Switcher production.
Bring remote guests or co-hosts into your video podcast
Though there are plenty of solo podcasters making amazing shows, most podcasters have co-hosts or guests, which is why it’s so important to consider how you’d bring a remote guest into your video podcast. If possible, you’d like to avoid choosing a video podcasting software that you then have to integrate with a separate video calling tool. Look for software that does both.
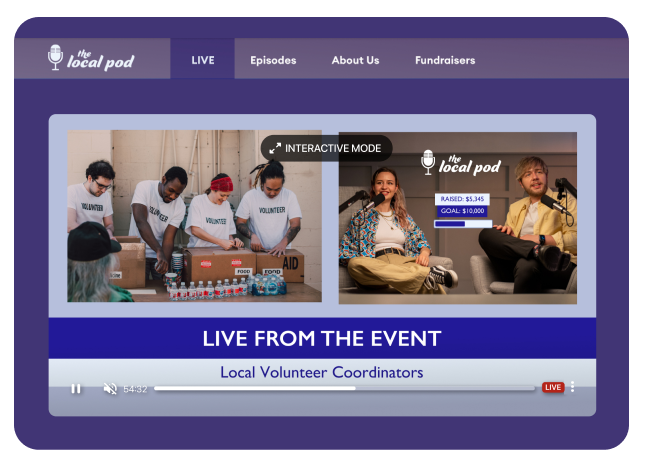
Switcher’s Remote Guests feature lets remote guests join your podcast from any device, anywhere in the world. All you have to do is send your guest a URL to join your production from their browser, and their webcams or smartphone cameras instantly become part of your production. Your guests don’t need to make a Switcher account, download any apps, type in any access codes, or wait for admission to your room.
You can also choose whose cameras are part of your stream or recorded video (easily switch throughout the video or show multiple at once with multiview layouts), and you can mute and unmute individual guests as needed, which is perfect if you have a series of guests in one podcast.
Connect to the biggest platforms
Switcher integrates directly with YouTube, Facebook, Twitch, and more. You can even reach multiple platforms at once with our built-in Multistreaming functionality.
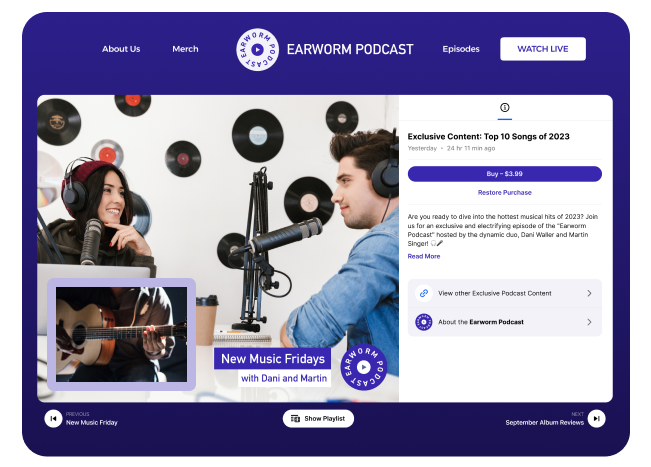
Stream directly to your website (or embed video)
Switcher also offers an integrated video hosting solution, allowing you to embed your Switcher productions — or any other videos — on your website. You can create as many players as you like, add links and additional information for each video, and compile playlists of content. You can even …
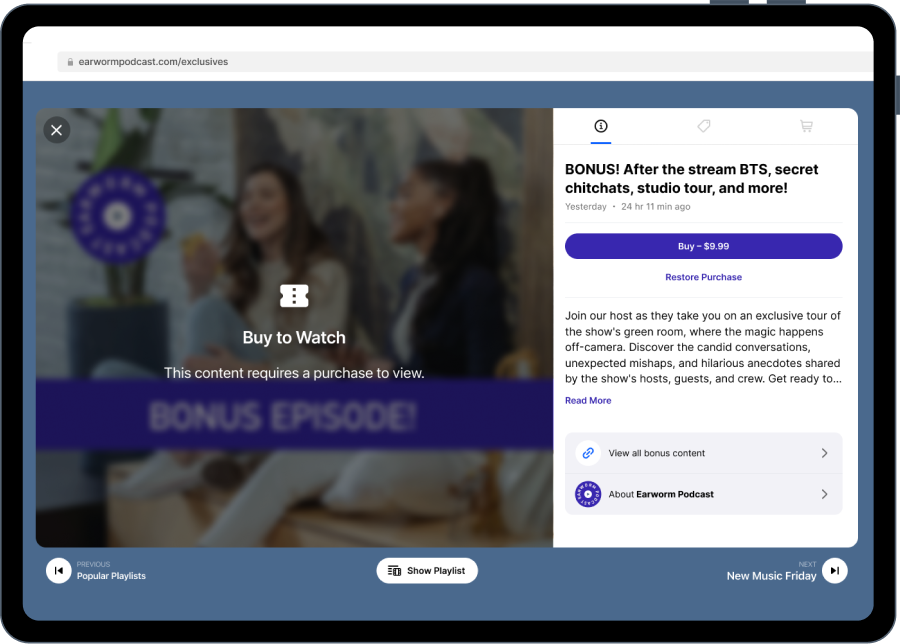
Earn revenue from your podcast
When you embed the Switcher video player, you can easily monetize your multi-camera video podcast by enabling Gated Content for one-time purchases (think, “ticketed live shows”) or creating subscriptions for your most supporters (think, “bonus content”). You can even sell merch right in your video player. It’s the ideal end-to-end solution for video podcasters, and your production grows with you.
Start creating your video podcast today
Now that you know the video podcast equipment and software that you need, it’s time to get started producing the thing! Start your free 14-day trial of Switcher to create your first multi-camera video podcast, and make sure to subscribe to our blog for more tips and tricks about video podcast creation, growth, and monetization!
Subscribe to the blog
Sign up to receive notifications whenever a new blog post is published. You may unsubscribe at any time.

Share
About the Author
Maddie is a writer and curious content marketer with experience in nonprofits, advertising, and tech. As Switcher’s content strategy manager, she’s passionate about connecting with our audience through content that educates and inspires.
All posts by Maddie Tong