Every day, people stream live to their personal profiles and business pages. While there are older options like YouTube and Twitch, Facebook Live is now a common place for live video. These live broadcasts are easy to set up and are easy for friends and fans alike to view.
But what if you only want to stream to a few people, rather than to all of your Facebook friends? What if you are doing specialized broadcasts for a fitness group or a book club that's not for public view?
Luckily, there is now a solution.
Facebook Live was already functional for use with Facebook pages via Switcher Studio. Now, Facebook Live now works for groups, meaning that you can stream to a specific group of your choosing. This opens the door for more private and intimate live videos that are visible to only select people.
Should I Do A Public Or A Private Group?
If you have never created a Facebook group before, you can do that by going to your Facebook homepage. This article from Facebook will get you up to speed.
The privacy settings of your group are completely up to you and reflect the purpose of the group. You will select the privacy when making the group, but you can change this setting later on as well.
- Public groups are used for common-knowledge topics where sensitive information is not published. Use these to promote products, support public figures, and share creative content. You can search for a public group using its name and/or topic.
- Private groups are the most common of the groups. Use these for publishing sensitive information. Anyone can search for and find a private group and see who's in it. Yet, no one can see the group's contents unless you accept their join request. Use these groups for medical support, customer support, and sharing unfinished creative content.
- Secret groups are the least common of the groups. Use them when sensitive information is frequently published. No one can search for or find a secret group; a member of the group will have to add new members instead. Use these groups for team members, product prototype development, and wedding plans.
Make sure to customize your group to fit its topic and purpose. Adding a cover photo, a description, and more will make people more likely to join and communicate.
Okay, The Group Is Ready. How Do I Go Live?
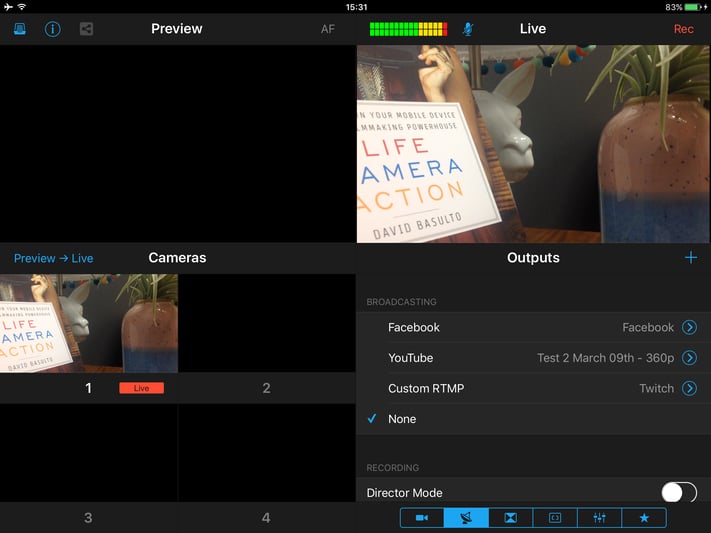
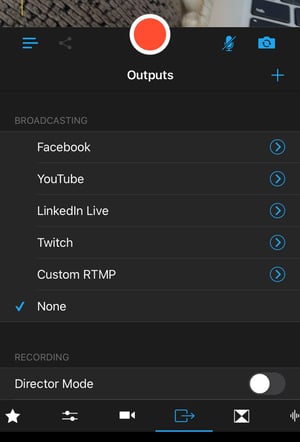
When you open your Switcher Studio app, tap on the blue arrow that says Facebook from your Outputs tab.
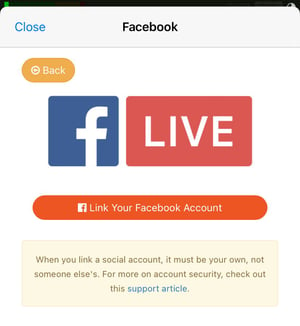
If you have not already linked your Facebook account to Switcher on this device, you will need to sign in. Use the email address and password associated with your Facebook account.
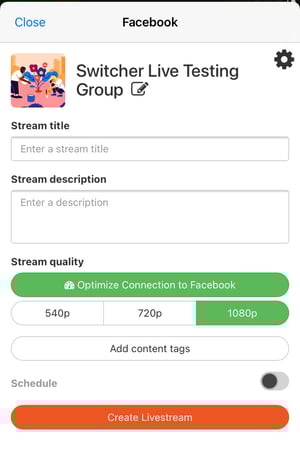
Afterward, you go to the Event Creator window.
The stream destination will be set to your personal timeline. You need to change this to stream to your desired group. Tap the pencil beside your destination to bring up other destination options.
 Tap Group. All Groups that you own or have admin status for will be displayed. Select the group of your choice.
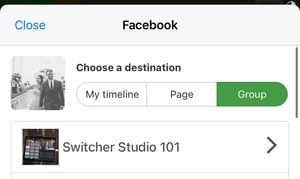
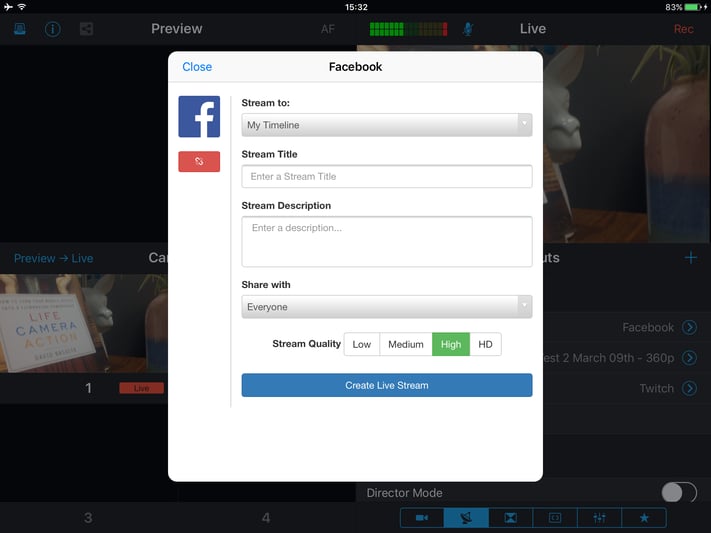
You will now see your group name displayed as the destination.
Perfect.
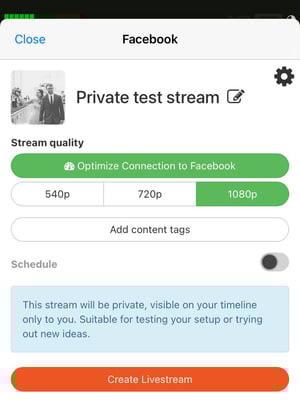
Title your stream and write a description for it. All of your viewers will see this information. Enter in details that will encourage your group members to watch your broadcast.
You can also choose your stream quality. If you have a fast and strong internet connection, you may want to choose high or HD. If you are on a weaker connection, choose low or medium. This will prevent lag.
Finally, select Create Livestream.
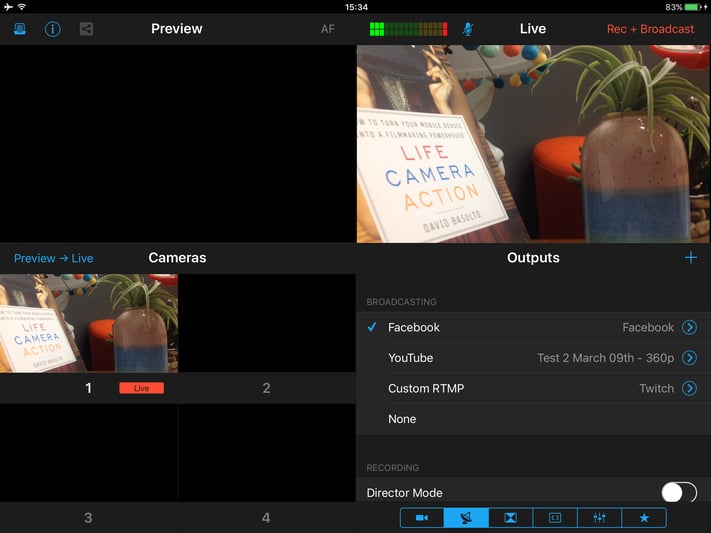
When you are ready to go live, tap on the big red button in your Switcher Studio app. This will send your stream to your chosen group.
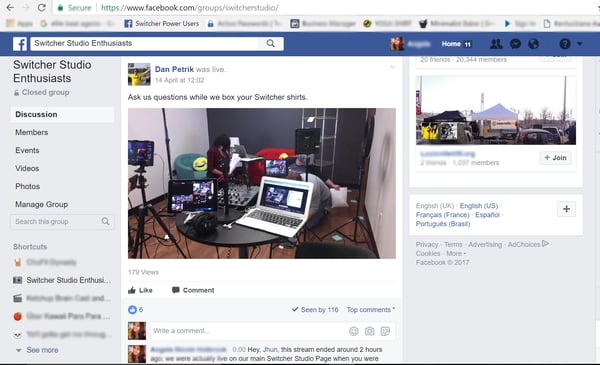
Facebook will notify your group members that you are live, and they will be able to watch your stream. They will also be able to leave comments as they watch.
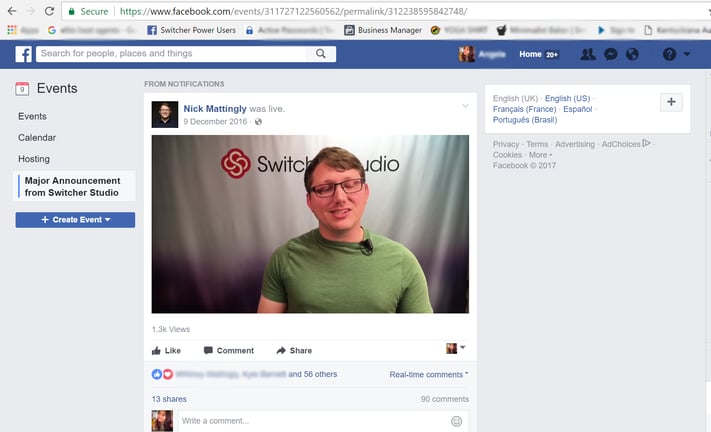
When your stream completes, Facebook will archive your stream inside the group. This way, anyone who missed it will still be able to watch it on demand.
For additional help in getting your Facebook Live stream set up with Switcher Studio, be sure to visit our Help Center.
Wondering if Switcher Studio is right for you? Sign up for a free 14-day trial.